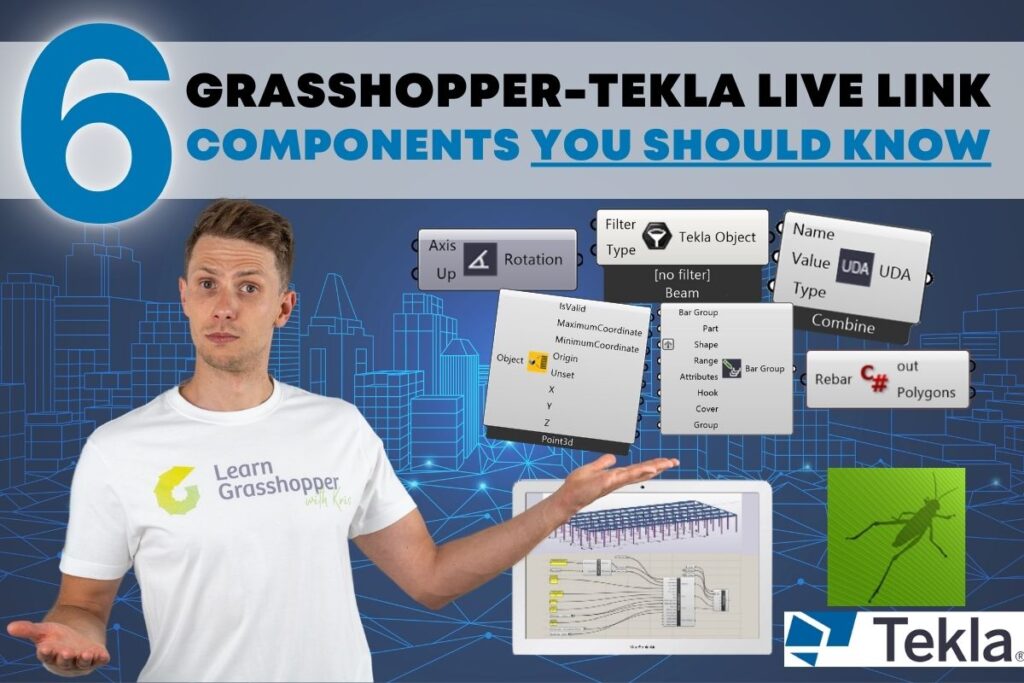
6 Grasshopper Tekla Live Link Components You Should Know
In this blog post, we’re going to look at some cool and surprising parts of Grasshopper Tekla Live Link. We’ll also discover some secret features that can make your work easier. I’ll share easy tips and tricks for using Live Link well, so you can really benefit from this great tool. Whether you’re just starting with Grasshopper Tekla Live Link or you’ve used it a lot, you’ll find helpful ideas in this post, plus you can download practical Grasshopper files.
Table of Contents
1. Discovering Hidden Options in Grasshopper Tekla Live link
1.1. Beam rotation
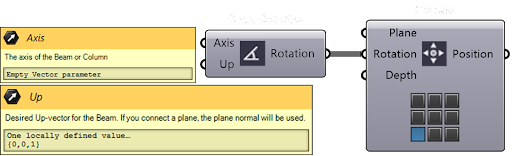
This tool helps you find the right angle to rotate beams or columns. It uses the beam’s direction and the up-vector you want. Just connect the angle it gives you to the Rotation spot in the Position tool.
Beam rotation component in GRasshopper Tekla live link
Use this tool whenever you need to rotate beams or columns without worrying about calculating the exact angle. It does the math for you based on the vector you provide.
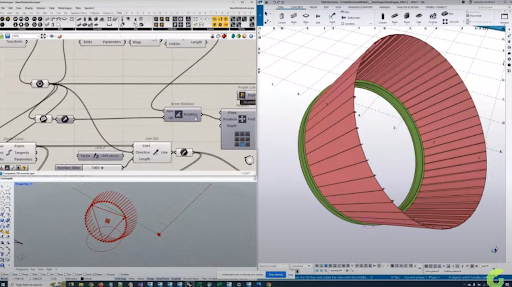
Easy Tip: Figuring out the axis of circular beams or polybeams can seem hard, but it’s actually simple. It just looks at the first two control points. So, for a circular beam, it uses the first point and the second one, which is right in the middle of the beam.
A practical example of using Beam Rotation Component
Get GH files with Beam Rotation Component Example:
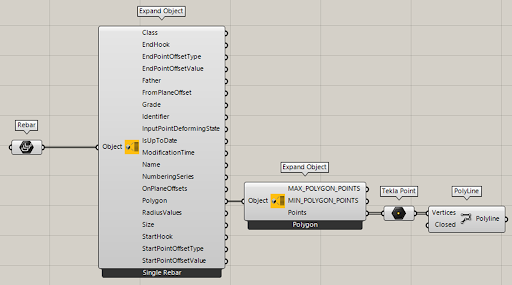
This tool lets you see all the details of any object (not just the ones from Tekla). It’s really useful for getting information about things like reinforcement or other types of objects that don’t have their own specific tool for this.
We didn’t have this tool in the first versions of Grasshopper Tekla Live Link, but now that it’s here, it’s super helpful! It can pull out all kinds of information from Tekla objects. Just plug something into it, and it’ll show you everything you can learn about that object. For example, connect it to a Tekla Grid, and you’ll get a bunch of useful details that are usually hard to find.
I’ve tried it with different parts of Grasshopper, and it works not just with Tekla things, but also with objects from other parts too!
The most exciting part is using it with reinforcement. You’ll suddenly see about 20 different bits of information from Tekla. This tool really changes how you use Grasshopper Tekla Live Link.
This tool isn’t a standard part of Tekla Live Link. It’s a special C# script that works directly with the Tekla API, but it’s really handy.
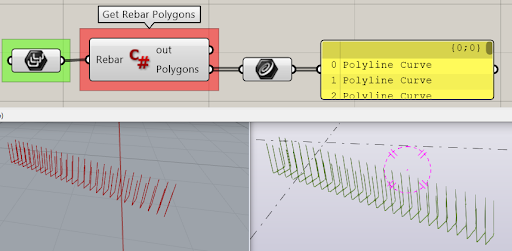
The tool is called “GetRebarPolygons.”
It uses a method from the Tekla API to get the shapes (polylines) of individual bars from any type of reinforcement.
Reinforcement shape in Grasshopper Tekla Live link
How can we use it?
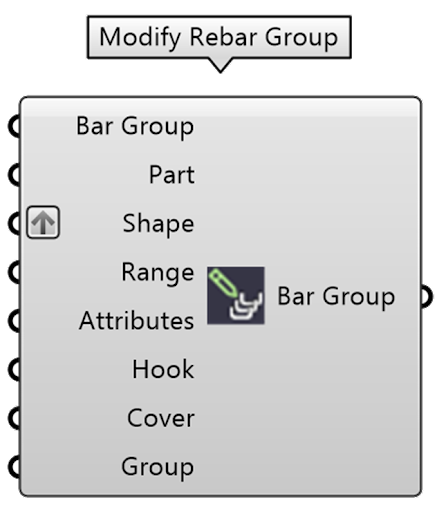
We can use it to change things like the shape of rebars that are already made. You can alter the shape code, the length of the ends, and more, all automatically.
When you use it with the “Modify Reinforcement” tool, it’s a game-changer. You can adjust not just the features of the rebar but also details about its shape or size. Imagine, for example, changing curved rebars or any unique shape that’s hard to make just in Tekla.
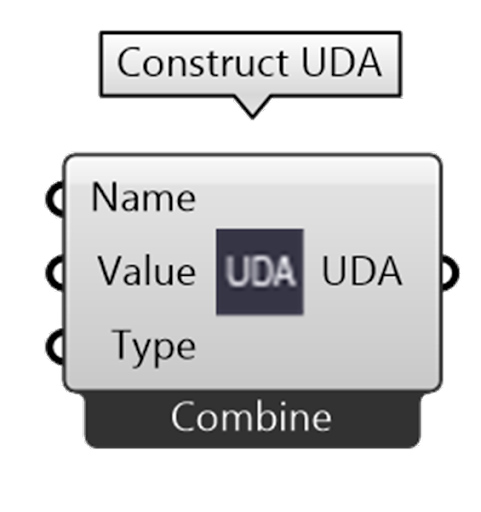
Construct UDA input strings for the Part Attributes and Rebar Attributes components. Outputs are the attribute name, the attribute value and the attribute type (string, int or float). Per default, the attribute type is detected automatically.
Contruct UDA component in Tekla Live link
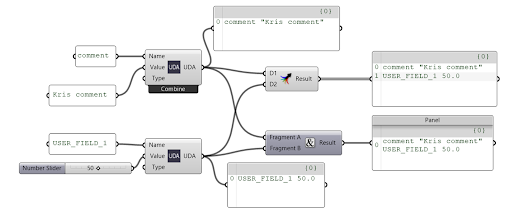
If several attribute names and/or values are provided, the component can either combine them into a single output (for setting all attributes of the same part) or output them separately in a list (for setting different attributes or values for different parts). Right-click the component to change the output mode of the component from the context menu.
The component can be used to construct Attributes input for the Component component as well.
UDA and attribute string values can contain semi-colons, e.g. myAttribute “1;2;3;4” is parsed correctly.
“Date” option for the ‘Type’ input. With this enabled:
Value inputs of type GH_Date (e.g. what you get from the ‘Construct Date’ component) are converted to Tekla Date UDAs and vice versa. Text input of the form YYYY-MM-DD (e.g. “2022-01-01”) will be converted to the required int representation (e.g. 1640995200).
Note! If you’re using a Panel component, multiline data on will keep the attributes as a single string (same part) whereas off means the output will be a list (separate parts).
Use Concatenate to add UDAs.
Do not merge UDAs in order to add them.
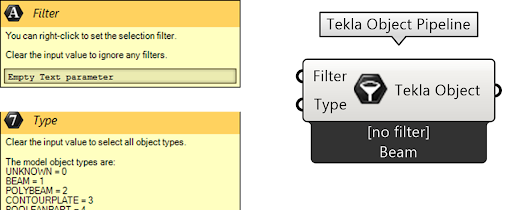
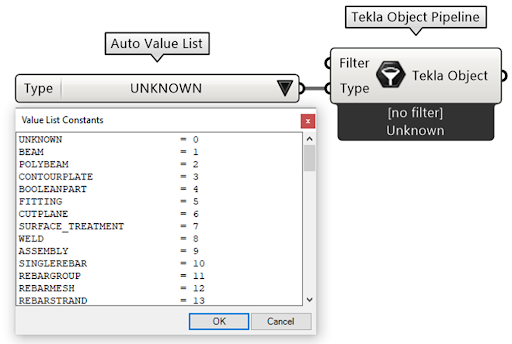
1.5. Object Pipeline
Object Pipeline can reference objects from the Tekla model based on their type and/or a selection filter.
Inputs in Object pipeline
“Auto Value List” that can be connected to any input with named values (i.e. inputs that you can right-click to get a list of values to pick from).
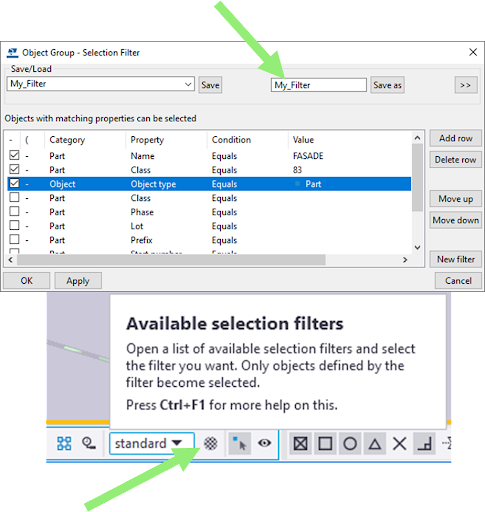
Selection type filter
Remember that it is possible to set wildcard in the selection filter in case of similar names:
* – Matches any number of characters ? – Matches a single character [ ] – Matches whatever is enclosed in the brackets
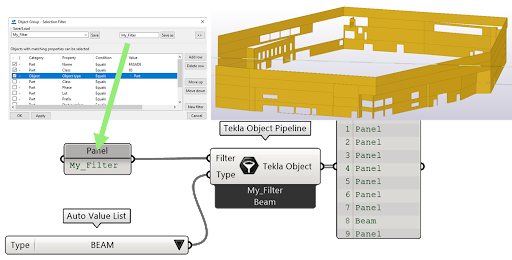
Selection filter in Tekla
Filter in Pipeline component
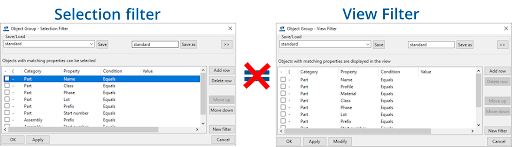
NOTE! Selection filter is not the same as view filter:
Selection filter vs view filter
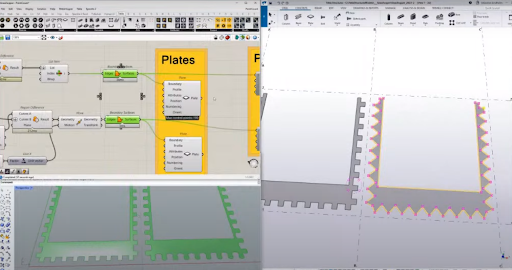
1.6. Plates number of points
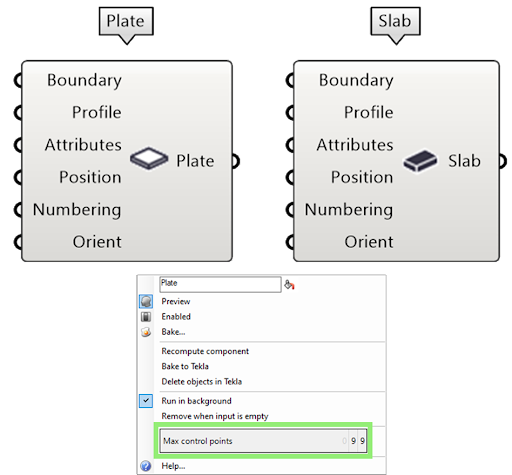
Plate/Slab component Creates a slab outlined by the provided geometry. The boundary can be a point list, a simple surface, a rectangle, a circle, a polyline or a general curve.
Change control points in plate component
Right-click the component to set the maximum number of control points that will be used. 99 points is the default. More points mean greater accuracy but slower performance when updating.
Example of changing the number of control points in Plates
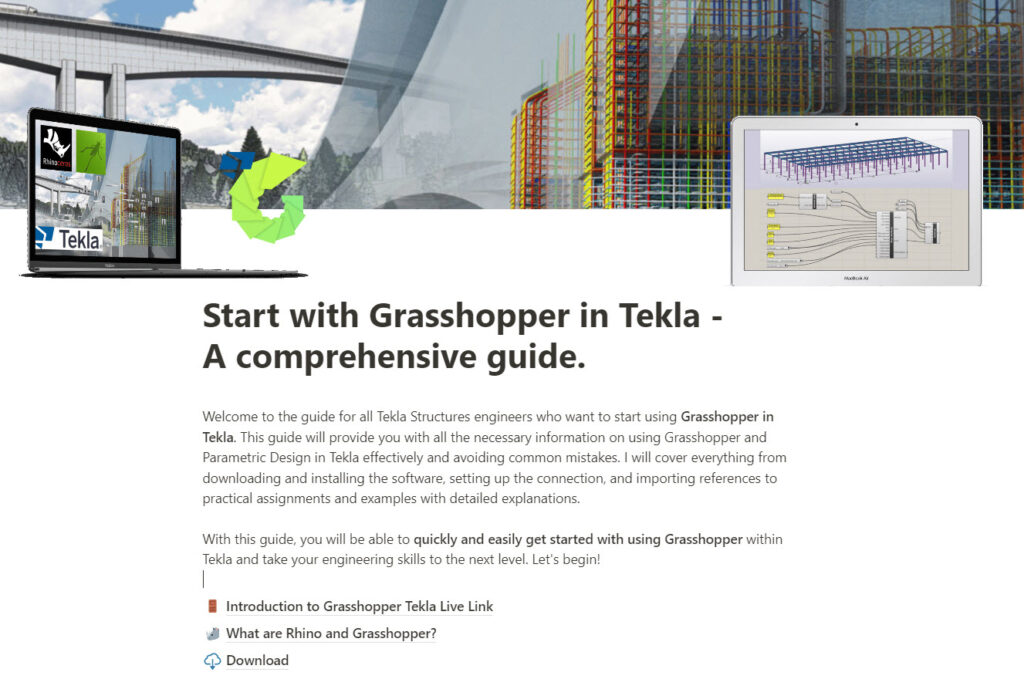
2. Comprehensive guide - Grasshopper Tekla Live link
If you’re new to using Grasshopper in Tekla, it can be difficult to know where to start. While there are limited resources available online, it can be challenging to find practical examples and tutorials that cover everything you need to know. Additionally, setting up and placing your model and references in the correct coordinate system can be a challenge, and the lack of YouTube videos on the topic can make it difficult to troubleshoot.
However, there is a solution that can make the process much more manageable. “Start with Grasshopper in Tekla – A Comprehensive Guide” covers everything you need to know, providing a step-by-step guide that’s accessible to both beginners and advanced users. This guide takes you through the entire process of using Grasshopper in Tekla, from downloading and installing the software to advanced examples. With this guide, you’ll be able to overcome common obstacles and take your Tekla Structures skills to the next level.
With the “Start with Grasshopper in Tekla – A Comprehensive Guide,” you’ll be able to quickly and easily get started with using Grasshopper within Tekla and take your engineering skills to the next level. This guide is perfect for both beginners and advanced users, providing valuable insights and practical examples to help you master Grasshopper in Tekla.
Don’t wait any longer to start using Grasshopper in Tekla effectively. Download the guide today and take your engineering skills to the next level!
You have successfully joined our subscriber list. Check your inbox. Confirm email in order to get access BIM Case Studies from the biggest Norwegian projects.
Reasons to Subscribe to the BIM Corner List:
BIM CASE STUDIES
After reading this guide, you will learn:
How BIM is used on the biggest projects in Norway
What were the challenges for the design team and how were they solved
What were the challenges on the construction site and what was our approach to them
News From BIM World
Every Thursday you will get a package of news and useful links from the BIM world.
No Hype
Just real content that’s meant to make a difference in your BIM knowledge.
This site uses cookies to offer social functions, analyze traffic and conduct remarketing activities. Details can be found in the privacy policy (info button).