BIM Coordinators often use Navisworks Manage as their go to software for coordination. It’s
The question is – Are you getting the most out of it?
While Navisworks is packed with powerful features, most coordinators only scratch the surface. This can mean:
- wasted time,
- cluttered workflows, and
- missed opportunities to improve model checking process.
Today I show eight practical, tips and features to help you make your work with Navisworks more effective. Let’s dive in:
Table of Contents
Tip 1: Use Search Sets for Easier Model Navigation
Navigating complex models in Navisworks can be a nightmare, especially when you’re in a time-crunch during meetings.
Searching manually wastes time, and finding the right elements on the spot can feel like looking for a needle in a haystack. Without a quick way to pull up specific elements, you risk losing valuable time—and patience—in front of your team (I remember my first coordination meetings😒 )
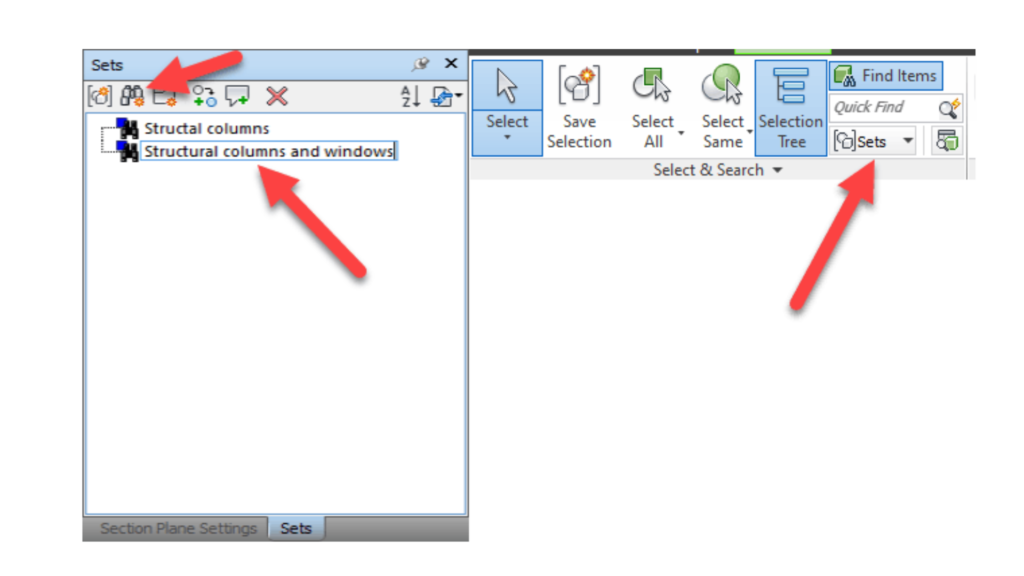
In that case – Use Search Sets. By creating and organizing Search Sets, you can quickly access specific categories, like structural columns or windows, without a fuss.
Imagine being able to pull up critical elements in seconds, no matter how complex the model! This trick is a lifesaver in presentations and coordination meetings, keeping things efficient and focused.
Want to know more – I already talked about Seach Sets in this article here, just have a look:
Search sets in Navisworks – Essential tool of BIM Coordinator

Tip 2: Use Clash Rules to Filter Out False Positives
Clashes are meant to highlight critical issues, but with false positives piling up, it’s hard to know what to focus on. If you’ve worked on a BIM project, you know that not every clash flagged by Navisworks represents a real problem. This is where false positives come in.
A false positive is a clash that appears in the results but doesn’t actually affect the construction or coordination process. For instance, small overlaps in insulation layers or ducts might show up as clashes, even though they aren’t any real structural or functional issues. These unnecessary clashes can create noise, distracting you from the important issues that need attention.
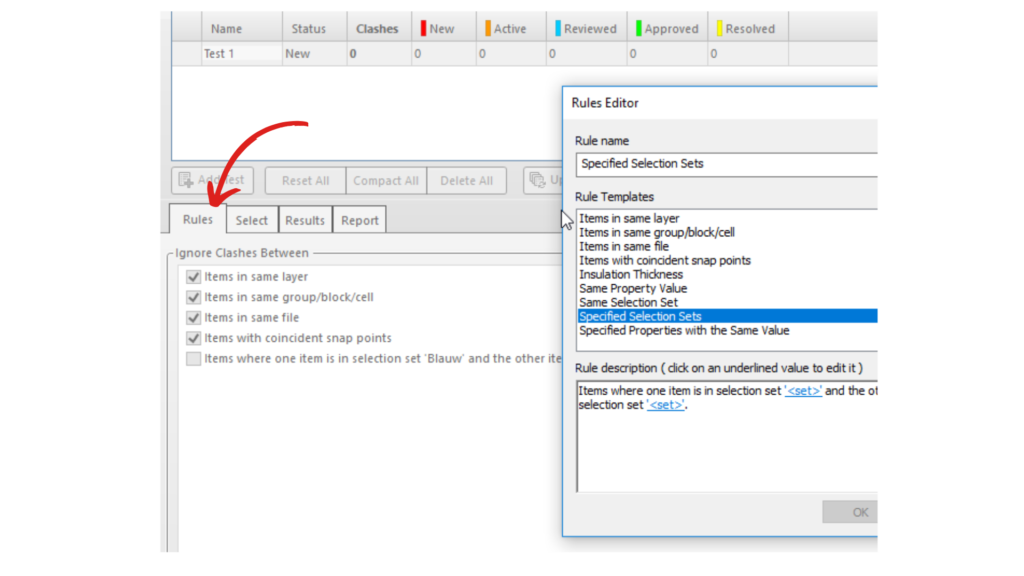
To address this, Clash Rules in Navisworks allow you to filter out these false positives by setting conditions on the types of elements to ignore during clash detection. You can define these rules in the Clash Detective window.
For example, you might set a rule to ignore clashes between smaller objects like pipes and conduits, or to avoid clashes that fall within the same discipline, such as architectural elements colliding with each other.
These customized rules help reduce the clutter in your clash detection results, allowing you to zero in on meaningful issues that impact the project and require coordination.
By managing false positives, you’ll save time, maintain focus on real coordination challenges, and make the clash detection process far more efficient
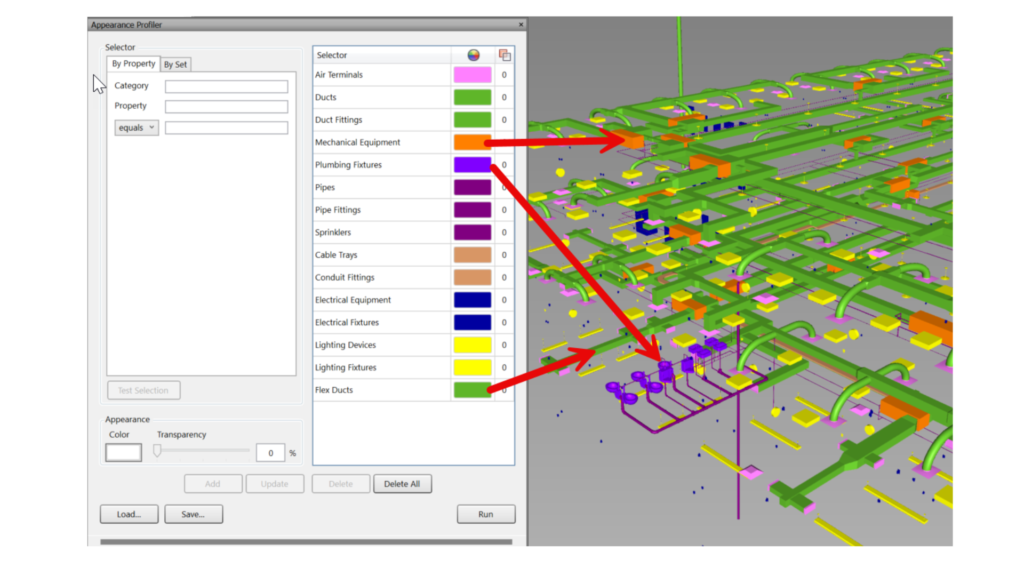
Tip 3: Take Advantage of Appearance Profiler
Complex models can be difficult for stakeholders to understand, especially during clash detection sessions.
Without clear visualization, you risk losing your audience’s attention and failing to communicate effectively. Visual confusion can slow down discussions, especially during coordination meetings when time is limited.
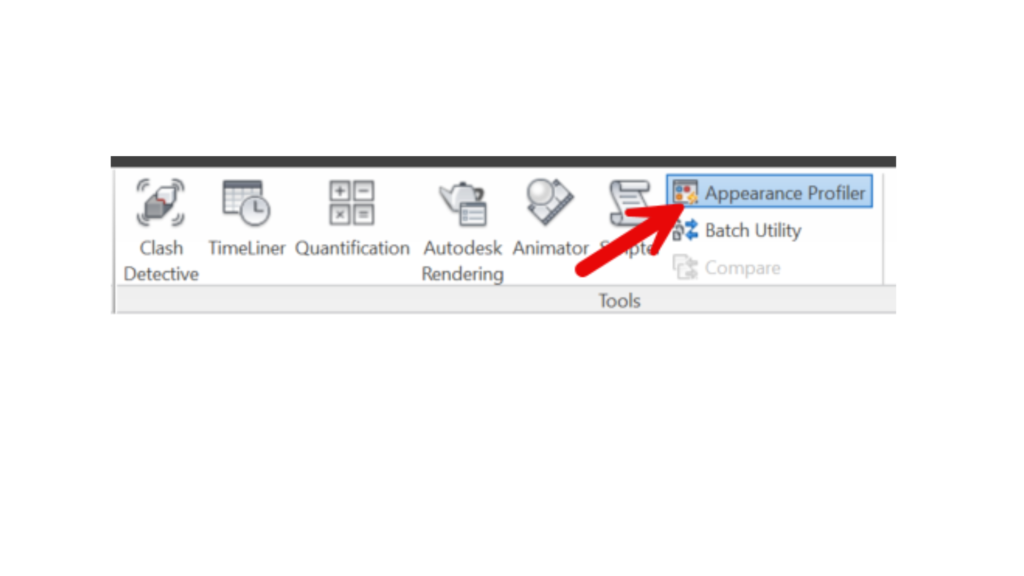
I suggest using Appearance Profiler. It’s a a powerful tool for color-coding different elements.
By visually separating structural, architectural, and MEP elements, you can make your model more digestible at a glance.
It’s not just about aesthetics — Appearance Profiler transforms your model into an intuitive, organized, and effective communication tool.
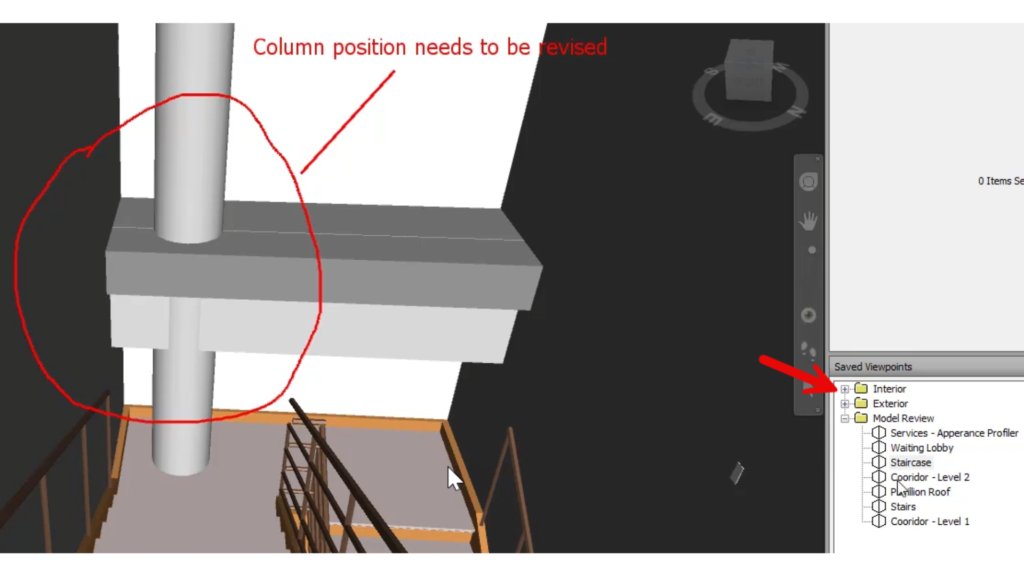
Tip 4: Use Custom Viewpoints to Save Important Perspectives
Constantly re-navigating the model to critical viewpoints wastes time and interrupts workflow, especially when revisiting the same issues.
Without saved viewpoints, you’re left retracing your steps every time you return to a specific issue, slowing down your coordination process.
That one might be obvious, but a lot of people still not use it. I mean Custom Viewpoints.
They let you save and return to crucial perspectives instantly. These viewpoints help you guide project teams through the model seamlessly, keeping discussions clear and efficient.
Adding notes to these viewpoints can even highlight specific issues or comments, making it easier to track context and history for each viewpoint.
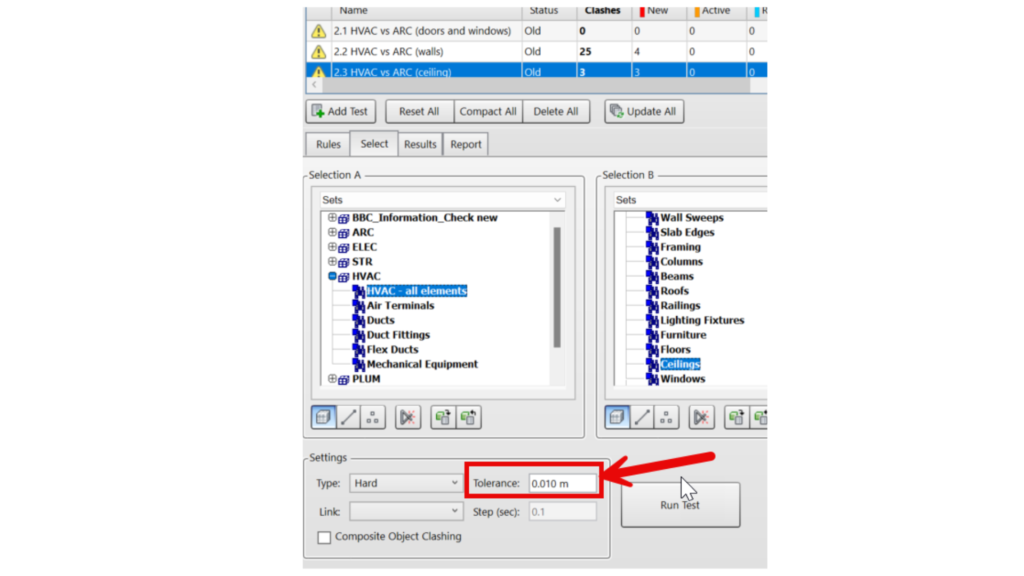
Tip 5: Set Up Clash Tolerances to Focus on Critical Issues
As I mentioned in the tip 2 – Not all clashes are equally important, but it can be hard to filter out minor overlaps that don’t impact the project.
If you’re spending time on every minor clash, critical issues might slip through the cracks, making the process overwhelming and inefficient.
Sure, using ignore rules you can filter out minor issues. What I also recommend is to set clash tolerances. They lets you filter out minor overlaps, leaving only the critical clashes that impact the project.
With this feature, you’re able to prioritize major issues without getting bogged down by noise of having too much irrelevant issues on the “plate”
Interactive BIM Coordination guide full of tips, graphs, mind maps, and practical exercises. It will teach you the basics of BIM Coordination. All for free.
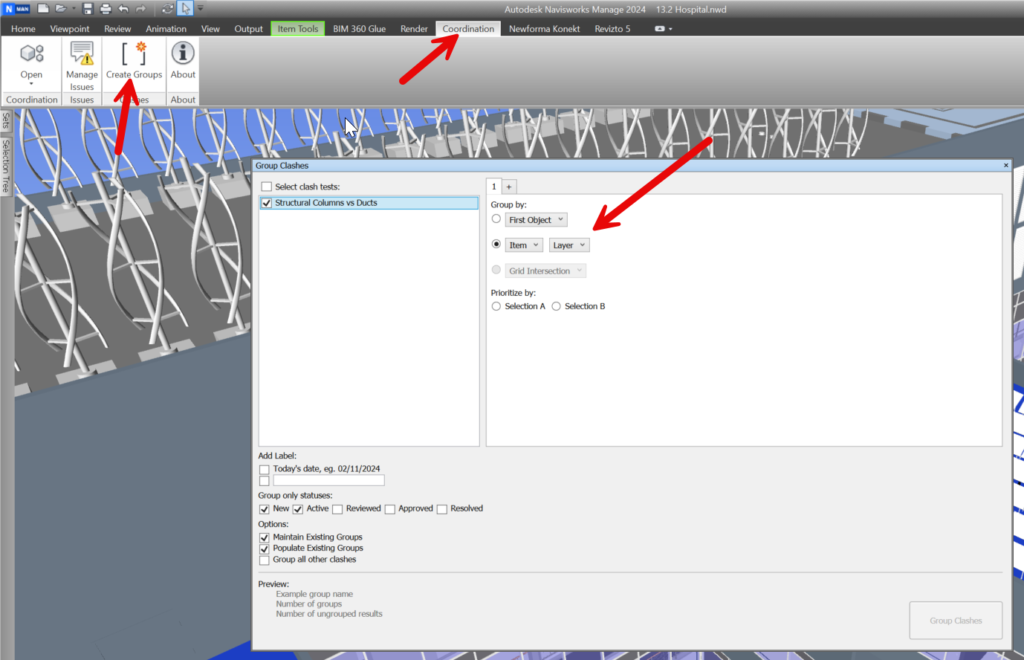
Tip 6: Organize Clash Results by Zones or Floors
Sifting through a chaotic list of clash results can be overwhelming, especially in large projects like hospitals or office complexes.
Without clear organization, reviewing clashes becomes a daunting task, wasting time and making it difficult to communicate specific issues with teams.
First of all group clashes. Use a fee Navisworks Coordination Issues Add-In. Download it here.
Then organizing clashes by zones or floors.
By breaking down clash results, you can focus on one area at a time, delegating sections to specific team members as needed. This system brings clarity and structure to your coordination, making it easy to track and address issues by location.
Tip 7: Link Navisworks to Issue Management Platforms
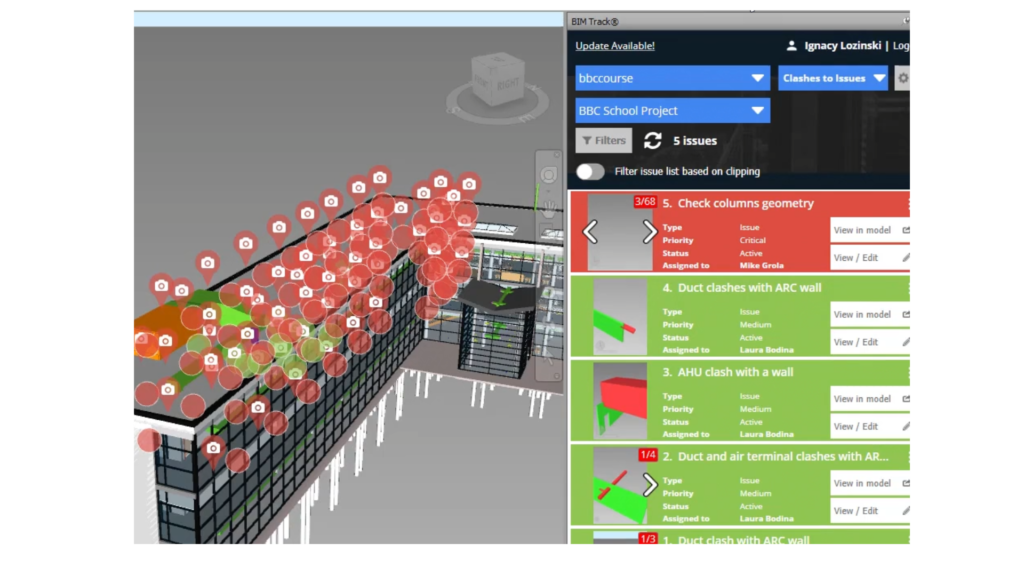
Managing and tracking issues outside Navisworks can be a hassle. Especially when you are going to use static files like HTML or PDF’s.
Emails and spreadsheets make it easy for crucial details to slip through the cracks. I know it from my own experience. Such communication leads to confusion which issue was resolved, which needs to be checked etc.
So I encourge you to link Navisworks to an issue management platform like Newforma Konekt, BIMcollab, or Autodesk Construction Cloud.
These platforms centralize issue documentation, allowing you to track, assign, and update issues in real-time. With everything in one place, team members stay in sync, making coordination smoother and preventing costly oversights.
Tip 8: Utilize the Batch Utility Tool for Automated Model Creation
We as a BIM Coordinators are responsible for creation of federated models.
Manually updating and creating these models is time-consuming and leaves room for inconsistencies.
Remember that outdated models can cause miscommunication, and constant manual updating wastes time.
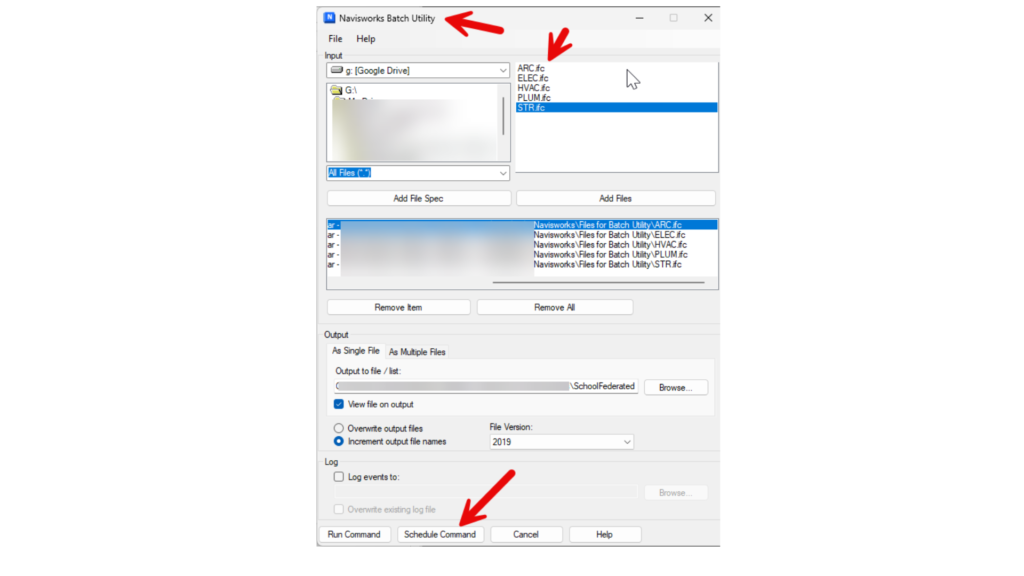
That’s why we can make it more effective – The Batch Utility Tool automates model updates, ensuring consistency across the project.
With scheduled batch updates, your model remains current, making coordination sessions more effective and freeing up time to focus on high-priority tasks. In large projects, this tool saves hours and prevents errors, ensuring you’re always working with the most up-to-date information.
Conclusion
In my opinion Navisworks isn’t the best coordination tool on the market but as you see from todays post it offers a wealth of tools that, when properly used, can transform your BIM coordination process.
By implementing these features—Search Sets, Clash Rules, Appearance Profiler, and more—you can improve your workflow , focus on what matters, and deliver smoother, more effective project outcomes.
Start applying these today, and you’ll quickly see the benefits of a more organized and efficient coordination process.

