Key Points to Remember When Building Clash Tests in Navisworks
If you are a BIM Coordinator and you are using Navisworks Manage then there is one thing that you HAVE to know very well – “How to set up clash test”.
One of the common issues in BIM coordination is the inability to detect clashes efficiently.
Ineffective clash detection can lead to construction delays, increased costs, and numerous revisions, impacting the overall project timeline and budget.
The root causes often include improper setup of clash tests, lack of understanding of the tools available in Navisworks Manage, and overlooking critical elements in the model.
Table of Contents
Imagine working on a project where clashes are detected too late. Been There Done that (unfortulatly)
Quick example: The structural team realizes that their beams intersect with HVAC ducts only after the fabrication stage. This oversight results in expensive rework, project delays, and a frustrated team. The impact is not just financial but also affects the project’s credibility and the client’s trust in your ability to deliver. The stakes are high, and the need for a reliable clash detection process becomes evident.
WANT OT LEARN ALL 5 AREAS OF BIM COORDINATION? JOIN MY ONLINE PROGRAM TO BOOST YOUR SKILLS
Step-by-Step Guide to Building Reliable Clash Tests
That’s why knowing how to find clashes in Navisworks is so important.
Now I will show you the step-by-step process how I would do it👇
1. Preparation and Model Setup
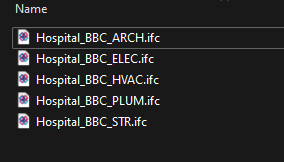
Before diving into clash detection, you need to ensure that your models are correctly set up and aligned. For the purpose of this artilce, I am going to use sample Hospital files.
Here you can download the files and follow the steps with me. It will help you better grasp the topic. LINK
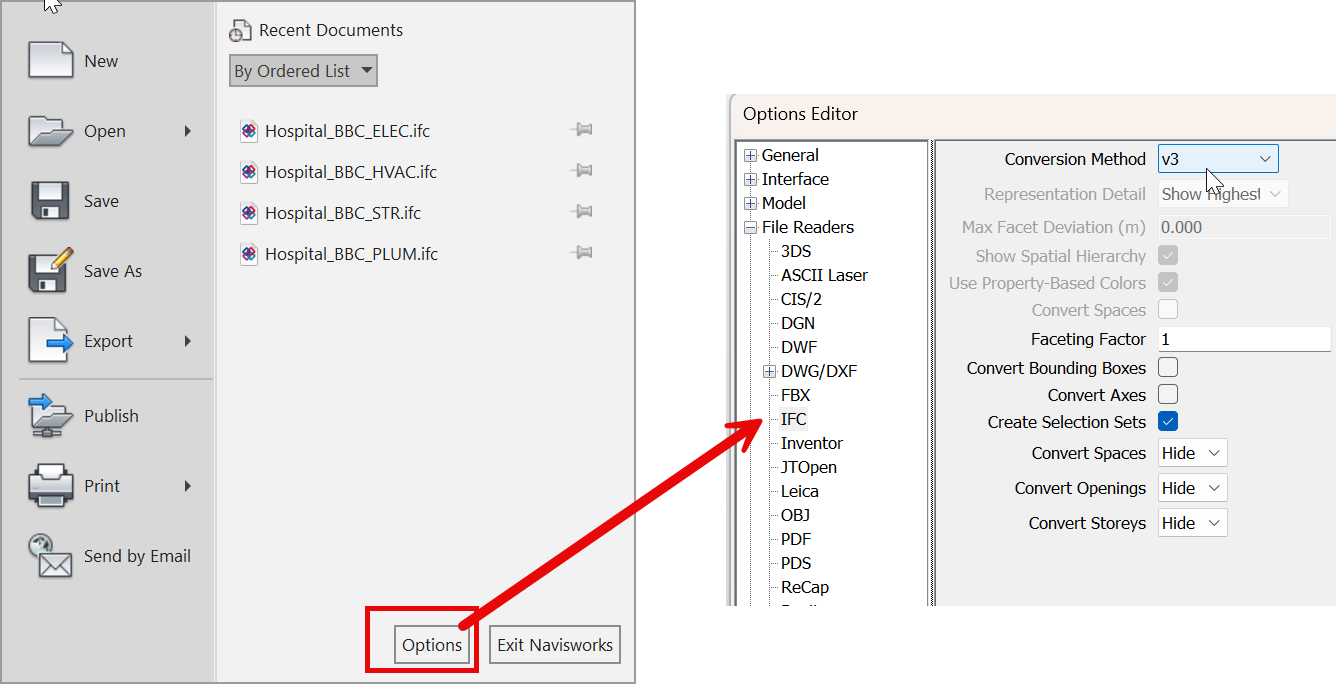
Step 1.1: Import Models
First of all, you need to import all relevant models into Navisworks. Two things you need to remember before you do it.
In the Home tab, use Append option, not Merge – trust me. I will explain why in other aritle.
Please check the import options for the specific file that you are going to add to Navis. In our case we have five diciplinary models in IFC format.
Ensure that they are up-to-date and properly aligned using the coordinate system. This is crucial to ensure that all elements fit together as intended.
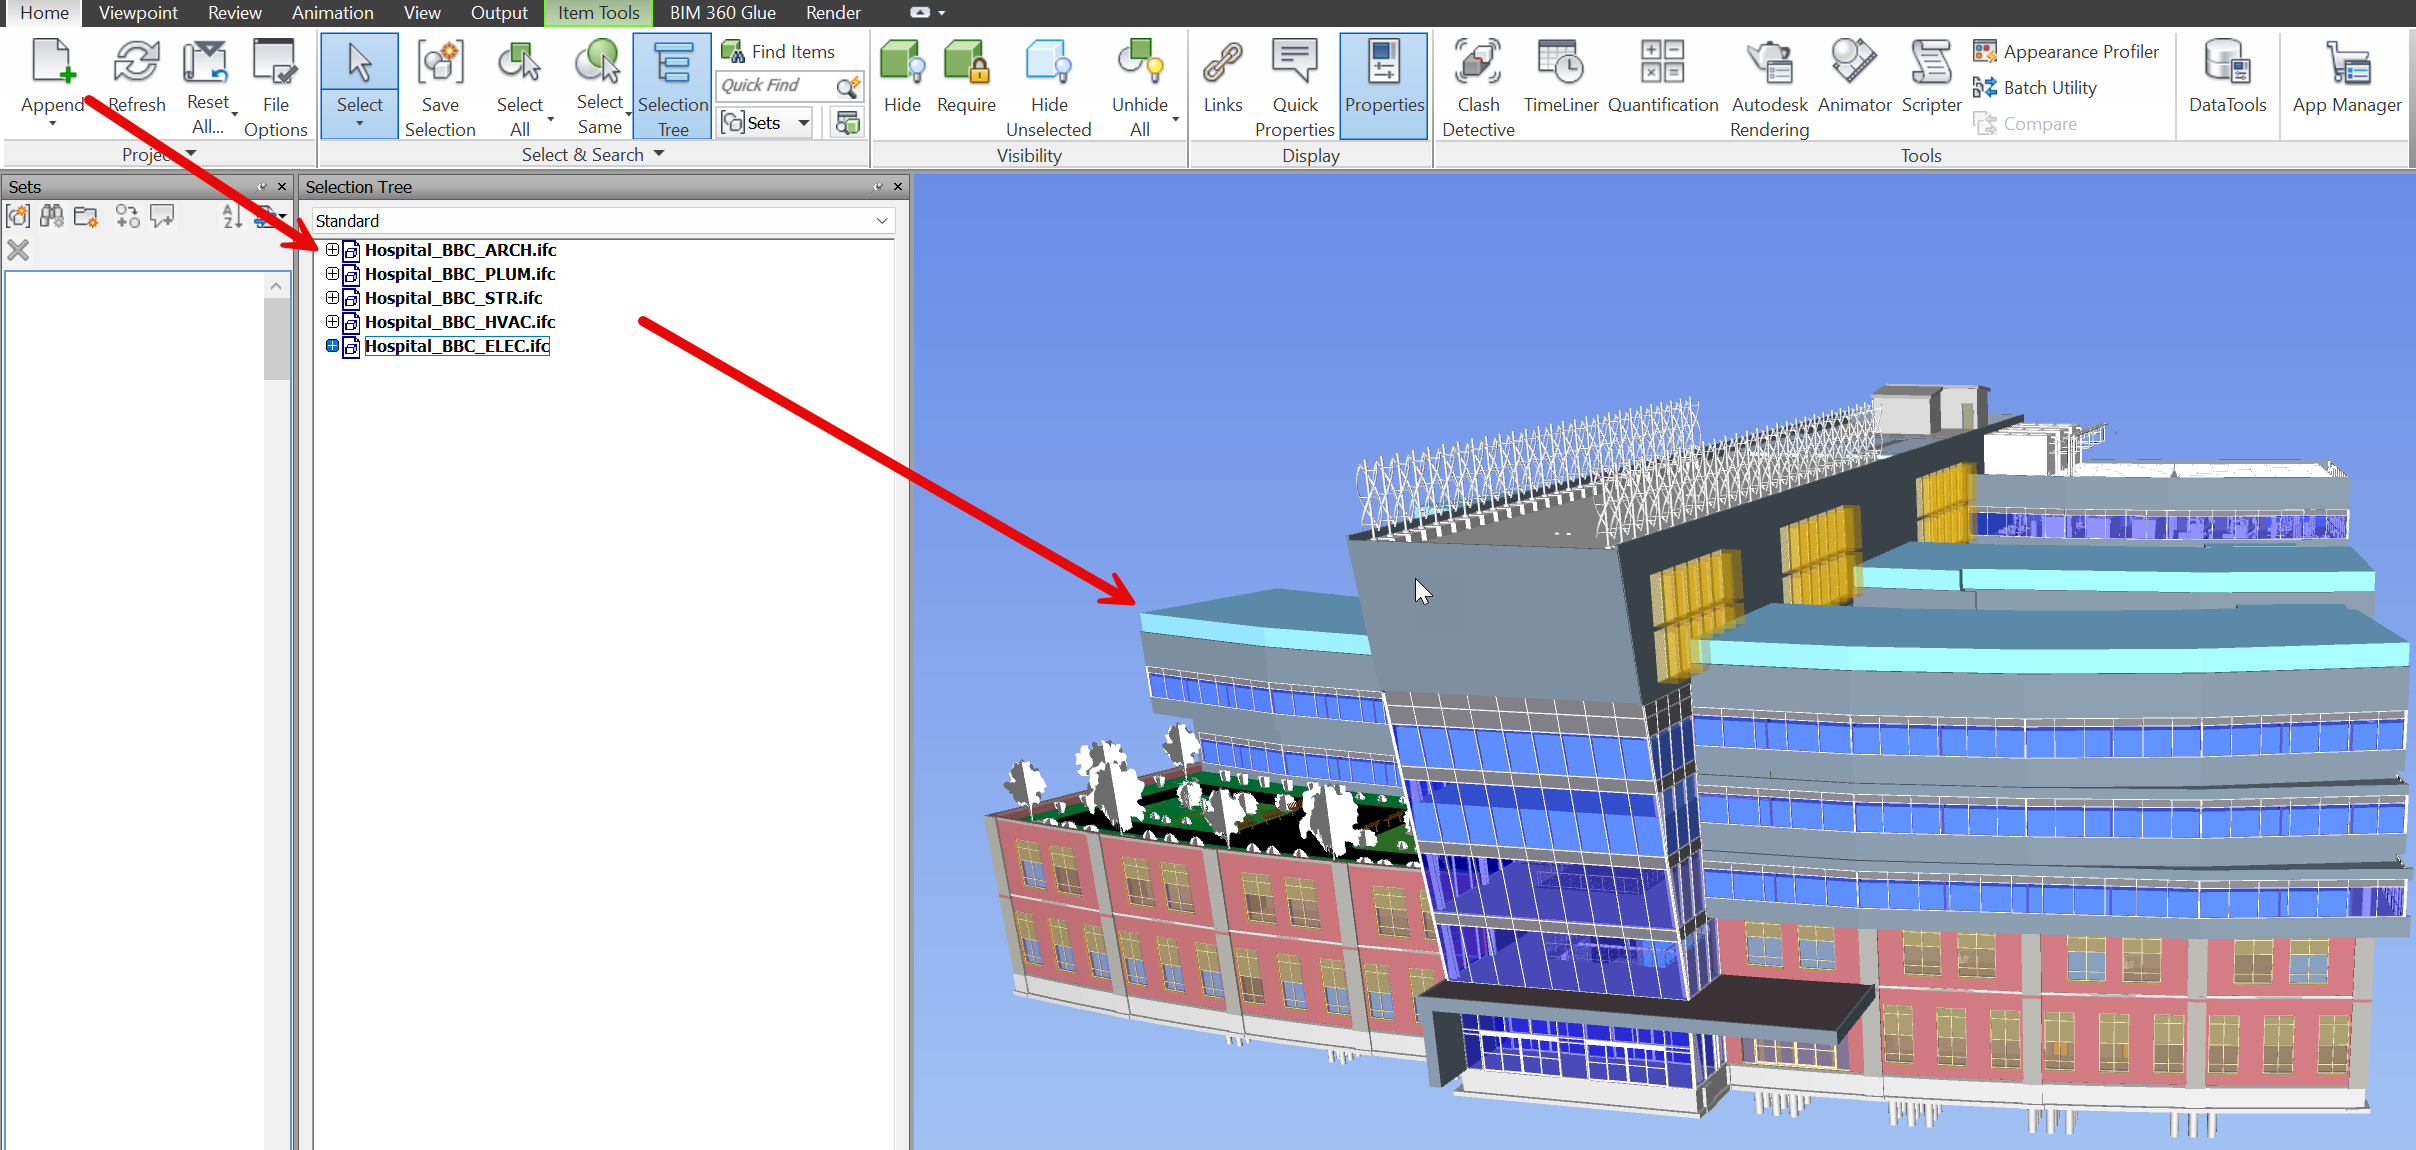
Step 1.2: Organize Models in Sets
Organize your models into logical sets (e.g., architectural, structural, MEP) to facilitate the clash detection process. I prefer to use search sets instead of selection sets. I suggest you will do the same.
If you want to know more about search sets check my previous article:
This organization makes it easier to manage and run specific clash tests. Clear categorization also helps in quickly identifying which disciplines are causing clashes.
Remember that you not only can organize sets per disicpline, but per also per category of the elemenet or it’s location. Its up to you how you will organize your sets of elements.
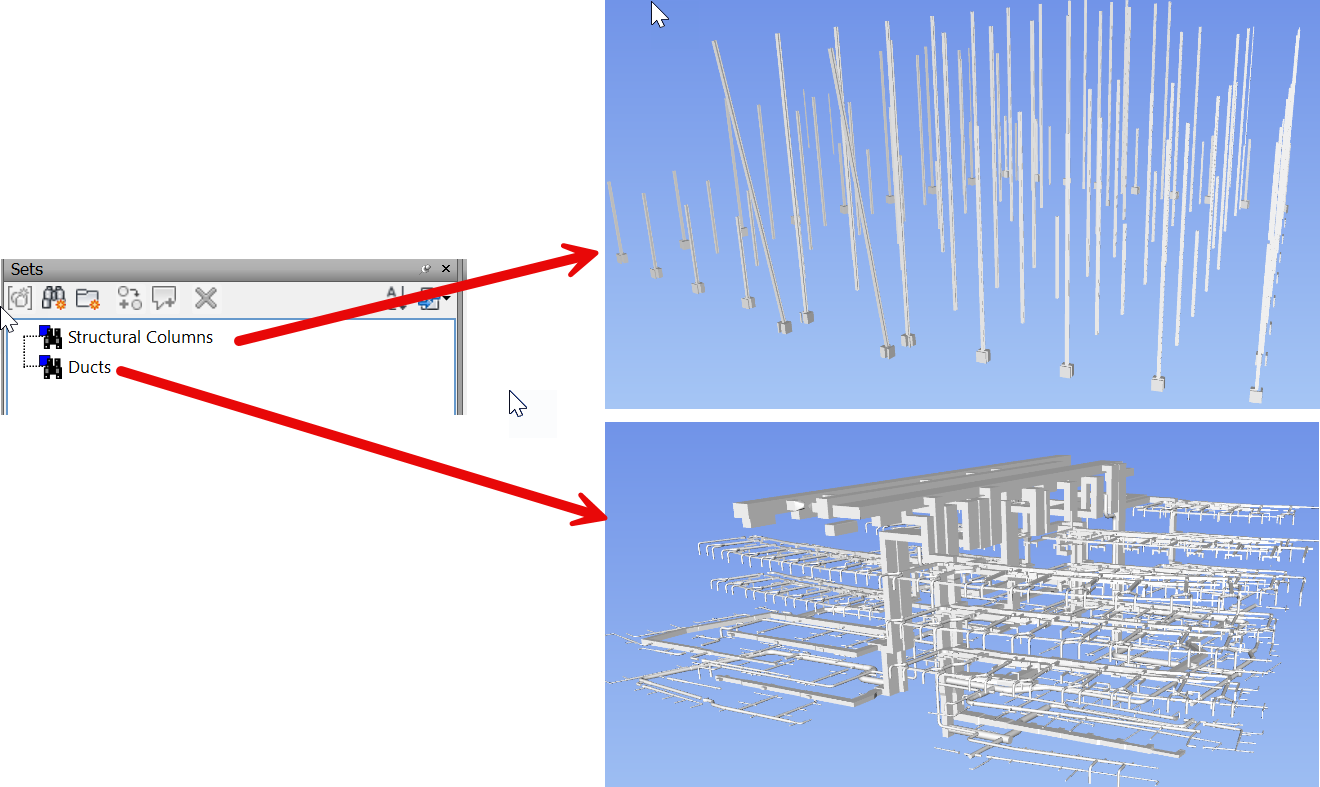
In our case I want to check clashes between Structural Columns and HVAC ducts. So I create such search sets:
2. Creating Clash Tests
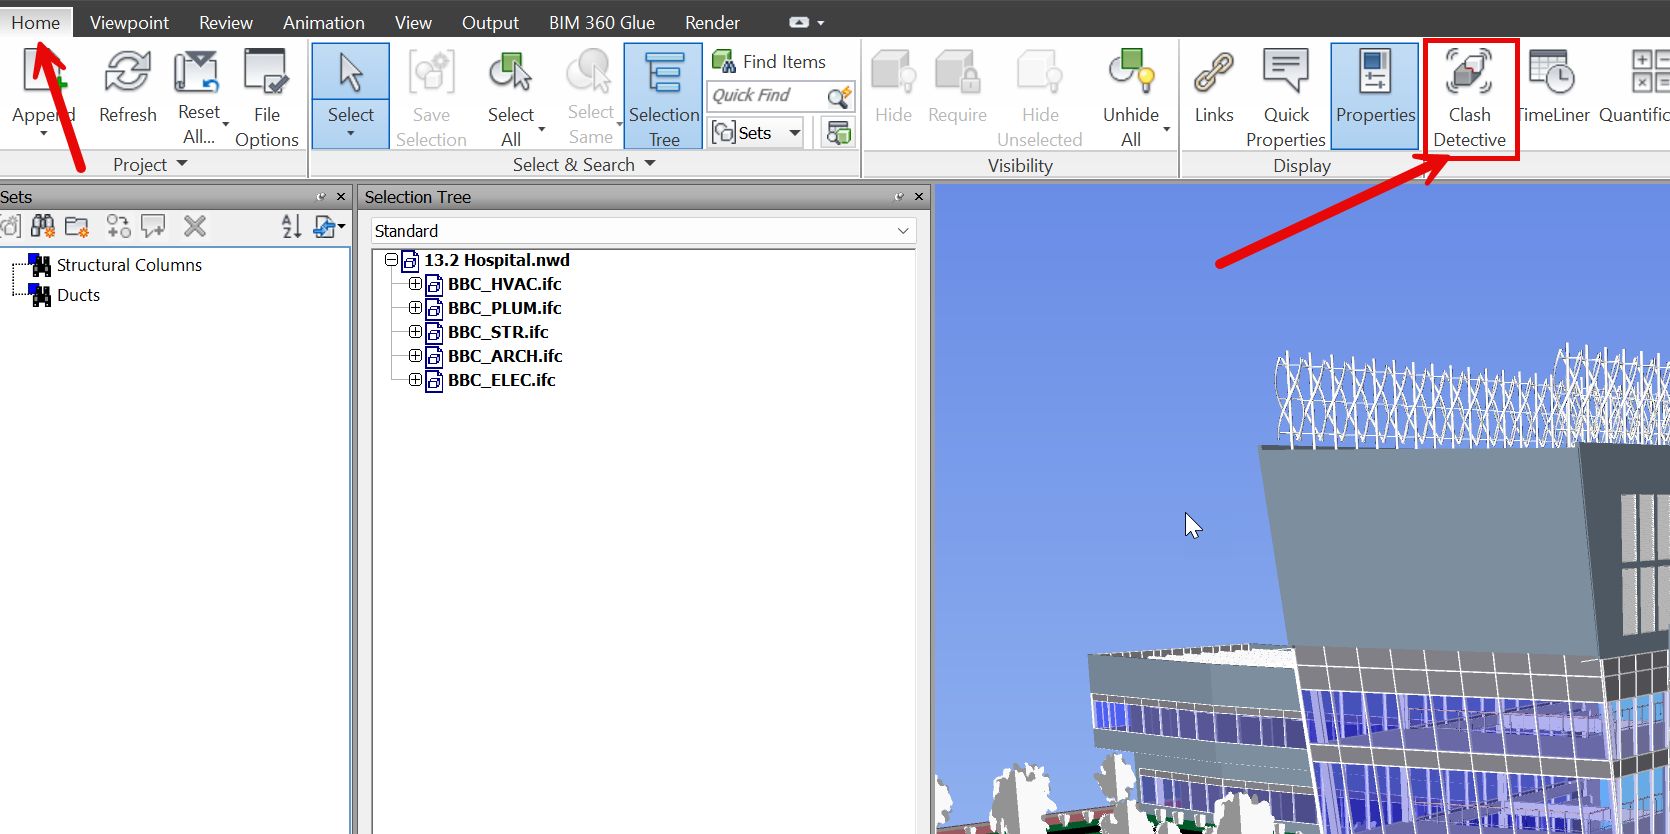
Step 2.1: Open Clash Detective
Now let’s build clash test that will perform a check between these elements. First, navigate to the Clash Detective tool from the Home tab. This is where you will set up and manage your clash tests. It is a powerful tool that helps in identifying and resolving clashes efficiently.
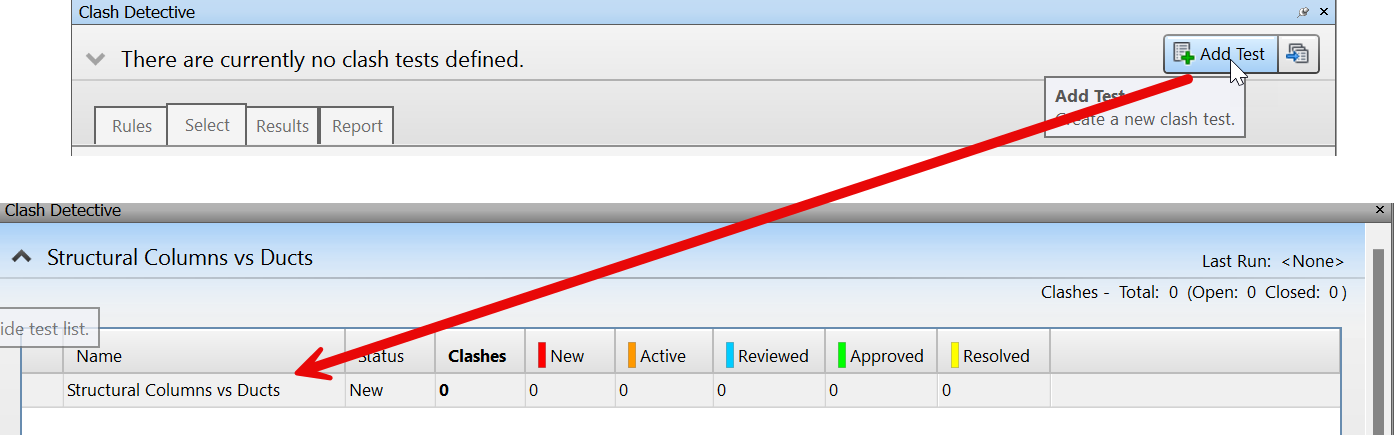
Step 2.2: Set Up Clash Test
In the new window, click Add Test. Create a new clash test and name it appropriately (e.g., “Structural Columns vs. Ducts”). Naming your clash tests clearly helps in keeping your project organized. It also ensures that you and your team can easily identify and understand the purpose of each test.
3. Configuring Clash Tests
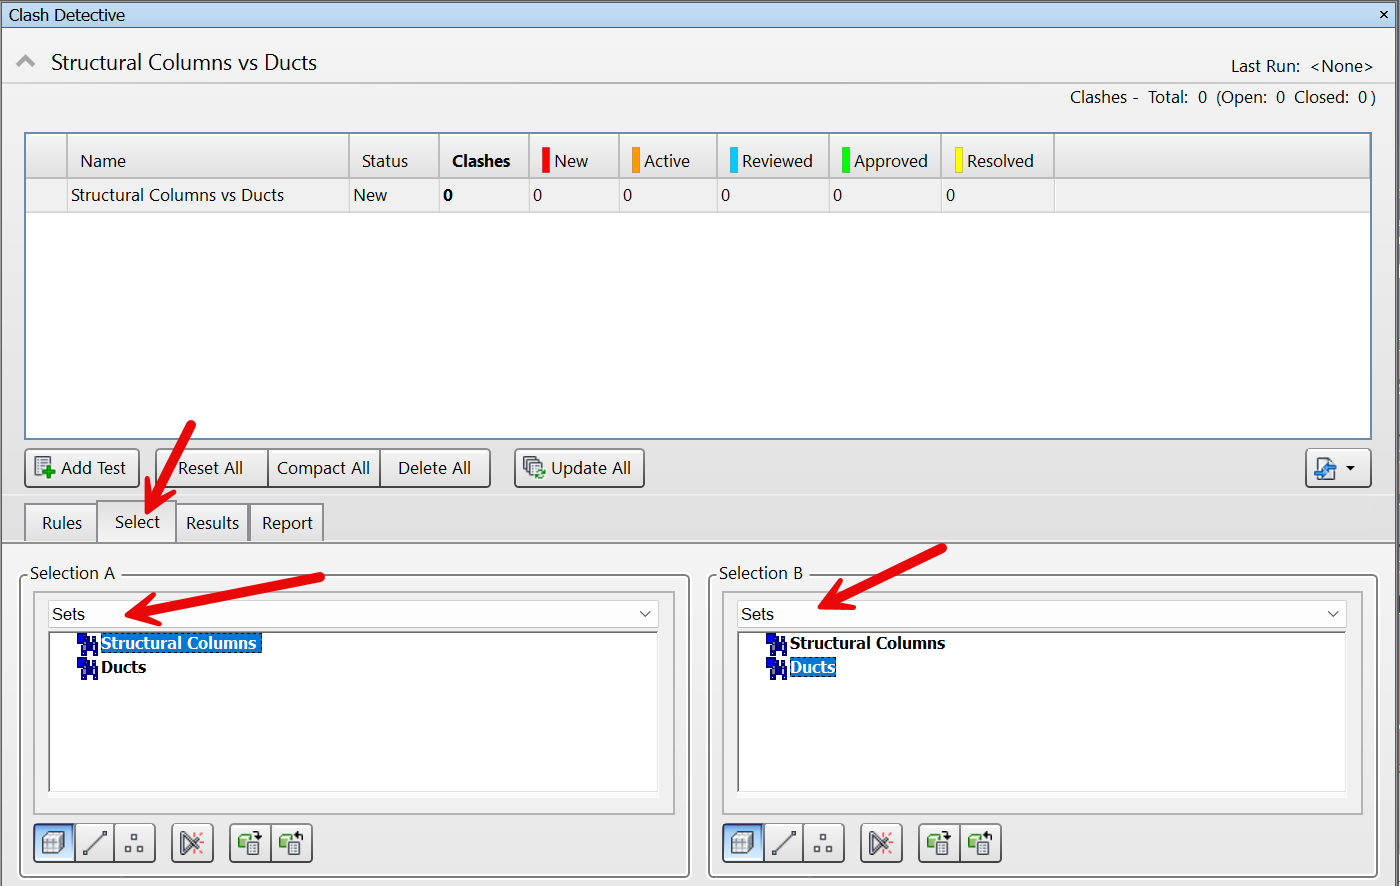
Step 3.1: Selecting Models for Clash
In the Select panel under – Select the model sets or individual elements you want to clash against each other.
From the Selection dropsown choose: Sets.
This step is crucial to ensure that the right components are tested for potential conflicts. Proper selection helps in identifying relevant clashes and avoiding unnecessary tests. In our case we will check “Structural Columns vs. HVAC Ducts”
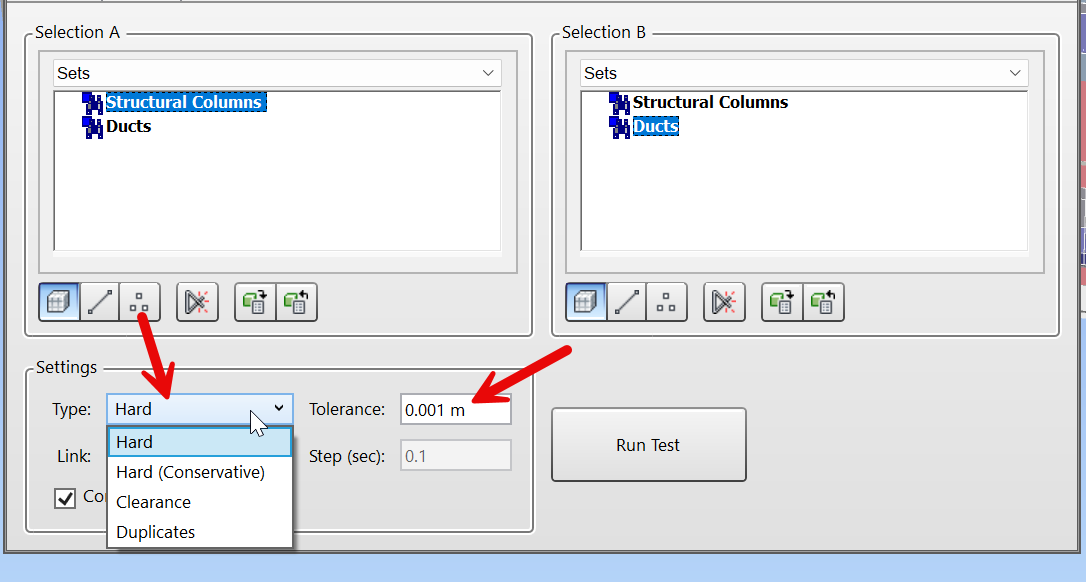
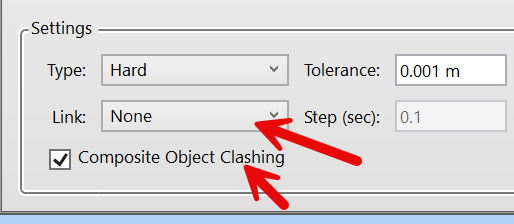
Step 3.2: Defining Clash settings
– In the Settings panel – Define clash rules based on the type of clashes you want to detect (e.g., hard clashes, clearance clashes). I will talk about Clash Types in the future article.
Setting clear helps in filtering out the critical clashes that need attention. It ensures that you focus on significant issues rather than getting overwhelmed by minor ones.
– Set appropriate tolerances for your clashes. Tolerances help in filtering out minor clashes that are not critical. This step is important to avoid being inundated with trivial clash reports, allowing you to concentrate on more serious conflicts.
As a link method use None. We are not going to link clash detection with any Timeliner simulation. I suggest you tick also Composite Object Clashing.
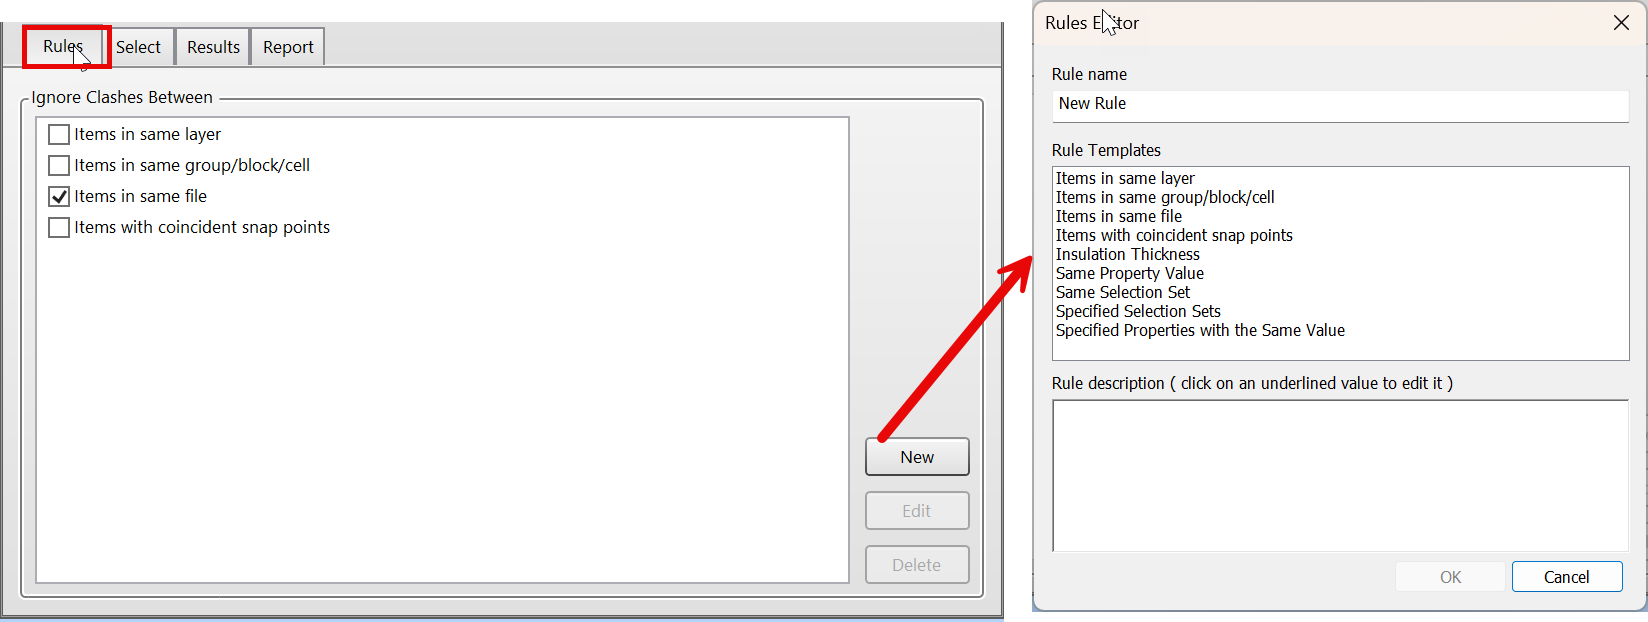
Step 3.3: Defining Clash Ignore Rules
Navis offers a variety of ignore rules within the Clash Detective tool to help reduce the number of false-positive clashes, making the clash detection process more efficient.
You can go to the “Rules” tab in the Clash Detective tool to configure ignore rules. This is a big topic and in our example we will not use Ignore rules, but I will focus on this topic in the next article.
4. Running and Reviewing Clash Tests
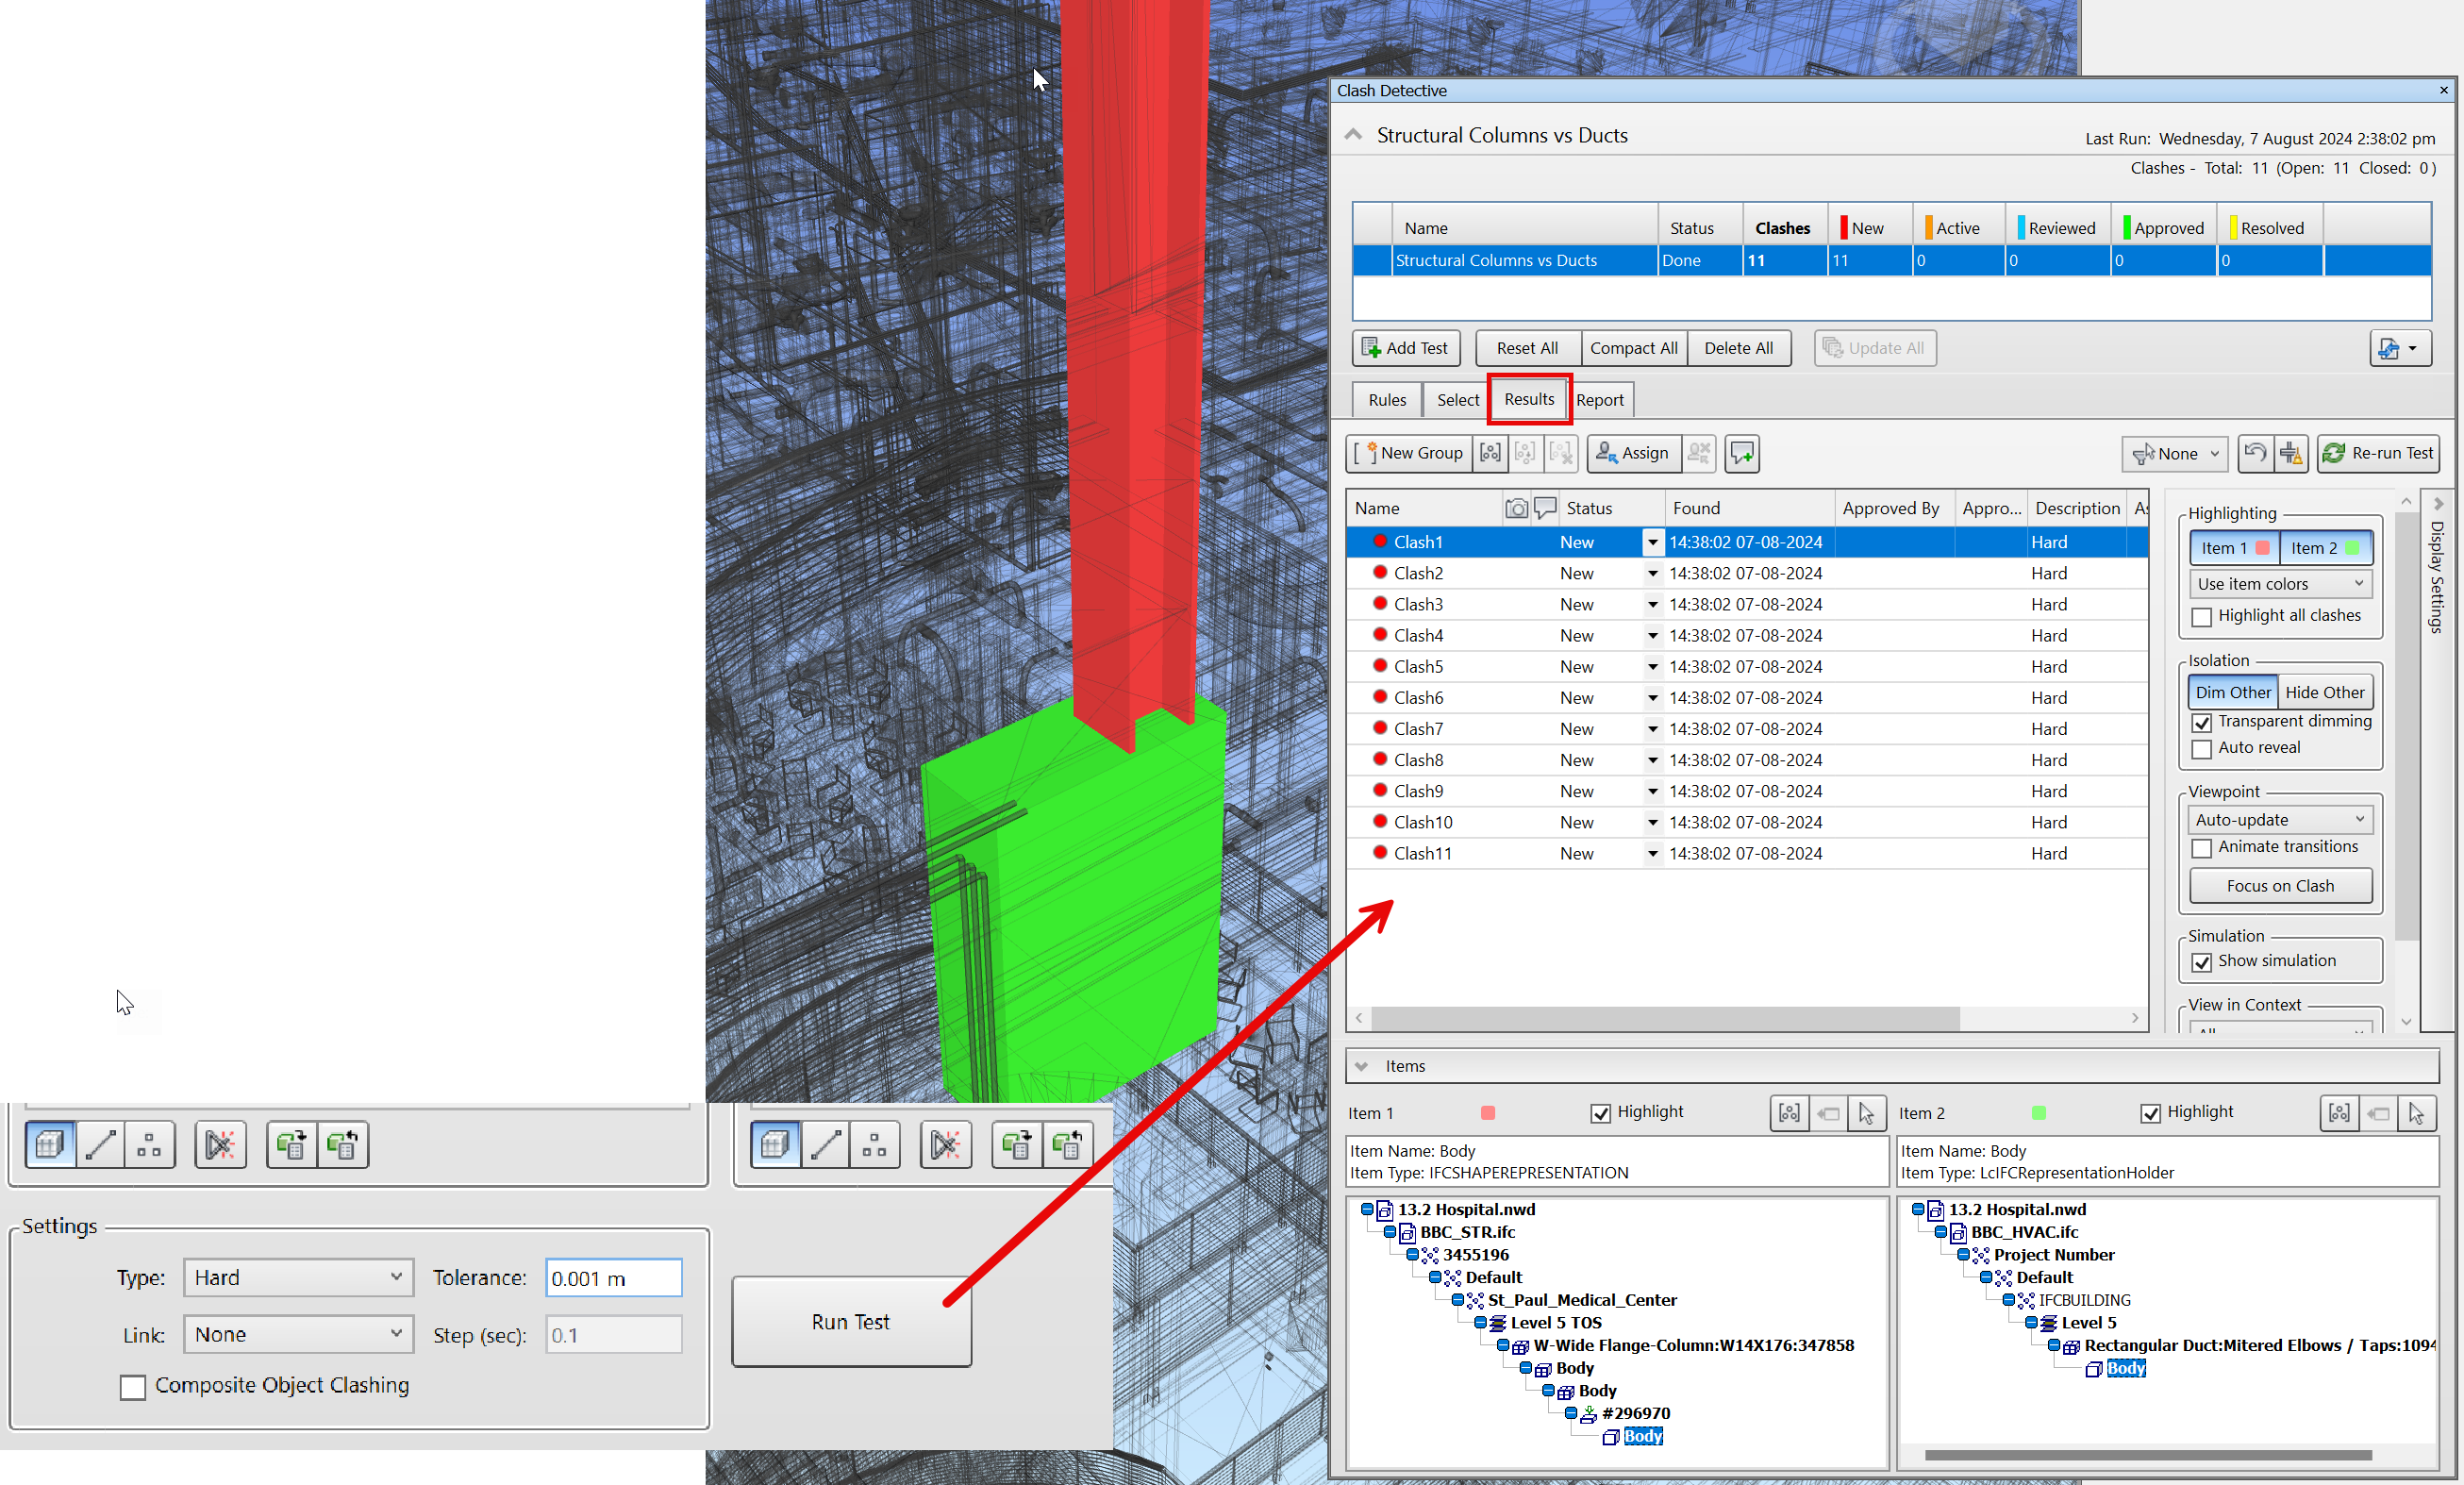
Step 4.1: Run the Clash Test
Now let’s click Run Test button. Wait for Navisworks to generate the results. Running the test might take some time depending on the complexity of your models. Patience during this step ensures that you get a comprehensive list of clashes, which will displayed in the “Results” tab.
In our case Navis found 11 clashes.
Step 4.2: Reviewing Results
Now we need to review the clash results carefully.
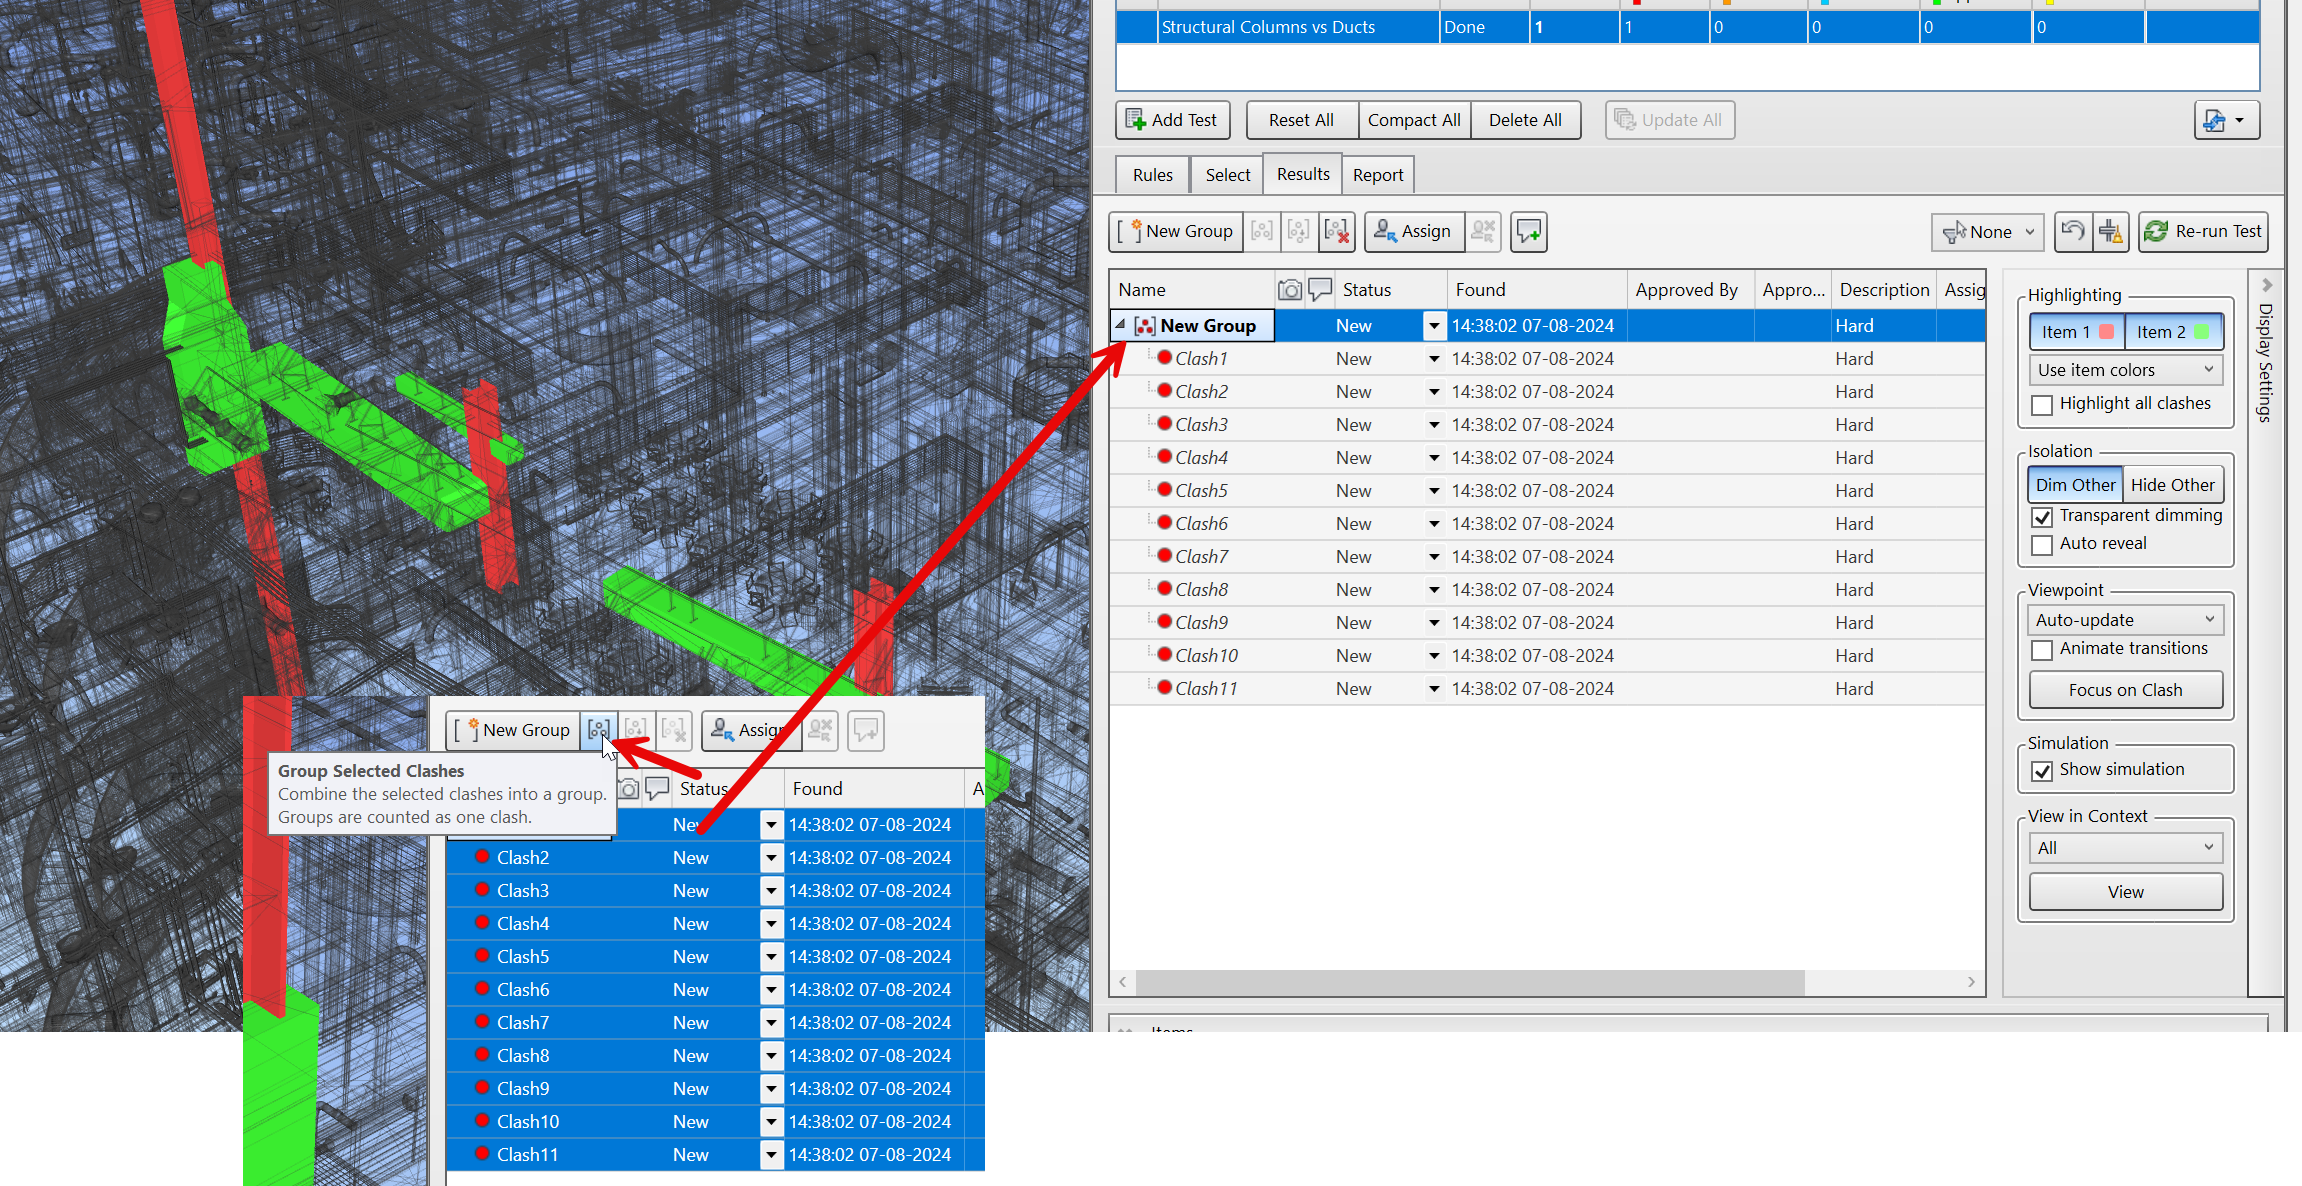
I recommend using the “Group Clashes” feature to organize clashes into manageable categories. Select all clashes that you think, can be grouped in one issue, and click “Group Selected Clashes” button.
Grouping helps in systematically resolving clashes and understanding patterns in the conflicts.
Step 4.3: Adjust Clash Dispay Settings Results
On the right you have Display Settings panel. It allows you to adjust how you see the issues in the 3D view. I like to keep Highlighting as it is. In the Isolation panel I like to tick “Hide Other” to hide dimmed “black objects”, but of course it depends on your preferences.
DOWNLOAD BIM COORDINATION GUIDE
Subscribe to our list and download Practical Guide to start with BIM Coordination. Interactive BIM Coordination guide full of tips, graphs, mind maps, and practical exercises.
It will teach you the basics of BIM Coordination. All for free.
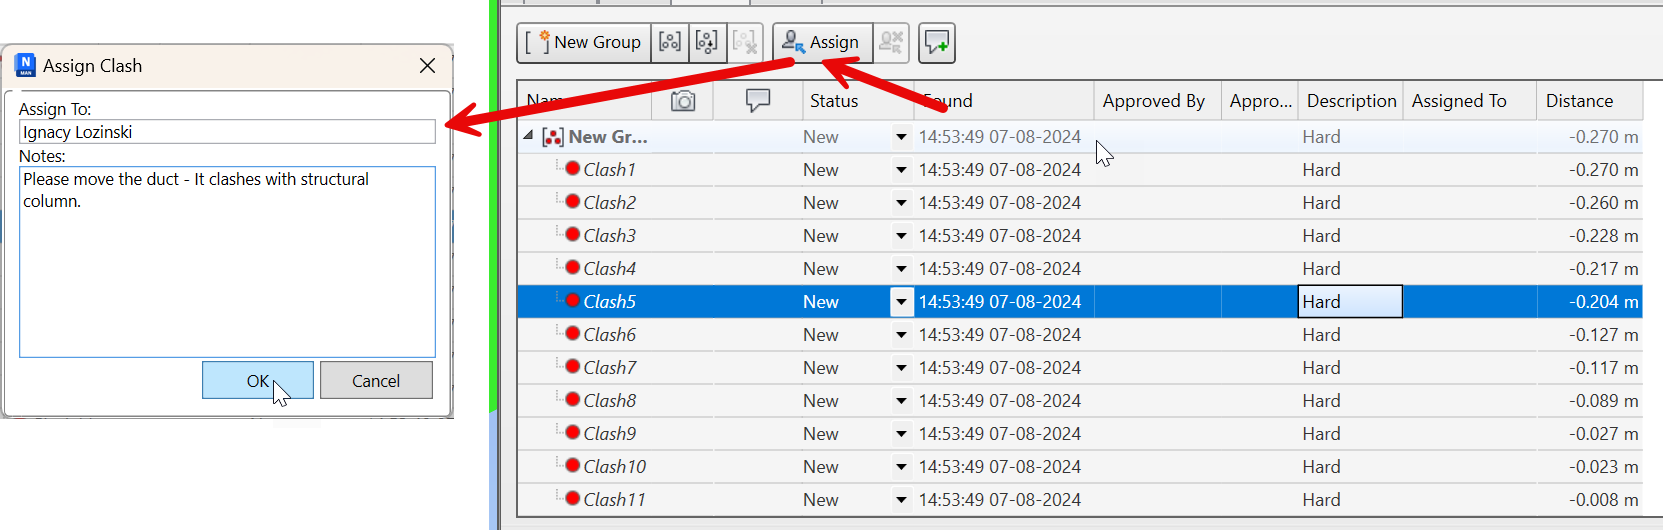
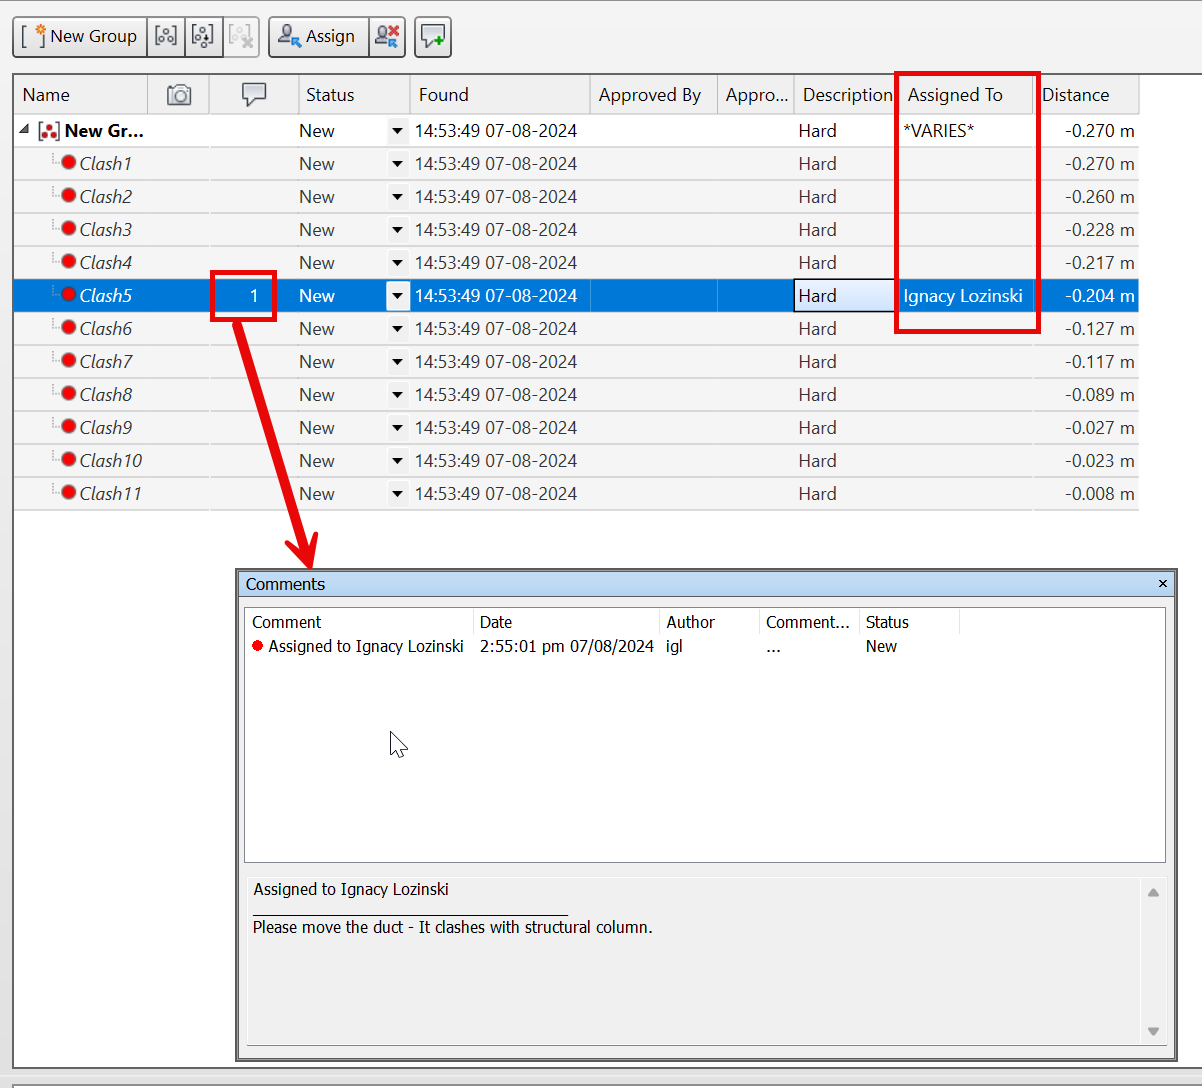
Assign clashes to relevant team members and track their resolution status. I click “Assign” button. I add the name of the person responsible for the issue and also a comment in the “Notes” box.
This step ensures accountability and helps in monitoring the progress of clash resolution. Clear assignments and tracking prevent issues from slipping through the cracks.
After clicking OK, you see that a comment is added to a test “number 1” in the table + a person is added to “Assigned to” column.
Step 5.2: Generate Reports
Now the last part. Reports.
Here, Navisworks gently says sucks (pardon my French😉)
We generally generate detailed clash reports for documentation and follow-up. These reports are crucial for coordination meetings and client updates. They provide a clear record of identified issues and the steps taken to resolve them.
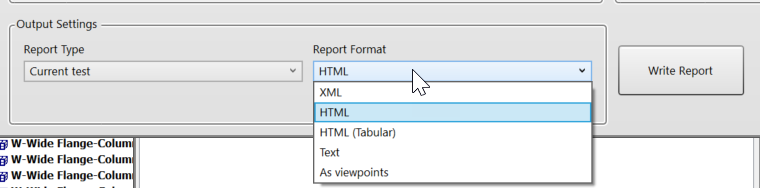
In Navis there are several formats you can use to create reports. These reports are mostly static – so they are not connected to models in modelling tools (like Revit, Tekla, etc) in any way. That’s why I don’t like them. I recommed more sofisticated approach using BCF servers or BCF files.
If you need to use a reports that are included in Navis, then I would recommend using XML file or reports as Viewpoints.
More about Reports in Navisworks, I will talk in the future articles.
So let’s sum up
Today I showed you, the By following these steps, you can build reliable clash tests in Navisworks Manage that will help you detect and resolve conflicts early in the project lifecycle.
I hope this article helps you in your clash detection process. If you have any questions or need further assistance, feel free to reach out at: [email protected]
Interactive BIM Coordination guide in the form of Notion notebook
A lot of tips, graphs, mind maps, and practical exercises
Guided step-by-step process on how to conduct simple BIM Coordination
Exercise files will help you go through each homework
Thank you!
You have successfully joined our subscriber list. Check your inbox. Confirm email in order to get access BIM Case Studies from the biggest Norwegian projects.
Reasons to Subscribe to the BIM Corner List:
BIM CASE STUDIES
After reading this guide, you will learn:
How BIM is used on the biggest projects in Norway
What were the challenges for the design team and how were they solved
What were the challenges on the construction site and what was our approach to them
News From BIM World
Every Thursday you will get a package of news and useful links from the BIM world.
No Hype
Just real content that’s meant to make a difference in your BIM knowledge.
This site uses cookies to offer social functions, analyze traffic and conduct remarketing activities. Details can be found in the privacy policy (info button).