

In most traditional projects, site managers create matrices and draw schemas to distribute responsibility in separate sheets. This helps only up to a point when the matrix is not detailed enough to cover a disputed element or the disagreement is too fierce.
However, you can do it smarter with the use of BIM methodology. How? Stay with me for this brief, but important topic!
Table of Contents
What is the responsibility property in the construction project?
Very often, the interface between different disciplines is disputable on a construction site. In case of errors, reworks or other issues, project stakeholders frequently end up with a blame game.
As a matter of fact, this is avoidable by assigning responsibility to each object in a model.
In other words, responsibility property is the information about what a contractor’s team is responsible for ordering and mounting on-site.
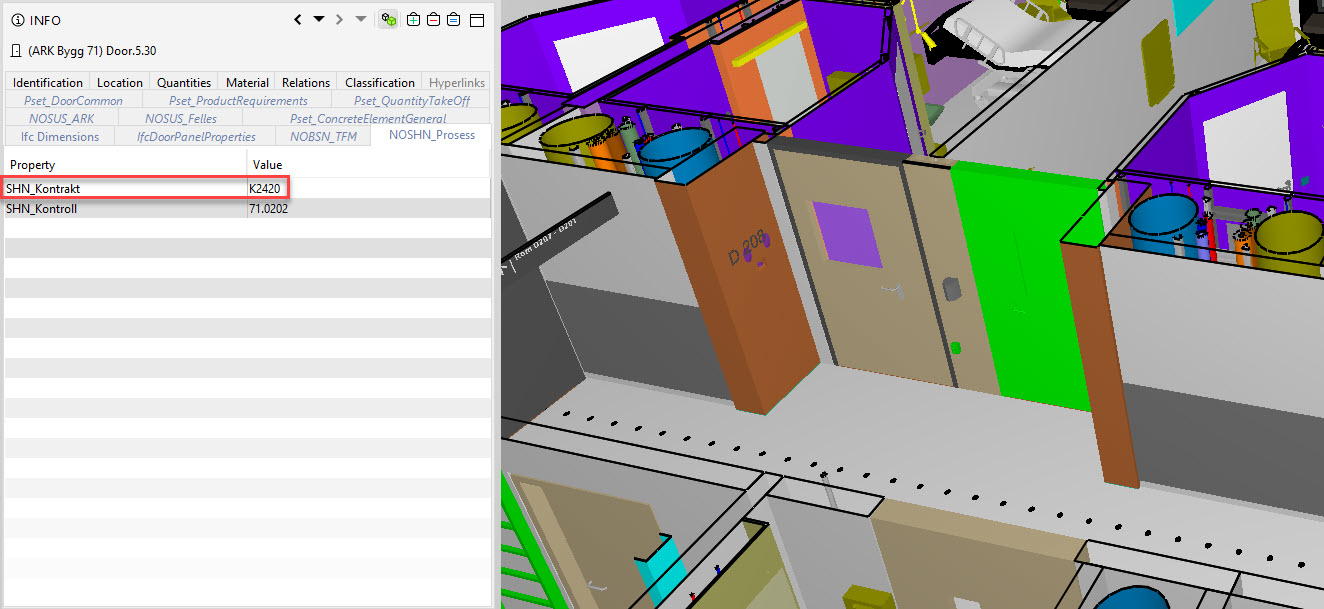
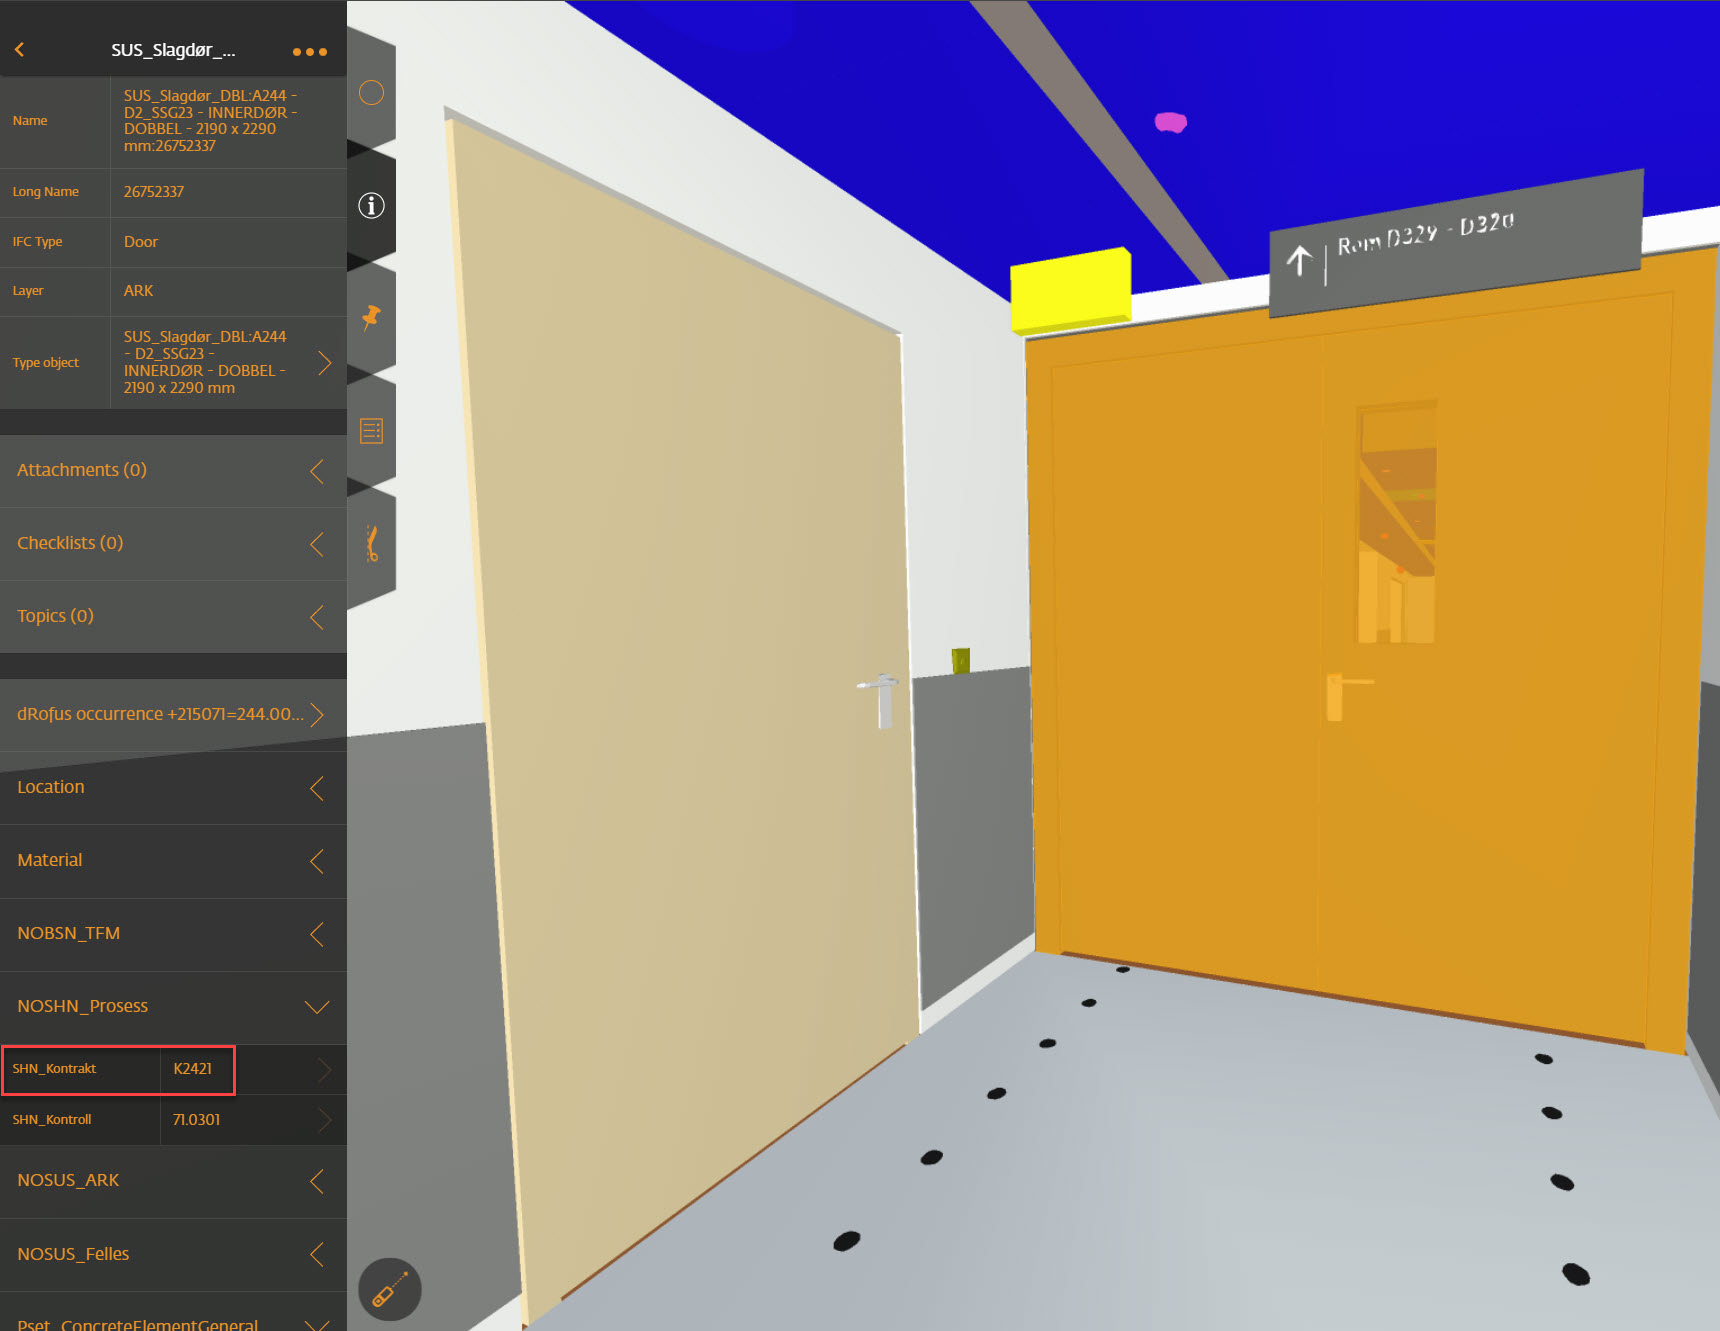
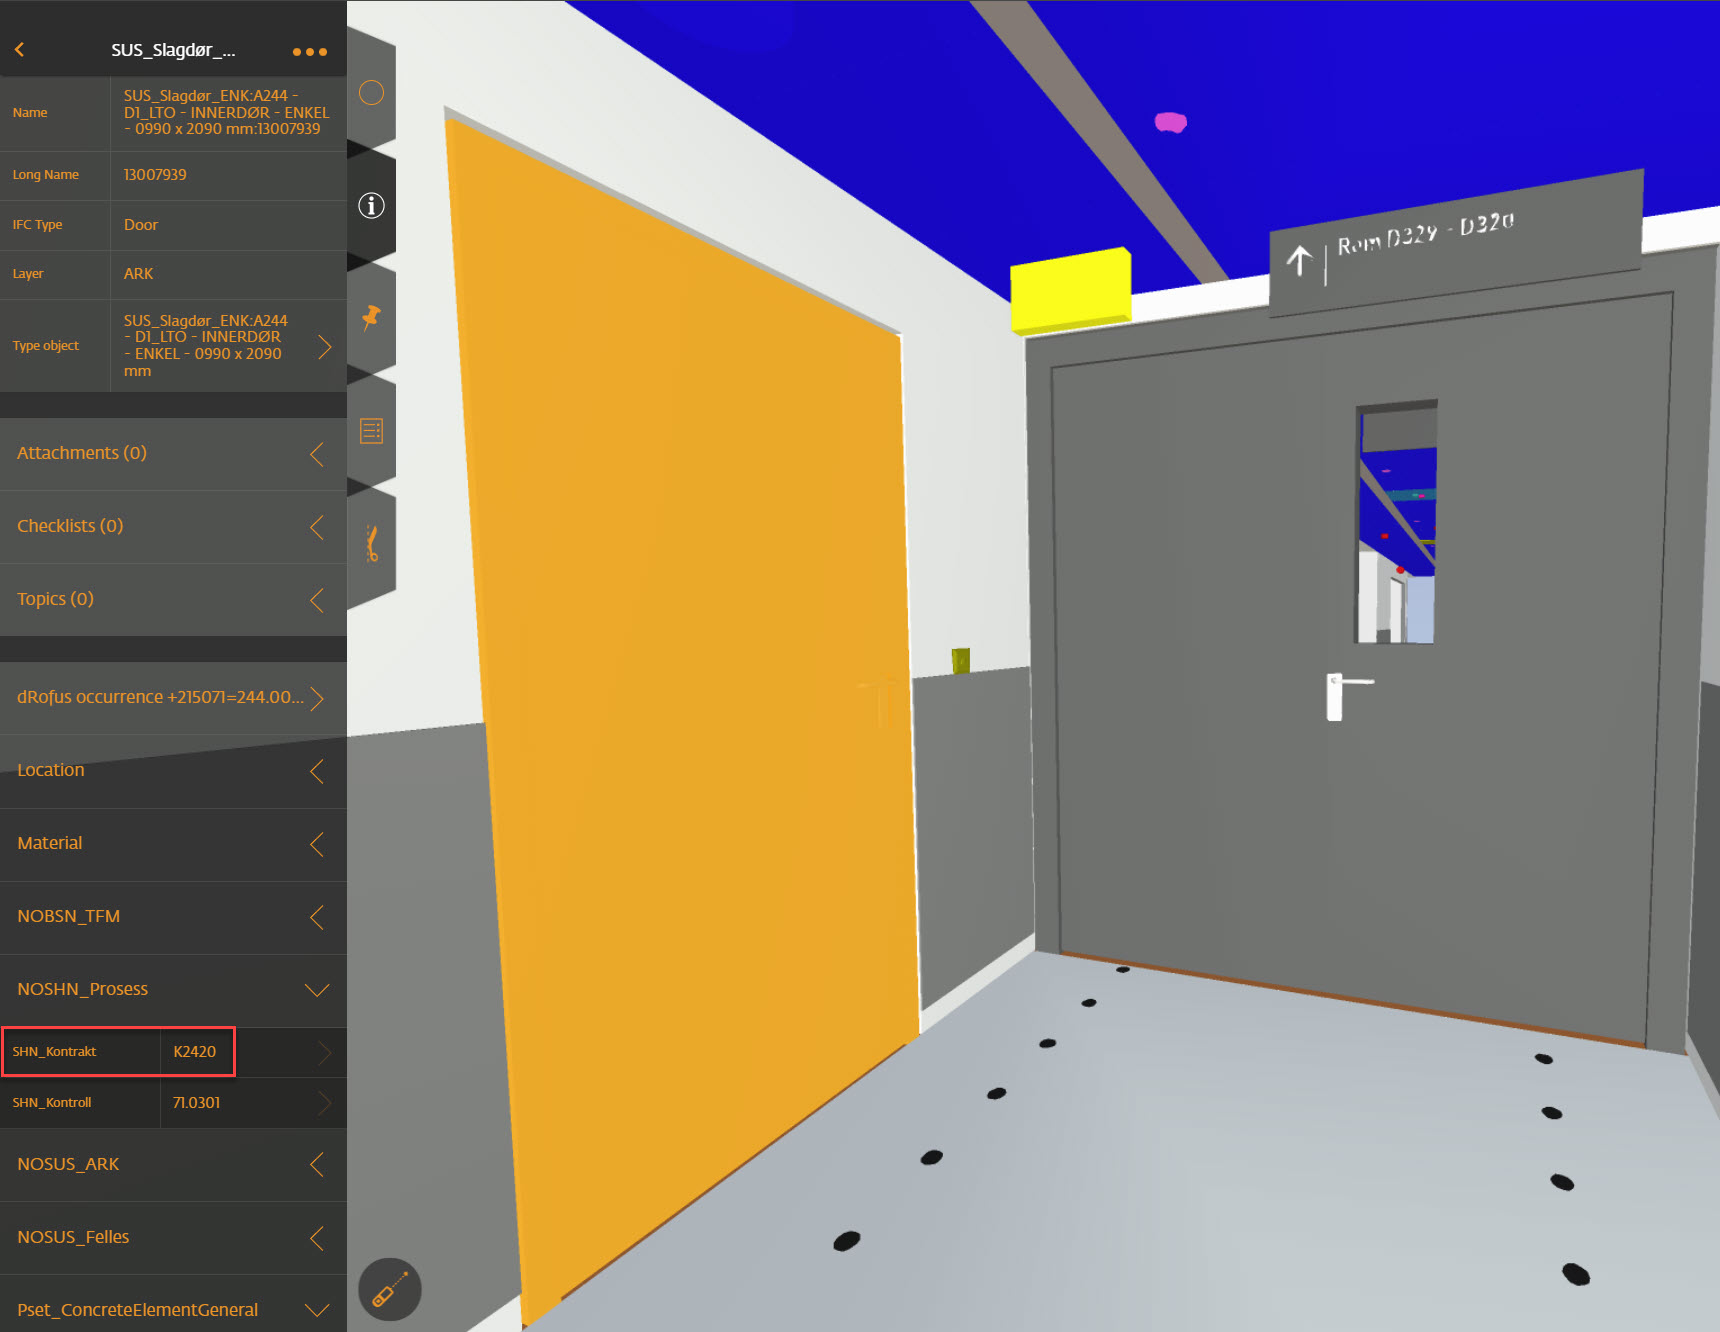
From a technical BIM perspective, responsibility is a user-defined property that contains a string. Every object in a project has this value and it corresponds to a discipline or team responsible for mounting the element on site.
Of course, you can name this property differently. Some projects name it “Contract”, others “Team”, “Company” or “Discipline”. The idea remains the same.
Why should you use Responsibility property in your project?
Straightforward distribution of building element’s responsibility among project stakeholders
Each responsibility number aims for a specific construction team. Using this property makes it easier to know which company is responsible for the installation of a particular object. If an object has a value e.g. “403 Lightning Equipment” it is clear that the contractor working for “401 Electrical Installation” doesn’t order or mount it.
It also helps to solve disputes – if the issue arises, it is often connected to a specific object. You fire up a model and check who is the assignee.
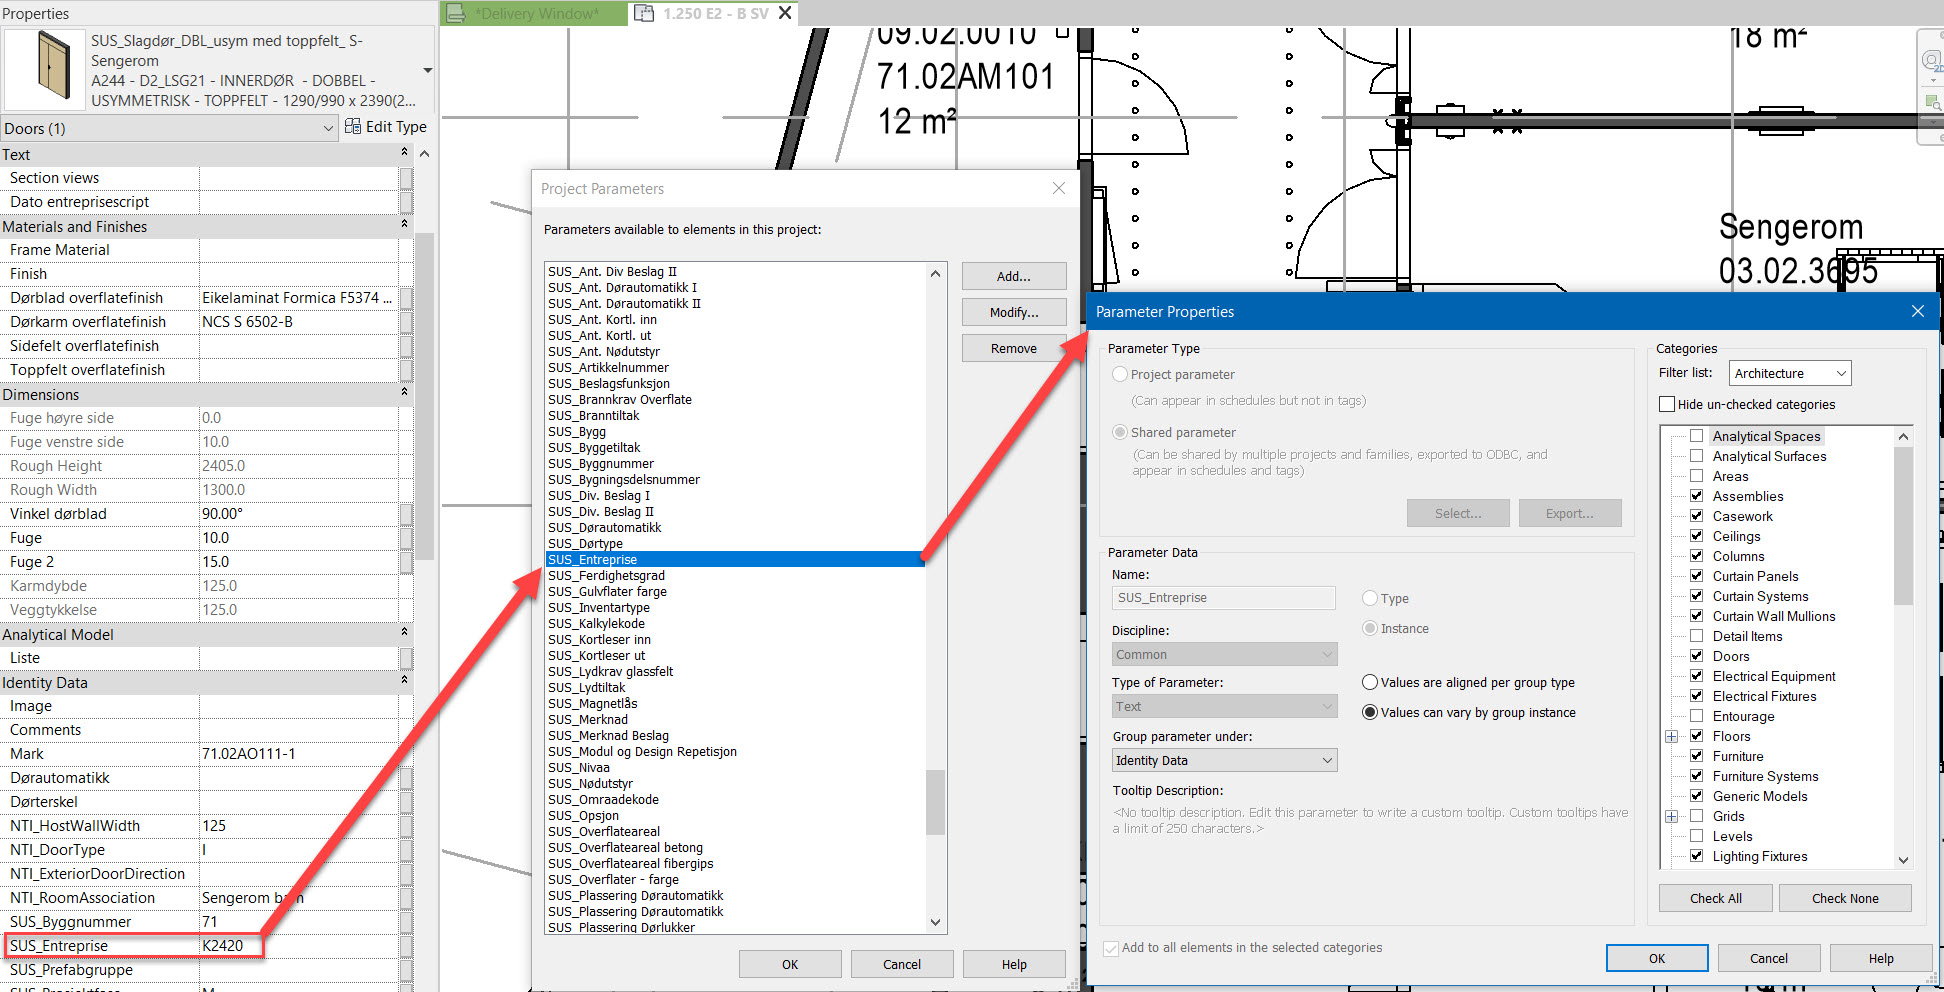
Inner doors and fire doors. In our project, these belong to two different sub-contractors. One is marked with responsibility number K2420 and the other one K2421.
Superior spatial orientation for workers on-site
Easier model management
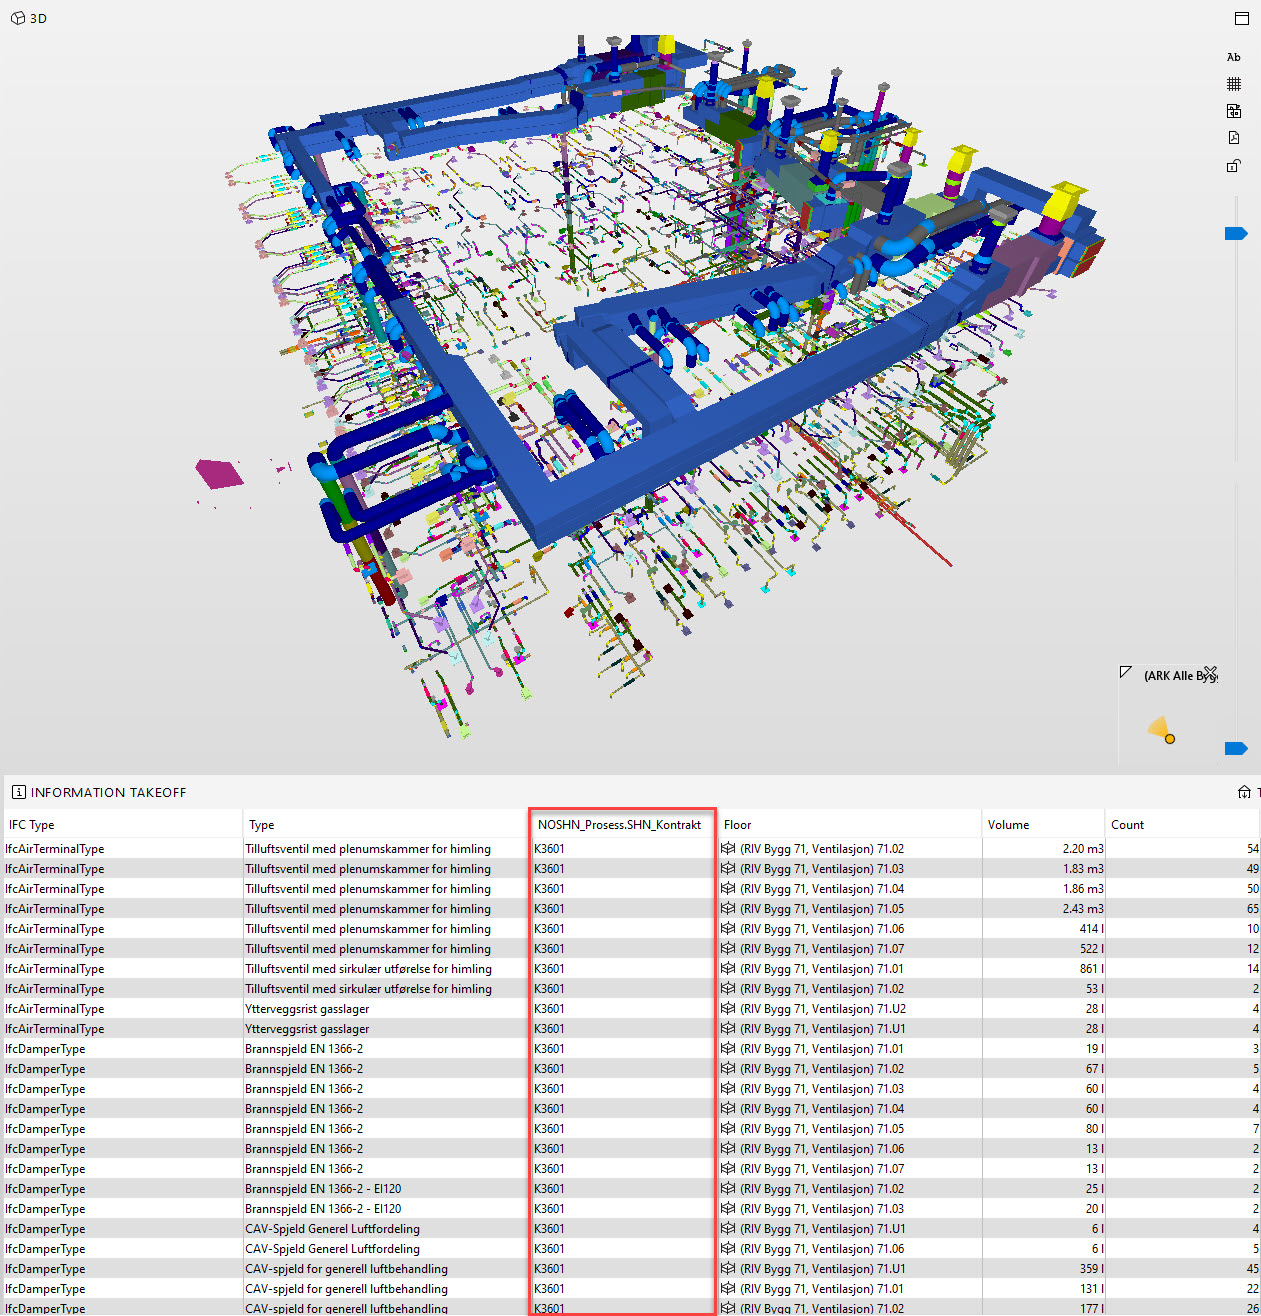
A contractor has a responsibility property that he can refer to. It is easy to filter down a model only to the elements the team is responsible for constructing. Thanks to that, making take-offs is much smoother – you already have all the elements you need to survey.
What is more, the contractor can deploy an issue checker to verify whether “his” objects in the model have the correct responsibility (e.g. check if there are only IfcDuct types and not IfcPipe if you install ventilation).
This enhances model quality and speeds up the procurement process.
Finer communication
Project stakeholders refer to companies or teams based on their responsibility numbers. This supports more straightforward communication both on-site and during issue management.
When we find an issue we can simply mark it with a responsibility number instead of using company names or long descriptions of elements. Also, when sorting and grouping issues, you can use this property as a key to redistributing issues.
How do you use Responsibility in practice in your project?
1. Create a responsibility list
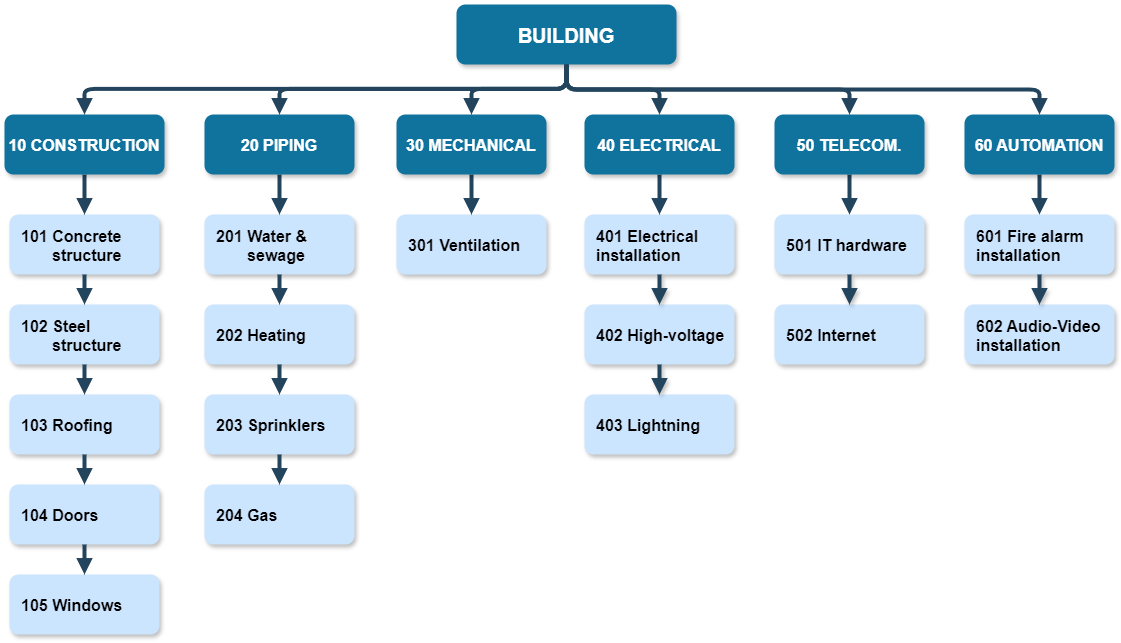
Just like when creating a project Work Breakdown Structure, you split the building by disciplines and systems from broad to narrow. You keep breaking down the schedule until each element from the list is managed by a single individual or organisation. How detailed the list is, can vary depending on the project size and complexity.
For example, in a smaller project, a single company can do all piping, whereas the bigger ones might require splitting further down the systems: water and sewage, heating, sprinklers, gas, etc.
While creating such a list, don’t forget to give each position a unique number and to break down the list until you cover 100% of the building elements.
Let us take a look at an example splitting of some responsibilities. First, we take the main building components and give them numbers and names:

Remember to include the schema in your BEP! You can also use the tabular form. This way you can also add a column with the responsible entity name and contact details. You should also keep this table up to date throughout the project.
Important notice!
The simplest to use and memorize is to follow a national standard that gives you ready classification numbers. Many countries have their tables. Examples of classifications: Omniclass, Uniclass, Coclass or Bygnigsdelstabellen.
2. Create a responsibility property bearer in your model and IFC mapping
When the list is created, the next action is to incorporate it into each object in every project’s model. You can use a custom property in each modelling tool (e.g. as an instance Revit parameter in a project Shared Parameter file). Also, remember to make a user-defined IFC property mapped to a proprietary value. I recommend checking our site about IFC. Jump to pages 4 and 5 for IFC export topics).
3. Write the correct responsibility property value for every single object
Remember that only consistent and correct data gives value!
Summary
In summary, responsibility property in BIM projects can make construction management more efficient. This helps especially contractors, who receive a clear division of tasks, helping to avoid confusion and disputes. Using responsibility properties speeds up procurement and allows easy issue-checking for contractors. This leads to smoother project execution.
Remember, however, that the key to achieving better project outcomes is only by staying consistent with this approach for every object in all models.


