Just picture this: you’re working on a massive 150,000 m2 project with 60 different discipline models and over 2 million model objects. BIM coordination for such a structure is indeed a challenging task, and it definitely calls for well-structured procedures.
To coordinate it you need to actually divide a project into smaller pieces.
You remember the saying – How to eat an elephant? – Piece by piece.
The same principle applies to BIM Coordination.
Now, there’s one aspect that is often overlooked yet absolutely critical: the use of control zones in BIM coordination. They are actually “the pieces of the elephant”
In this article, I will show present the concept of control zones, why they’re so important, and how they’re practically applied in BIM projects.
And don’t worry, we’ll keep it simple and straightforward, providing easy-to-follow guidance for all you professionals out there looking to optimize your BIM coordination process.
So, let’s dive in!
Would you like to learn more about BIM COORDINATION? JOIN AN ONLINE PROGRAM TO BOOST YOUR SKILLS
So what are actually control zones?
Control zones in BIM are special areas in a construction project that need particular attention and management.
They are often decided based on things like how complicated they are, how risky they are, or how many services and structures are there.
In BIM coordination, these control zones help to organize and simplify the work process.
They make sure every part of the project gets the right amount of focus and resources.
Control zones help keep complex construction projects organized.
They split a project into smaller parts. This makes it easier for BIM coordinators to watch over the parts, handle any problems, and make sure everything is top quality.
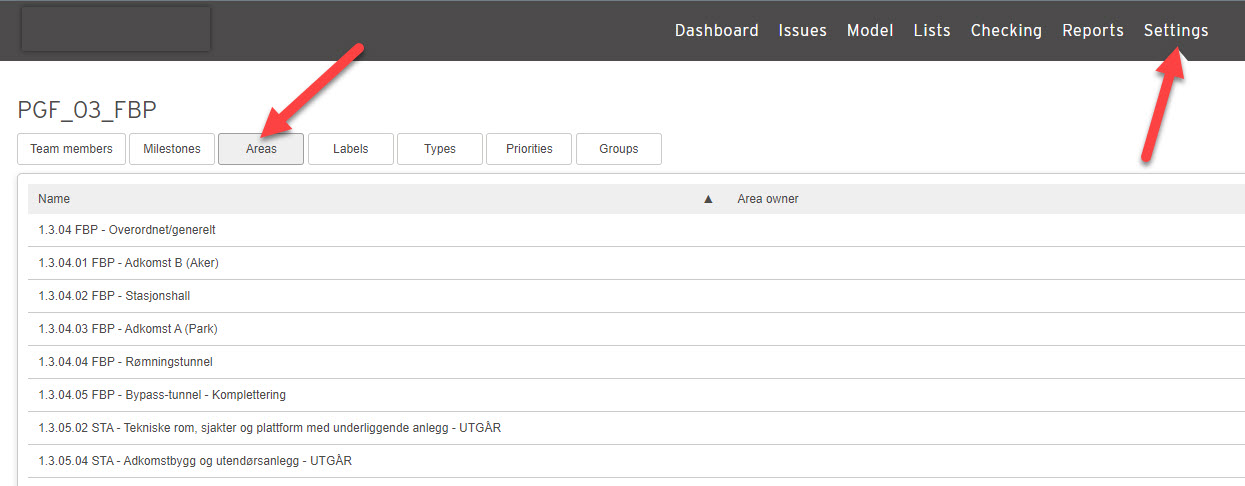
Here is a example of control zones on one of the biggest hospital projects in Norway:

Control zones can be of different sizes and types. Some might be small areas that need a lot of care.
Others might be big areas that need broad management.
Why we should use control zones in BIM projects
There are 3 main why’s you should consider, when implementing control zones in model checking process.
1. Improved planning of coordination activities
In general, control zones help make project management neater and smoother, improving the speed and standard of the end result.
In the picture below you see a part of the coordination plan. Plan is divided to several control zones that will be checked during certain period of time.
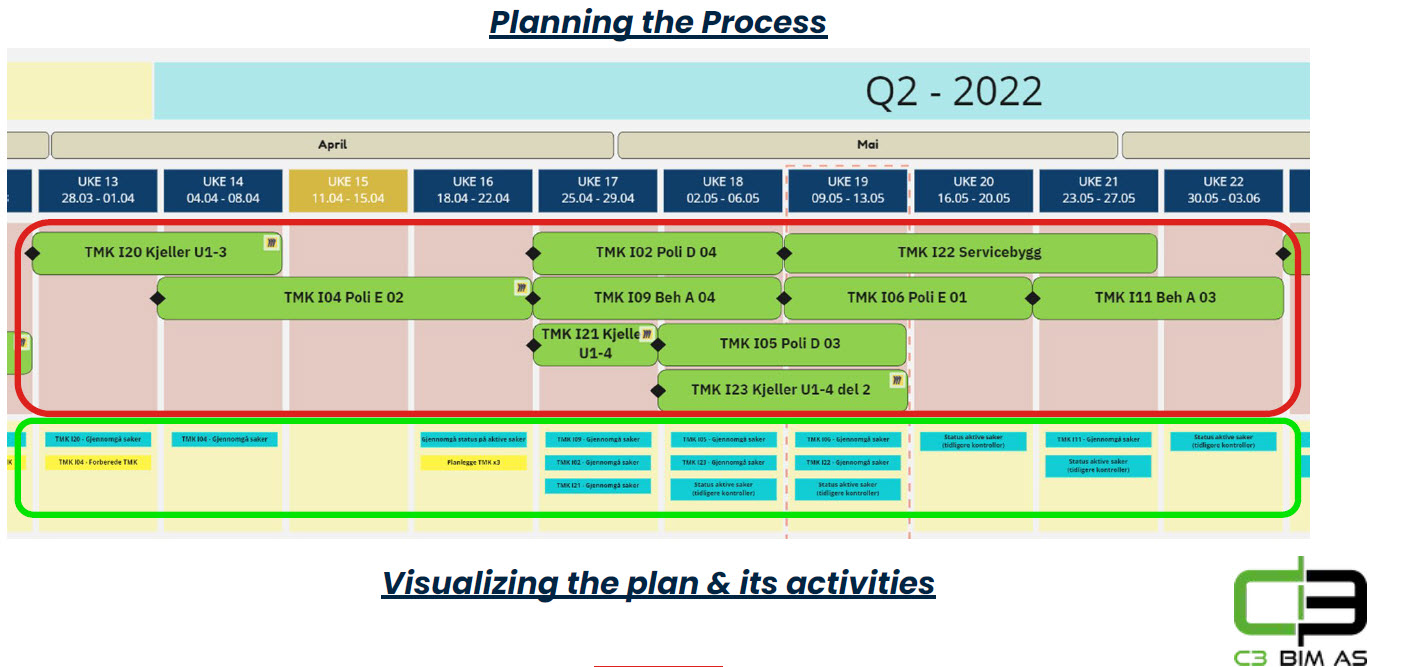
When a building is divided into control zones, we can schedule which zone should be inspected first, which ones require more time for quality control, and which parts can be checked concurrently.
Frequently, zones that are close to each other and contain similar building elements can be grouped together to speed up the coordination process.
2. Enhanced Focus and Precision:
By dividing a project into smaller, manageable zones, BIM coordinators can focus on specific areas, leading to more precise and detailed management. Finding issues in a smaller area is easier.
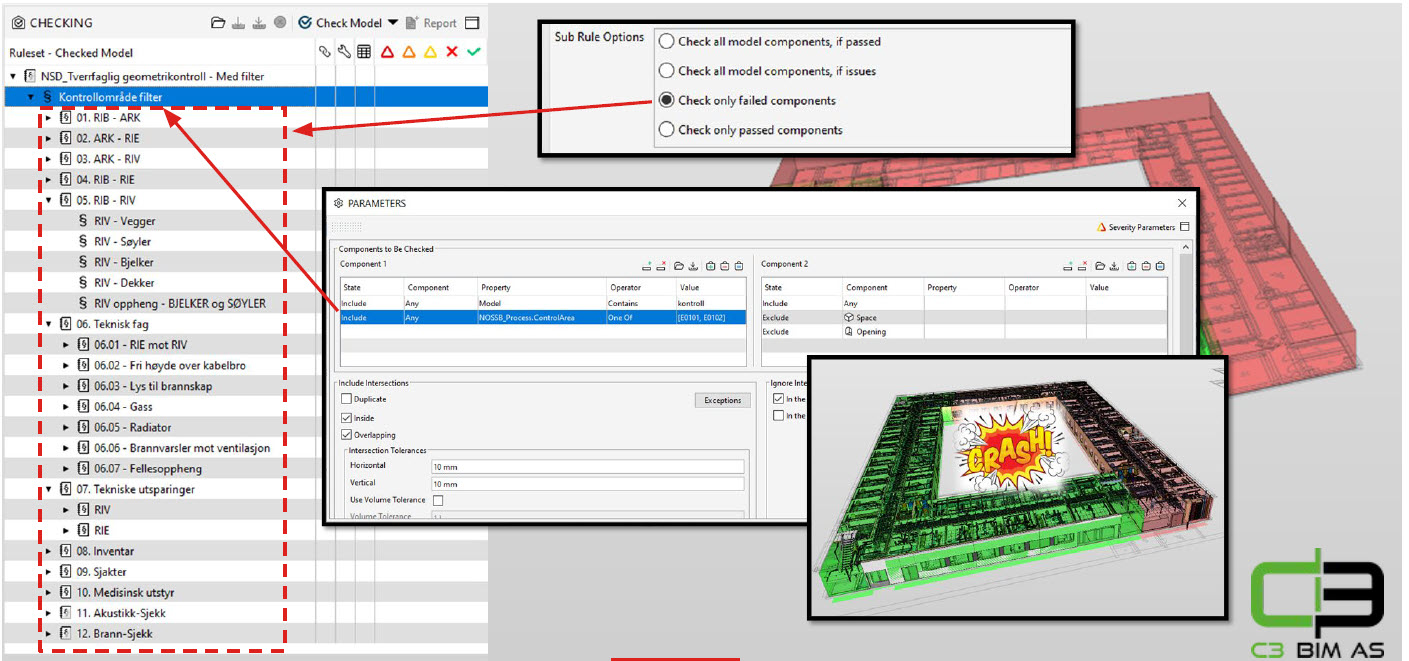
We can create rules in our coordination software that consider the specific zone we are checking.
Below in the picture is an example of a rule list:
3. Better Collaboration and Communication
In a building project, there are always areas that are more complex and require better expertise and coordination than others.
When we, as BIM Coordinators, run a model control, we notify the project team when we will check a specific area, so that the team can be aware of it.
Control zones facilitate clearer communication and collaboration among team members.
Team leaders can allocate more designers to a specific area that needs more attention or higher expertise.
Moreover, in issue management software like BIMcollab, we can assign a specific zone to each issue. In this way, issues are grouped in a meaningful way.
Here is a picture where you define zones in BIMcollab.
It helps teams responsible for specific areas to filter the issues that they are responsible for and focus only on them.
How to Use Control Zones in Practice
Implementing control zones in a BIM project involves several key steps that we should follow:
Step 1. Identify potential control zones
The first step is to identify potential control zones based on the project’s complexity, risk factors, and specific requirements. There are various ways to divide the project into specific control areas. Divisions can be:
– per level of the building,
– per group of rooms in the building,
– per building, or even
– per group of buildings.
– others
It all depends on your project specifics.
Step 2. Define parameters
Once identified, each control zone should have a clearly defined model parameter name that defines such zones. It can be called “Control Zone”.
This parameter should be added to all model elements. Values of that parameter should be discussed, agreed upon, and established at the beginning of the design process.
There is no rule for what values should be used; it all depends on your project specifics.
Here is an example where a meaningful combination of letters and numbers was used to define the control zone parameter value.
Here is another example where we use just an area name to describe a control zone.

Remember that parameter values should be understandable for the team and give a clear idea of where a specific control zone is, after checking its name.
Step 3. Integrate control zones in BIM software
The final step is to integrate control zones in BIM software. In the modeling software, we add a parameter (as described in the previous step) to each model element and specify a value for that parameter.
If we export the model to IFC files, we should also remember to export control zone parameters as user-defined parameters.
In Revit IFC Exporter, we use a special text file to do this. – If you would like to learn more, read this article.
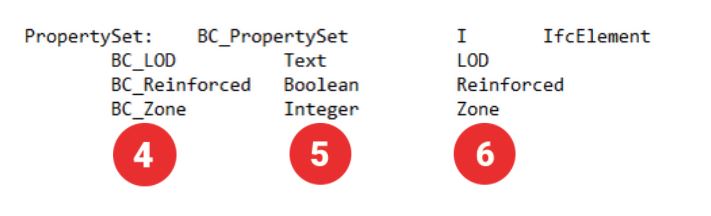
Here under you see BC_Zone parameter exported into IFC file using text file.
The parameter is then used in coordination software and modeling software to classify components by their control zone values.
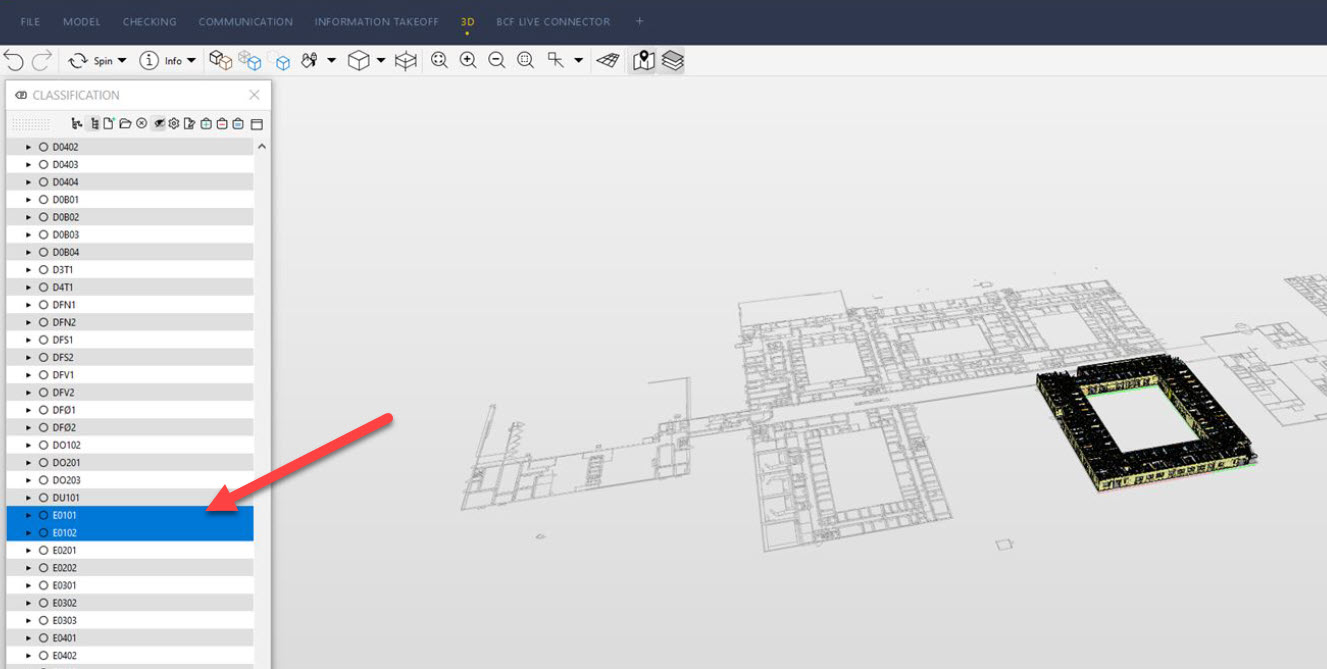
Here is a classification list in Solibri that specifies control zones.
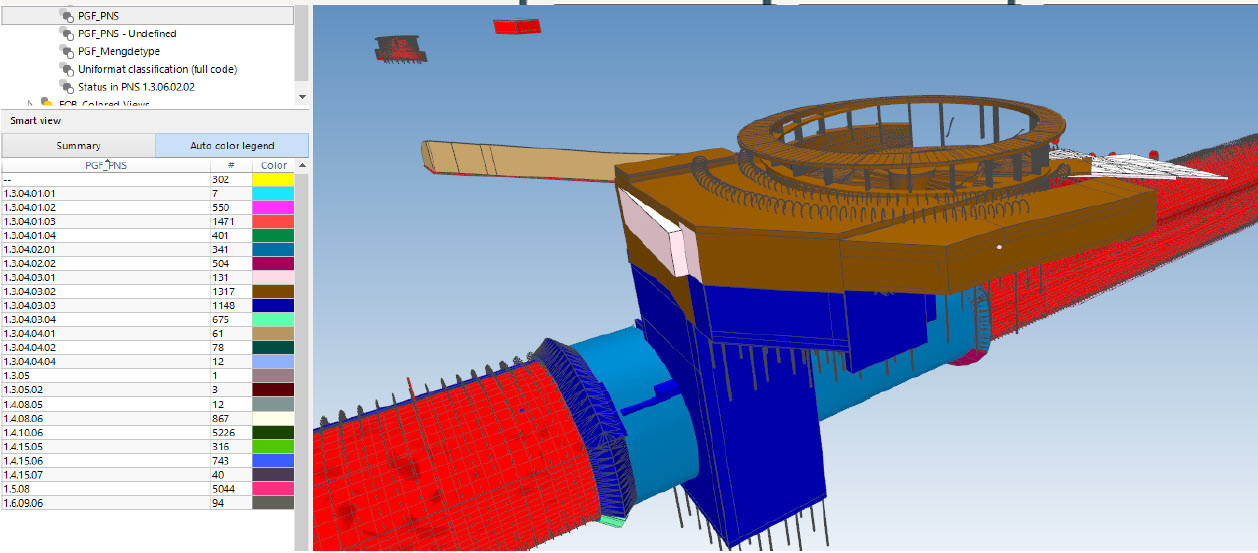
We can also color-code our model, assigning a specific color to each control zone. In this way, we can easily identify them.
Here is an example of such color coding:
Let's Summarize
Control zones in BIM coordination are an effective tool for improving the efficiency, accuracy, and management of construction projects.
By dividing a project into manageable sections, BIM coordinators can ensure concentrated attention, efficient use of resources, and effective resolution of conflicts.
But remember that implementing control zones requires careful planning, clear definitions, and constant management.
However, the benefits they bring to a BIM project, which I should in this article, are worth that effort.
I think that as the construction industry evolves, the use of control zones in BIM coordination will undoubtedly be crucial in creating successful and sustainable projects.
What about you?
Do you use Control Zones or similar tool in your project?
Write in the comments. 👇👇