Some Grasshopper options are well hidden. In many cases, you have to just know that trick, because it is almost impossible to find out by yourself. In this article and attached video, I want to show you some secrets that you might not have found yet. Check out the list of Grasshopper options that you probably missed.
Options in Grasshopper that you missed
1. Average points
The Average component is mainly associated with numbers. As a mathematical calculation. Component divides the total sum of a set of digits, by the number of digits.
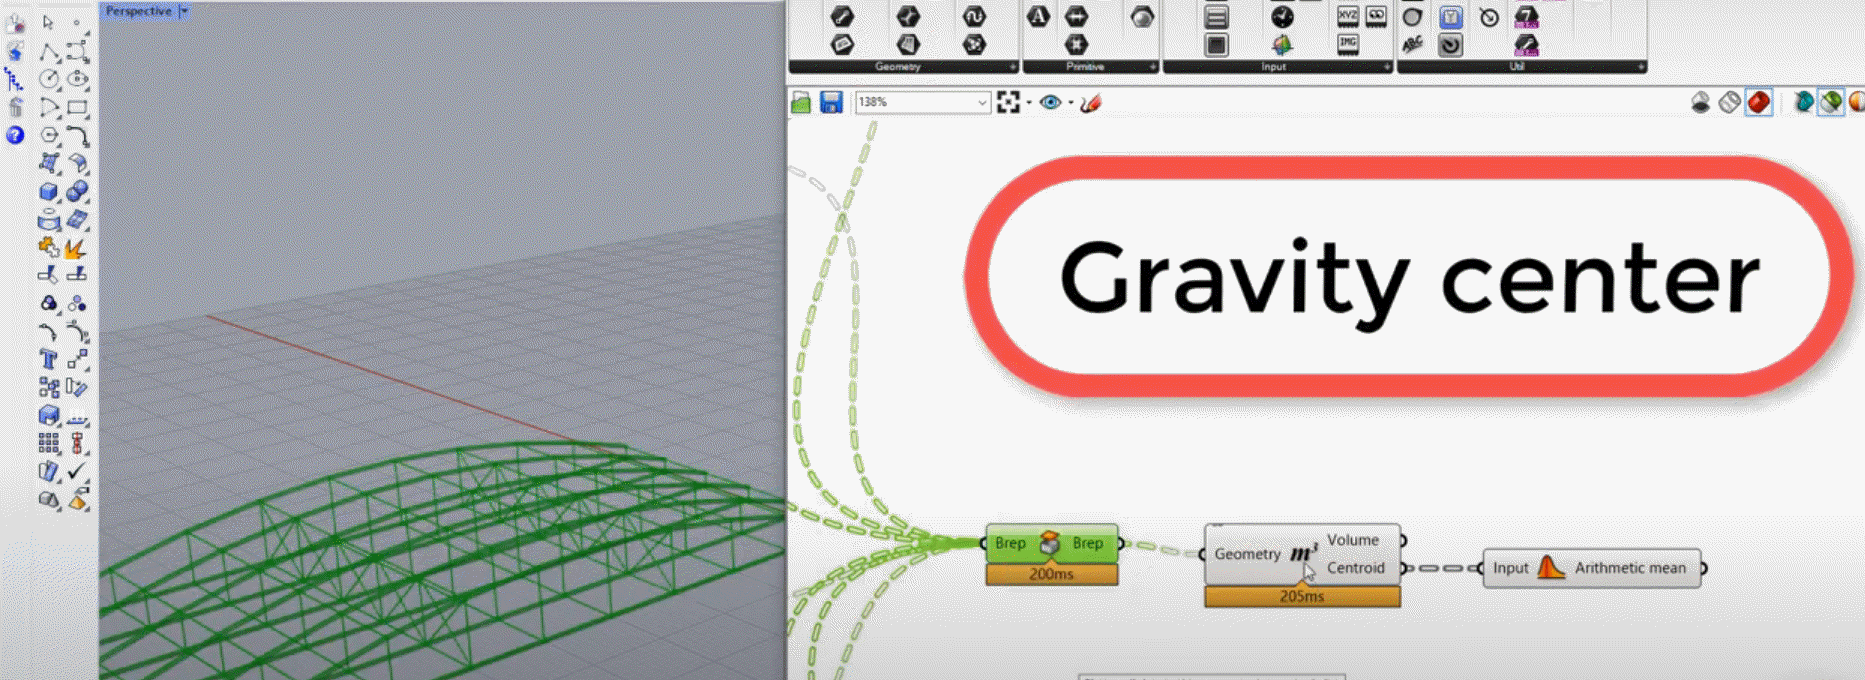
But I will show you the second way of using this component in Grasshopper. Let’s draw some points in our rhino. Afterwards, we can take all these points and connect them to the average component and in this way, you can get the arithmetic mean of all of these points. We can say that the result of the Average component with points as an input is a gravity centre of all points.
Okay, but this is just theory.
How can we use that in your work?
Let’s go to the example of roof structure when you take all of the breps elements from this structure. We connect them to the volume component to find the centroid. Afterwards, when you have lots of centroids of elements, actually, we can find the average of all of these points in that way, you can get the gravity centre of the whole structure.
Average component with points as an input is a gravity centre of all points.
Sometimes your script can be massive, and it can be tough to find all your inputs. Esspecialy if you are not keeping order from the first minute of script creation.
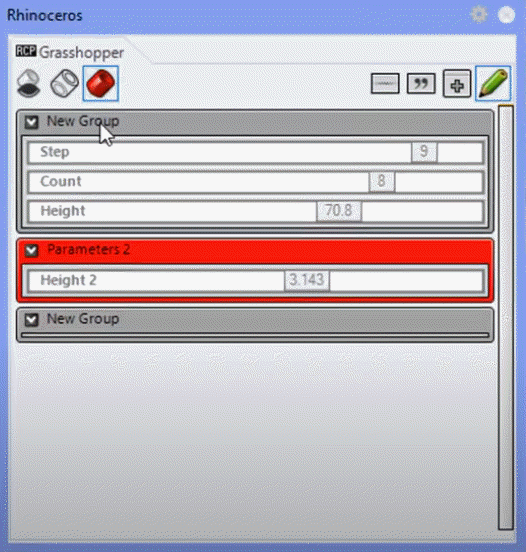
That’s why Rhino developers have created a Remote Control Panel (RCP) tool. You can find it in the View→ Remote control panel. This tool works in a way that you can send all your sliders to one table. This one table will represent all the input data that you have on your script. Right-click on your slider and click publish to the remote control panel.
Remote control panel Grasshopper
In one table, you can find all the input that you have sent. If you change the one slider in your table, the slider in the script will be changed as well. Remember to give always the name to this slider because it is just the only thing that differs from one slider to another. In this tool, you can also create the groups. The different groups can change other cases’ parameters and give different groups additional names to keep order in your table.
It’s wise also to give the colours to your groups. You can easily change your parameters specific to one group.
3. Change alias
Everybody knows that the searching tool in Grasshopper doesn’t work correctly. Every time when you try to find your component, you need to write down the full name correctly. The first result will be most relevant. Go more to the top, you get less relevant components, and you can find even rhymes… Rhymes? Why?
Anyways.
The thing is that you are not always finding your component as a first one. The most common use component in Grasshopper is a list item. Right-click on the component in your ribbon and select component alias. To see all components and parameters in your ribbon, make sure that the Obscure Components option in the View is turned on.
In the text input of component alias, write some first letters of a component.
For example:
List iteam - li
List length - ll
Curve parameter - c
Curve closest point - ccp
Now, when you double click on your canvas, write just these letters and Grasshopper will suggest a component. Using this trick can save a lot of time!
Alias option in Grasshopper
4. Explode Tree
Sometimes you need to use explode tree component. In order to get some branches of the data tree. It is not the nicest way of doing that by the fastest one.
After connecting the tree structure to explode, the component will extract just the first branches of the data tree. And with the plusses in the Zoomable user interface, you can manually add more.
But actually, you can skip this work of manual clicking plus go to explode tree right-click on the icon of a component and select match outputs. In that way, you will get the same number of branches and outputs in your component.
Automaticly you will get the same number of branches and outputs in your component.
DOWNLOAD
5 STEPS TO LEARN GRASSHOPPER
5 Steps to learn Grasshopper is a guide full of books, exercises, tutorials and videos. Everyone will find something for themselves – regardless of the level of initiation.
Maybe you had a situation where you needed to put some values in your empty branches.
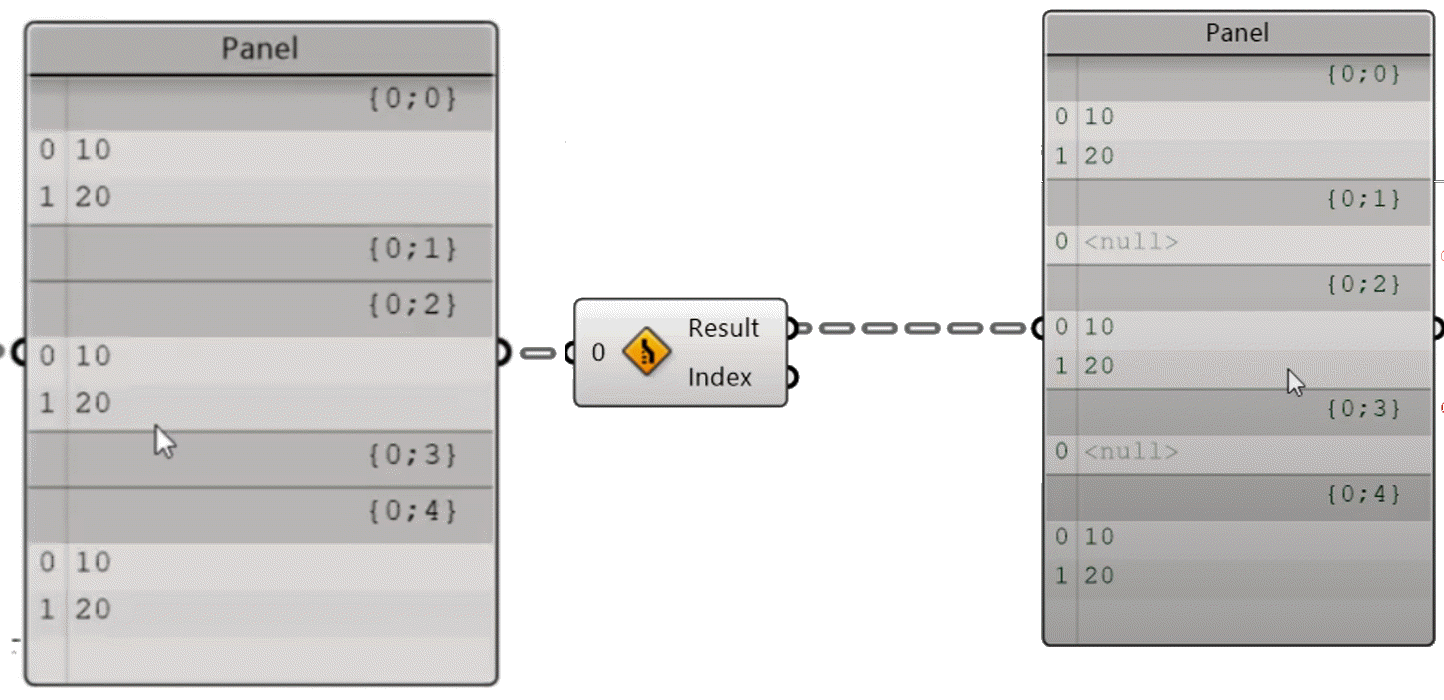
Below you can find an example picture of how you can solve it. With the Entwine component, a data tree was created. In this way, it will be no values in some inputs, so if you go to the panel and see the results, you can see that there are sub-branches where there are no results at all.
But in some cases, you need some inputs instead of nothing. For example, if you want to make some mathematical operations.
To do that, use the Combine component, and if you see on the panel you will get in these branches where was no value at all, you will get the null items.
In branches where was no value at all, you will get the null items.
I’m sure there are more easter eggs in grasshopper that I didn’t mention, so if you have any, let me know in the comments below.
You have successfully joined our subscriber list. Check your inbox. Confirm email in order to get access BIM Case Studies from the biggest Norwegian projects.
Reasons to Subscribe to the BIM Corner List:
BIM CASE STUDIES
After reading this guide, you will learn:
How BIM is used on the biggest projects in Norway
What were the challenges for the design team and how were they solved
What were the challenges on the construction site and what was our approach to them
News From BIM World
Every Thursday you will get a package of news and useful links from the BIM world.
No Hype
Just real content that’s meant to make a difference in your BIM knowledge.
This site uses cookies to offer social functions, analyze traffic and conduct remarketing activities. Details can be found in the privacy policy (info button).