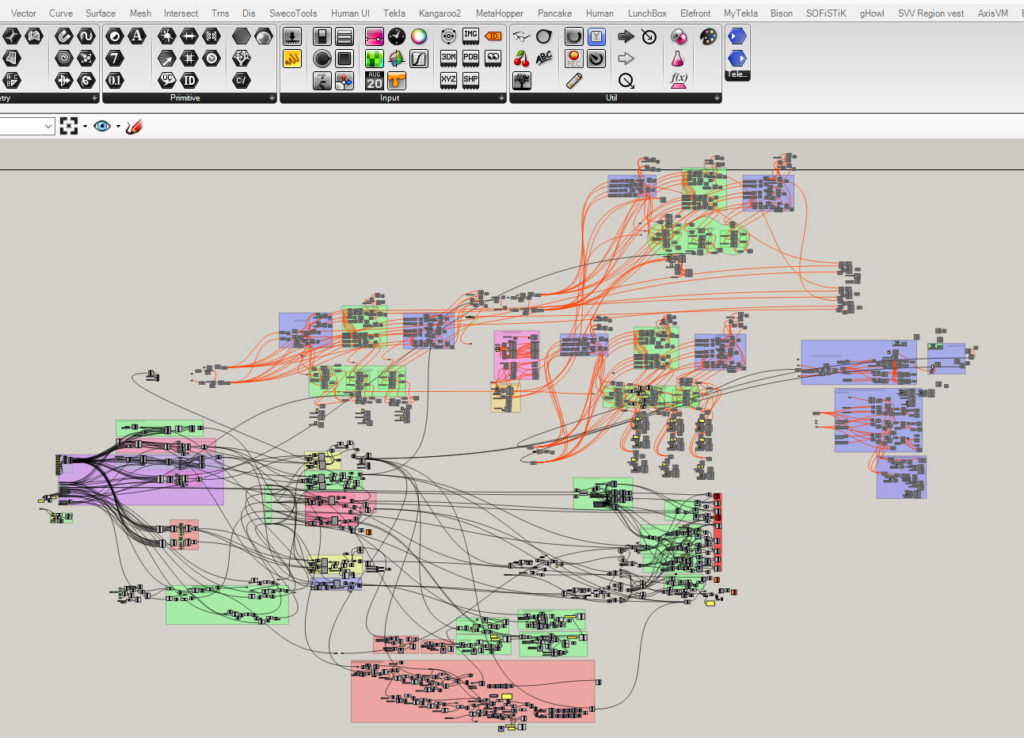
During the last years of my work, I have created too many terrible scripts. I mean it. Back then I was convinced that I had total control and I knew where exactly things were… I didn’t. But now I am much smarter and I call this kind of script a ,,Spaghetti Monster“. Today I am going to share with you my 5 Grasshopper tricks on how to defeat this monster and make your scripts cleaner. Enjoy!
5 GRASSHOPPER TRICKS TO DEFEAT SPAGHETTI MONSTER
1. Telepathy
Telepathy is a wireless sender/receiver that allows you to send Grasshopper data to anywhere on the canvas using a simple key naming interface. The component can be downloaded for free from Food4Rhino. From the toolbox, we can choose two components remote receiver and remote sender.
Remote receiver and remote sender
Connections will be created automatically based on the key name. In the example we have a definition of the road line which we connect to remote sender. By typing <<Road Line>> in receiver component wireless connection will be created automatically.
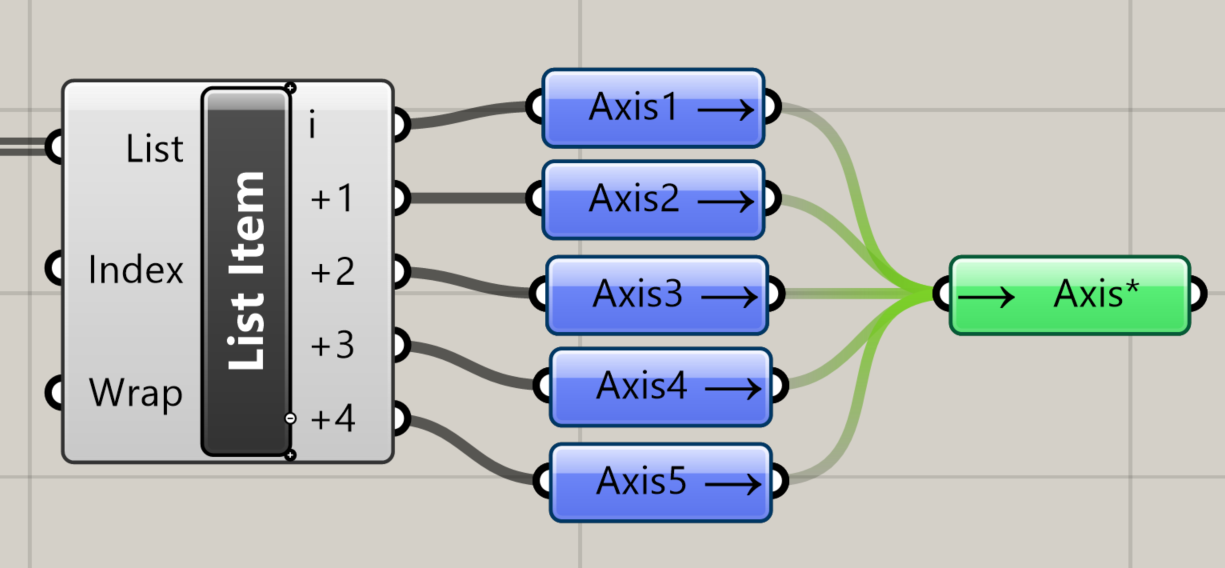
Moreover, receivers can collect data from many senders. By using an asterisk (*) I can pipe many data. You can use a shortcut by type <RE> to get receiver component, afterwards <=> sign and type Axis with an asterisk at the end and all data with Axis at the beginning will be collected. Same can be done for the Road line to get data in a quick way.
The perfect plugin to keep order in your script. Especially useful when you have a big script and you want to find your data in a quick way.
Collecting all senders by one receiver
2. SnappingGecko
SnappingGecko is a free Grasshopper plugin created by a company called weArk. The plugin helps you to keep order in your script. SnappingGecko by magnetic guidelines enables you to align components while moving. The plugin will automatically align the object to the sides or centres of other components or groups. An awesome tool which helps me with script creation every day.
SnappingGecko can be also customized. By changing guides colour, line type, thickness, strength so you can adjust it to your preferences. Link to webside HERE
SnappingGecko
3. Extrude from Excel
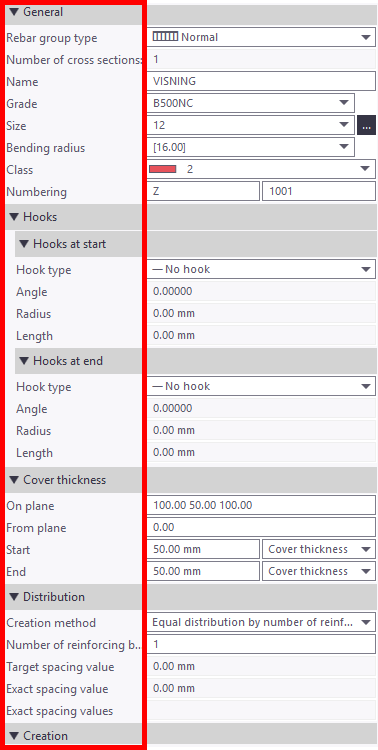
Rebar component in grasshopper needs a lot of input. Starting with the name, grade, numbering, cover distances, spacing and so one. Creating a rebar group needs 30 input data which equals 30 wires! This number corresponds with spaghetti Bolognese dinner for the whole family! And this is just for one reinforcement group!
Reinforcement group in Tekla
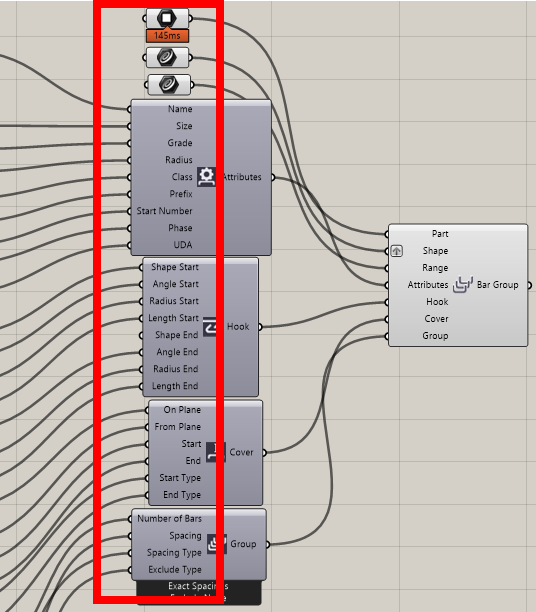
Rebar Group definition in Grasshopper
My colleague from work came with an amazing idea. Let’s use our old friend – Excel. With GH we can extrude all data from excel with all important information. We can skip connecting all wires and save time for searching a proper slider to change.
The advantage with this solution is the possibility for not GH users to make the modification. With this solution, we can have so many rebar definitions as we want. All changes will be implemented by just changing the Excel workbook path and updating file by one click.
Every time when you have a lot of data, thing about this solution.
Next one is spaghetti killer and one of most powerfull tricks in Grasshopper:
4. Control wire display
Sometimes you get sick about a number of wires connected to your components. Good news – you can easily change the visibility of the wires. Instead of doing it manually one by one, you can use a component which will do it automatically. Download a group of useful components called MetaHopper – You can find them on food4Rhino.
MetaHopper in Grashopper
One of them is called <<Control Wire Display>> which will change the visibility of selected wires. First step is to change wire display to Hidden. Second select which component wires you want to hide. I use it a lot to hide wires crossing other components. After click just a select button.
Moreover, you can do it for all components. Select all objects and hide them just by one click. In that way you have just eliminated spaghetti from your script.
5. AutoGraph
AutoGraphis a suite of tools that will help you organize the objects on your Grasshopper canvas. I haven’t used it a lot, because I like to organize things by myself not automatically. But looks promising and can be helpful for cleaning someone else script.
AUTOGRAPH
Main feature is a visual graph layout and algorithm editor that will automatically arrange the objects on your canvas based on a set of parameters. Select your components and click Update from a selection. Program makes all the magic. You can set up some settings for column spacing and row spacing or even a layout type . The plugin offers functionality to insert generic description parameters in between components, in order to neatly route the wires in your definition.
Visual graph layout
What are your Grasshopper tricks to manage big scripts?
Write in the commentary below what helps you to create clean scripts in Grasshopper.
Which components and Grasshopper tricks in your opinion are missing in this list?
You have successfully joined our subscriber list. Check your inbox. Confirm email in order to get access BIM Case Studies from the biggest Norwegian projects.
Reasons to Subscribe to the BIM Corner List:
BIM CASE STUDIES
After reading this guide, you will learn:
How BIM is used on the biggest projects in Norway
What were the challenges for the design team and how were they solved
What were the challenges on the construction site and what was our approach to them
News From BIM World
Every Thursday you will get a package of news and useful links from the BIM world.
No Hype
Just real content that’s meant to make a difference in your BIM knowledge.
This site uses cookies to offer social functions, analyze traffic and conduct remarketing activities. Details can be found in the privacy policy (info button).