It’s fundamental to know the basics of any program before starting more advanced scripting. In this article, you will find Grasshopper basics that every user should know. For some of you, it will serve as a knowledge refreshment. However, some basics in Grasshopper are not evident, and you can be surprised. Enjoy!
MY LIST OF GRASSHOPPER BASICS
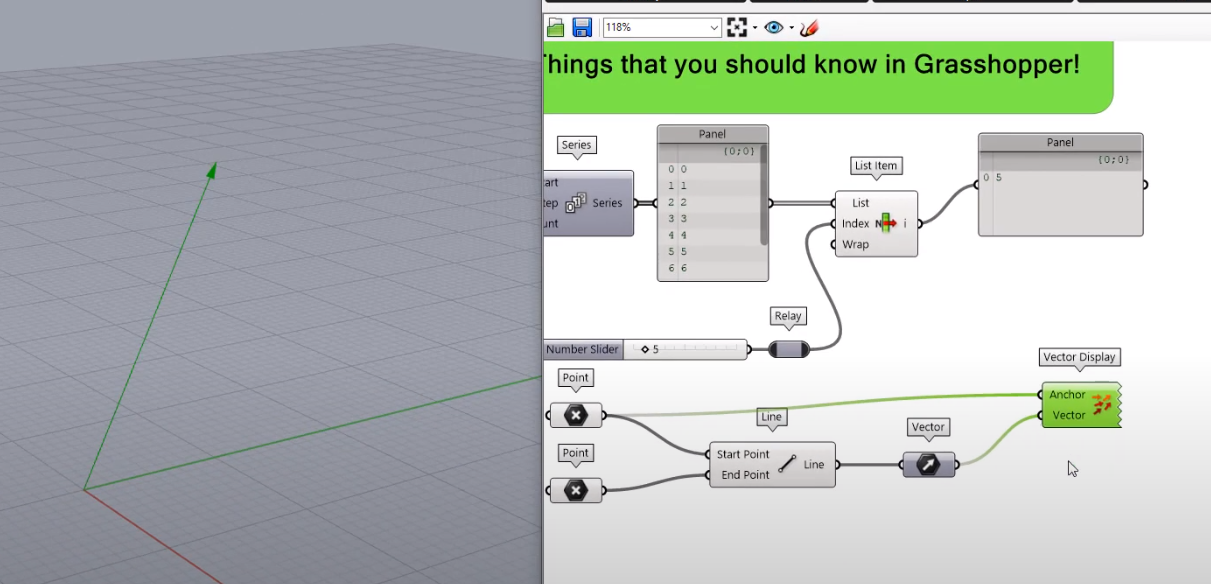
1. Vector Display
As default in Grasshopper vectors are not visible. Not even if you activate in the right corner ¨only draw preview geometry for selected objects¨. Missing vector display can be confusing because all lines, points, planes or surfaces are displayed normally.
To make all vectors visible, you need to use the ¨vector display¨ component. As you will see, all display components do not have the output. These components have just input on the left side and a beaten ending on the right side. In order to see the vector direction, use the ¨vector display¨ component and connect the starting point to the anchor and connect vector you would like to show.
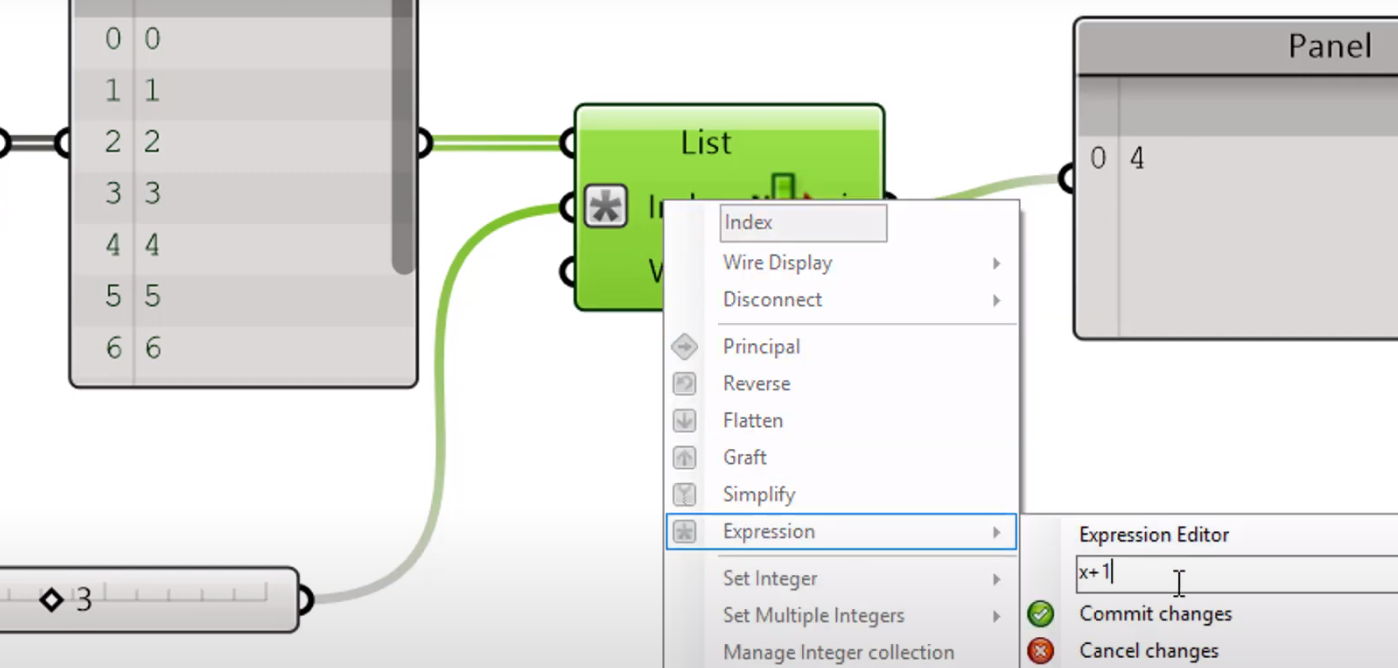
Good to know that you can put expressions in components. It is a kind of quick way of making calculations. Example:
If you right-click on your component and choose the expression, an empty box will appear. Here it is possible to write mathematical quotations. As a default x will stand for the numberwhich corresponds with the input value connected to the component. Let’s write x+1
Every time now, every value connected to a component will be increased by one. As a result, you will get the second element.
The same analogy can be used in the sliders. Right-click on your slider and write the new expression. For example: If you would like to have just even numbers, then multiply your input by 2 (x*2), and you will get just even numbers.
To Remember: Every time you use an expression in your component, a little star will appear. Try not to overuse this method. You can lose track afterwards, and it will be hard to find the errors for you and your colleagues.
Expression in GH are marked with an asterix
3. Last element
Did you know that the most used components in grasshopper is a panel, slider and list item?
That’s why it is essential to know how to use these components correctly.
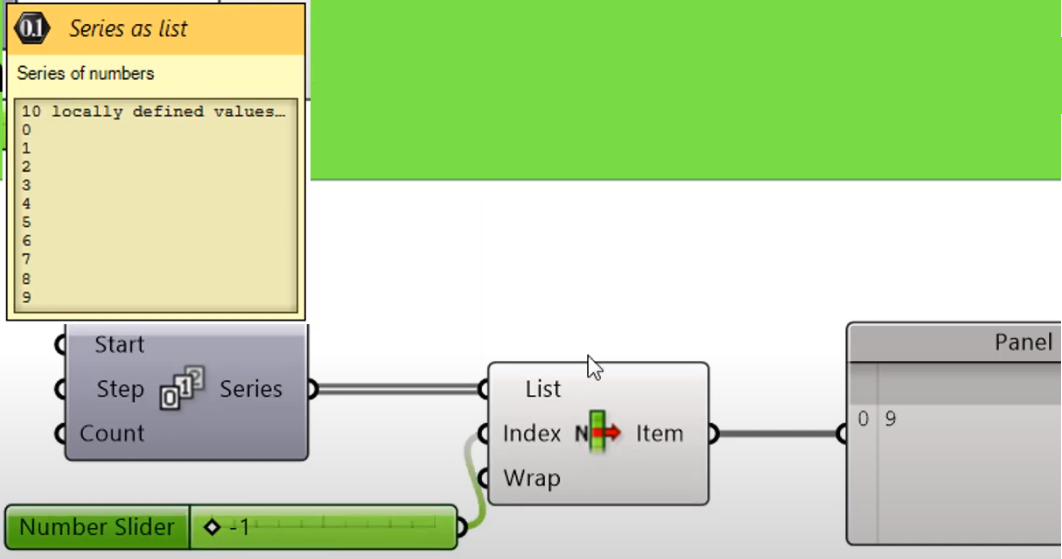
Let’s check out the ¨list item¨ component: Generally, as an index, we insert natural numbers starting from zero- the first element.
NOTE – 0 index ALWAYS corresponds with the first item.
However, you can input the minus values as an index as well. If the index input equals -1, you will get the last element in the connected list.
To remember: index equal to -1 -> The last element
Following this rule: if index input equals -2 we will get one before the last element.
-1 index will choose the last element
4. +/-
We will stay with the list item component. When you zoom closely to this component, the two pluses will appear—one at the top and one at the bottom of the component. If you click the lower one, you will get a +1 element. What does it mean? If your index input equals 0, then your output will be the second element.
NOTE: 1 index ALWAYS corresponds with the second item in the list.
However, if you click on the top one, you will get a -1 value. In that way, you can choose the last element on your list.
The same attribute has other components. For example, merge, entwine, and all mathematical components as addition, multiplication etc.
After zooming into component + and - will appear
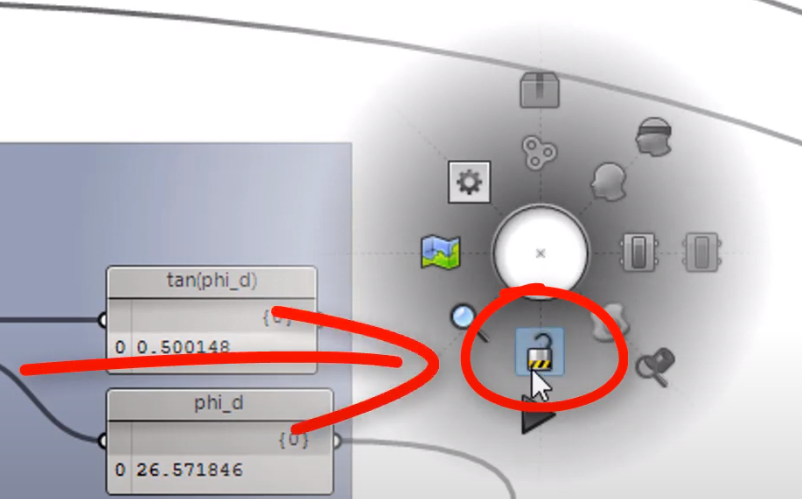
5. Disable solver
Imagine a vast and complicated script. Do you have it? Now, you have to change many parameters. Not that complicated job, right? However, computations time is extended. Changing parameters, one by one, takes ages—every change in the slider starts a new calculation for a new solution.
How to avoid situations like this?
Stop grasshopper engine!
Click on the canvas in the middle mouse button and choose a padlock symbol. Thanks to that, your grasshopper script will be stopped. Now make changes for all parameters without the waiting time. Easy right?
Disable solver
DOWNLOAD
5 STEPS TO LEARN GRASSHOPPER
5 Steps to learn Grasshopper is a guide full of books, exercises, tutorials and videos. Everyone will find something for themselves – regardless of the level of initiation.
When your script gets bigger and bigger, you will have more connections. There will be several inputs going to several outputs and vis-a-versa. With several wires in one place, you can quickly lose track. Wires can go on each other, and you will not know which one goes to which component.
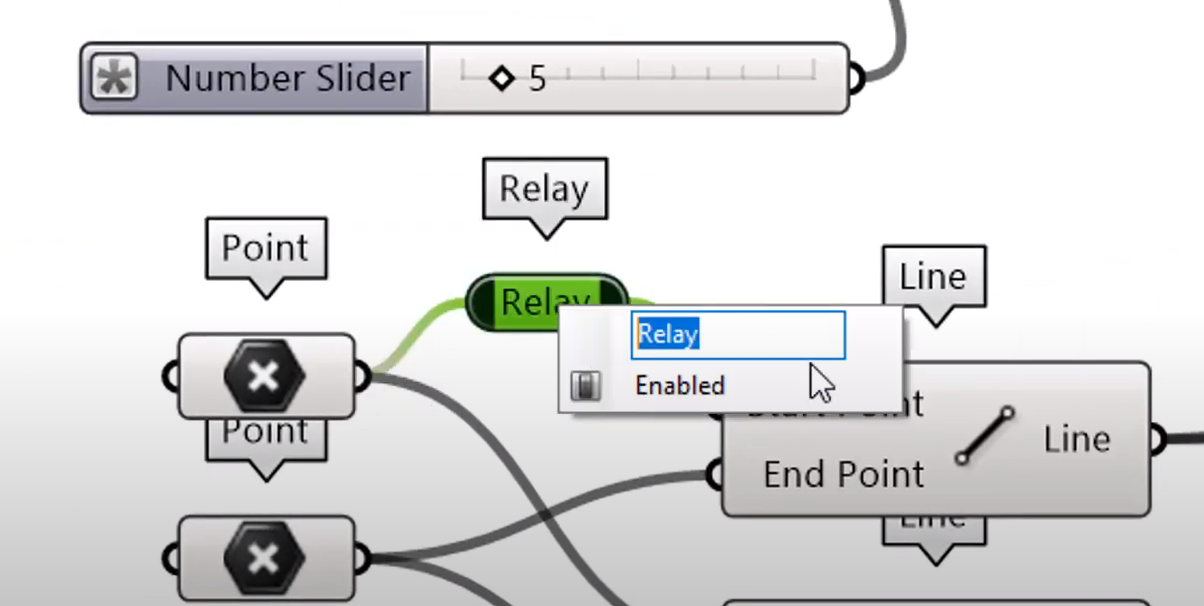
With help comes the relay component. In order to create a relay on your wire, you need to double click on your connection. Afterwards, you can connect the output of the relay and join it to several components. Grab all your wires into one relay and afterwards connect to other components. You can also create the relay component manually. Go to params -> util and grab it from the ribbon.
Moreover, you can also give the names of your relays. In this way, you can have an order in your script and provide the unique names of the wires. Just right click on your component, and in the empty box, write the relay name.
Create relay in Grasshopper
7. Zoom
This function saved me not just once.
For sure, many times, you have clicked on your component in Grasshopper, and it was not visible in Rhino.
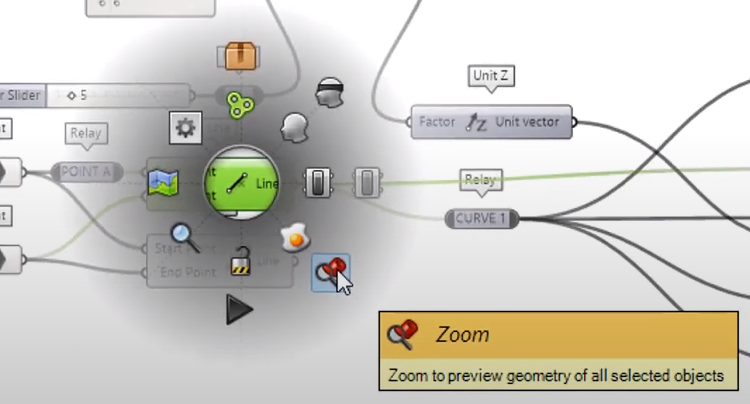
Most likely, your element was far away from the view zoom. Scrolling on your perspective window in Rhino didn’t help you to find it. When you would like to see your element in Rhino, just select your component, and it will change to green. Afterwards, click the middle mouse button and click the magnifying glass to zoom to the Rhino.
So again, when you lose track in Rhino and you click on your element in Grasshopper, and it’s not visible, just click the middle button of your mouse and magnifying glass to zoom into it.
Zoom to preview geometry of all selected objects.
8. Vector direction
The order of creating things in Grasshopper really matters. Let’s look closer at the example.
We have two points starting point and the ending point. We create a line with these points and another line in reverse order to visualize the direction of the curve. Evaluate curve component will show the tangent vector at the end of these curves. In this case, vectors will appear in opposite directions.
So remember, order matters in Grasshopper.
9. Param viewer
For all beginners, it’s hard to get how data’s tree structure works. And I understand that because I had problems too for all users that start the journey with Grasshopper.
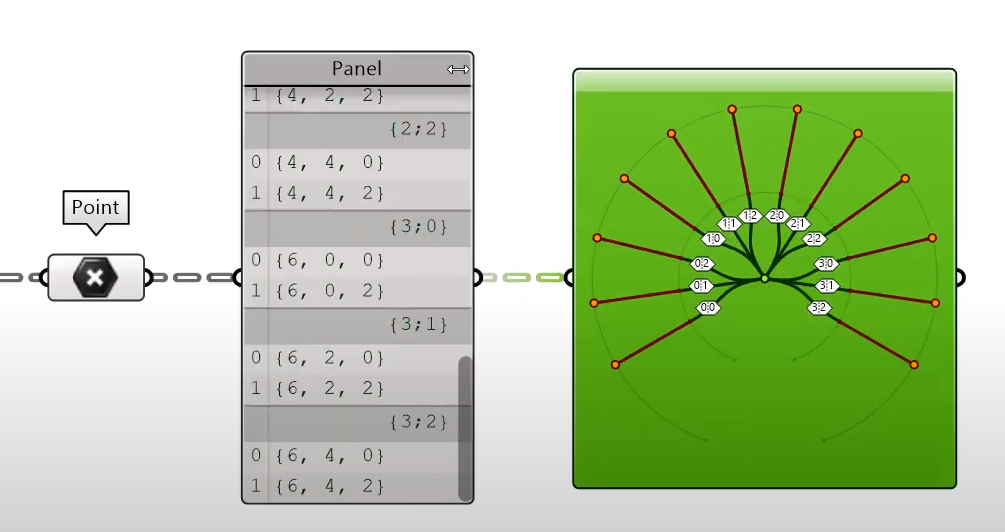
I really recommend using the param viewer component. You can visualize how data tree structure works.
You can find it in params and util and connect to this component your data tree. You can see how many branches and how many elements are in your data tree structure. When you double click, a visualization of the data tree will appear.
Param viewer component
10. Point list
When you have a group of points, it can be super helpful or have an order in that point group. Use the point list component to visualize the numbers of points. It will help you connect the correct points.
Note that you can also visualize the size of the points in Rhino or even bake it to have them as objects.
You have successfully joined our subscriber list. Check your inbox. Confirm email in order to get access BIM Case Studies from the biggest Norwegian projects.
Reasons to Subscribe to the BIM Corner List:
BIM CASE STUDIES
After reading this guide, you will learn:
How BIM is used on the biggest projects in Norway
What were the challenges for the design team and how were they solved
What were the challenges on the construction site and what was our approach to them
News From BIM World
Every Thursday you will get a package of news and useful links from the BIM world.
No Hype
Just real content that’s meant to make a difference in your BIM knowledge.
This site uses cookies to offer social functions, analyze traffic and conduct remarketing activities. Details can be found in the privacy policy (info button).