Here’s a quick reminder. In the previous article of the series –Secrets of the IFC format -, I introduced classes in the IFC schema. You could find out that the class is an attribute template. Thus, no matter which program the IFC file was exported from, its attributes will always be saved in the same format. You have also learned what relationships are and how attributes are inherited within the IFC schema family tree.
The objects’ attributes (Name, Type, Height, etc.) are defined by a “rigid” schema in the form of a template (previous post – graphic). Of course, it has its pros and cons. It is very convenient when exporting objects and their attributes to an IFC file. Great. But what if there is no attribute in the template of a given class that we would like to assign to a given object? The number and type of information we assign to the objects may vary depending on a project’s stage, the country, industry, etc. Since it is still hard to standardize all this information, the number of attributes assigned to classes in the IFC schema is reduced to the necessary minimum. And that does not mean we can do nothing about it. The IFC schema meets such requirements by Properties, which we can almost freely assign to objects. In this post, I am going to focus on this particular topic.
1 Attributes vs. Properties
Attributes (the number and the value type are part of the IFC object template – a graphic from the previous post). These attributes form an integral part of the schema. You cannot delete or modify them. Removing an attribute from the schema will simply ruin its structure, and it will be impossible to open the IFC file.
Properties, as opposed to attributes, give us the freedom to create. We decide how many and what type of properties we wish to create and assign to an object. They are not included in the schema, hence if they are modified or deleted, the structure of the schema is not damaged.
Many programs have built-in configurators that allow adding properties to objects. As a result, we can easily create our own property sets from information available in a given program or create completely new properties, so-called UDA (user defined attributes).
2 What are properties??
Let’s try to understand how IFC Properties are created and how to connect them to an object (class) so that after exporting IFC, they are visible in any IFC file viewer.
2.1 Creating Properties
Then let’s create a new property for the wall class (IfcWall) from scratch. May it be, for instance, a 20 mm thick plaster.
To make additional properties understandable for the software reading an IFC file, it is necessary to use… standard schematic templates. A little confusing? Or perhaps quite sensible.
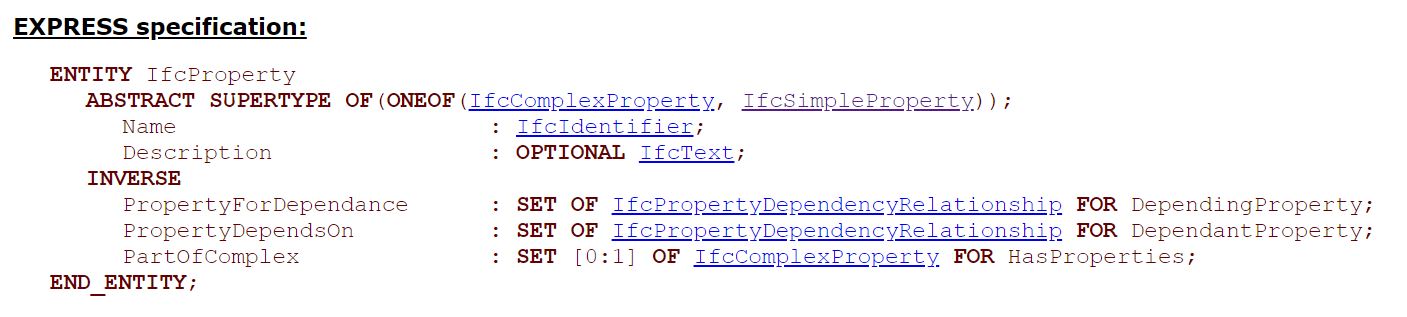
As I have already mentioned, the IFC schema is like a family tree with many branches, mutual dependencies. It also has an individual IfcProperty template. IfcProperty is special as it is a separate family tree in the IFC ecosystem. In the previous article, you could read, that the superior template for all of them is the ancestor of the entire IFC genealogical tree – IfcRoot. Well, the Ifc Property template is independent of the Ifc Root. Have a look:
This template contains two attributes Name (i.e. name for our newly assigned property) and a description.
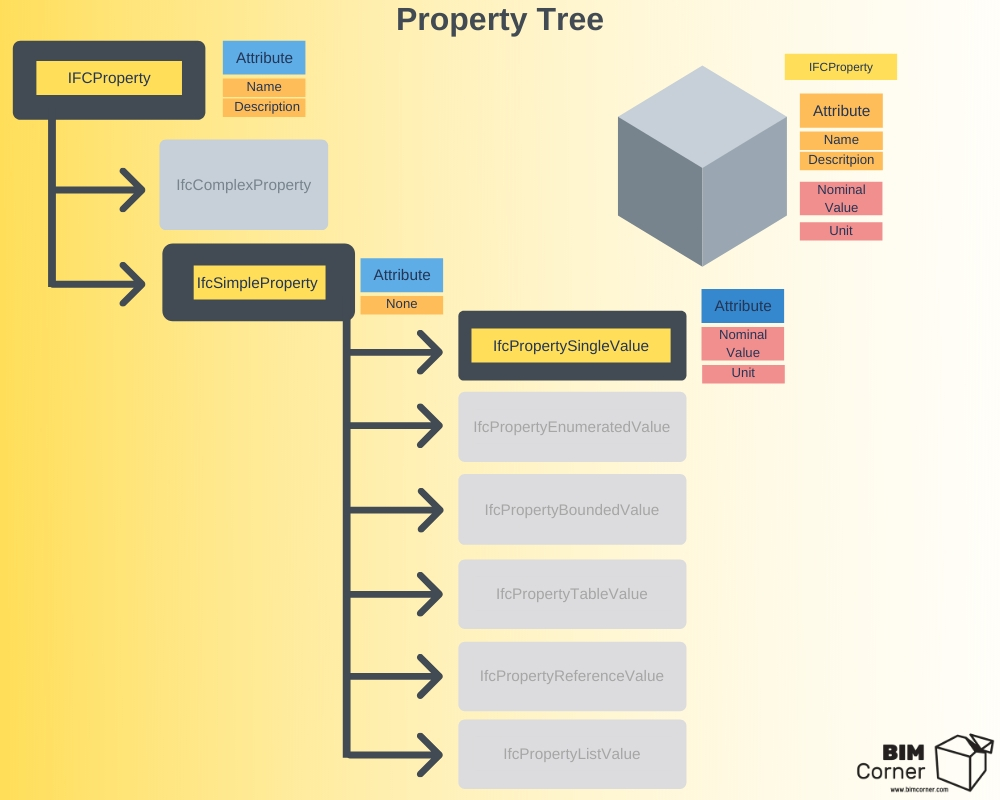
Ifc Property has two descendants (Ifc property graphic is divided into IfcSimpleProperty and IfcComplexProperty).
IfcProperty tree
Our example is extremely simple, so let’s focus on the Ifc Simple property template. It has no new attributes, yet has 6 branches (descendants).
Single: simple value. Text, number, true/false;
Enumerated: limits the selection of one value from a predefined list of possible values;
Bounded: allows to define a minimum and maximum value in one property, for example, tolerance;
Table: the entire table of values, for example, a size table for a valve;
Reference: link to another object;
List: many values on the list;
In our example, we are going to use IfcPropertySingleValue.
The template has two attributes:
Nominal value
Unit
This is the property template that we will add to our wall object.
IfcPropertySingleValue attribute table
2.2 Adding properties to an object
We have a completed property template with attributes… and what’s next. You should combine this template with the object. We have to put the template into the main IFC schema family tree.
Here, a template can help us – IfcPropertyset, property set template.
As you can see IfcPropertyset is already related to the most important IfcRoot template. Thus it has the attributes inherited from Ifcroot – Name and GUID number. However, the most important in this case is the attribute – “HasProperties”. This is the place where our independently created properties connect to the main schema tree.
IfcPropertySet - Attribute table
2.3 Referring a property set to an object
The last step (I promise) involves assigning a set of properties to our wall.
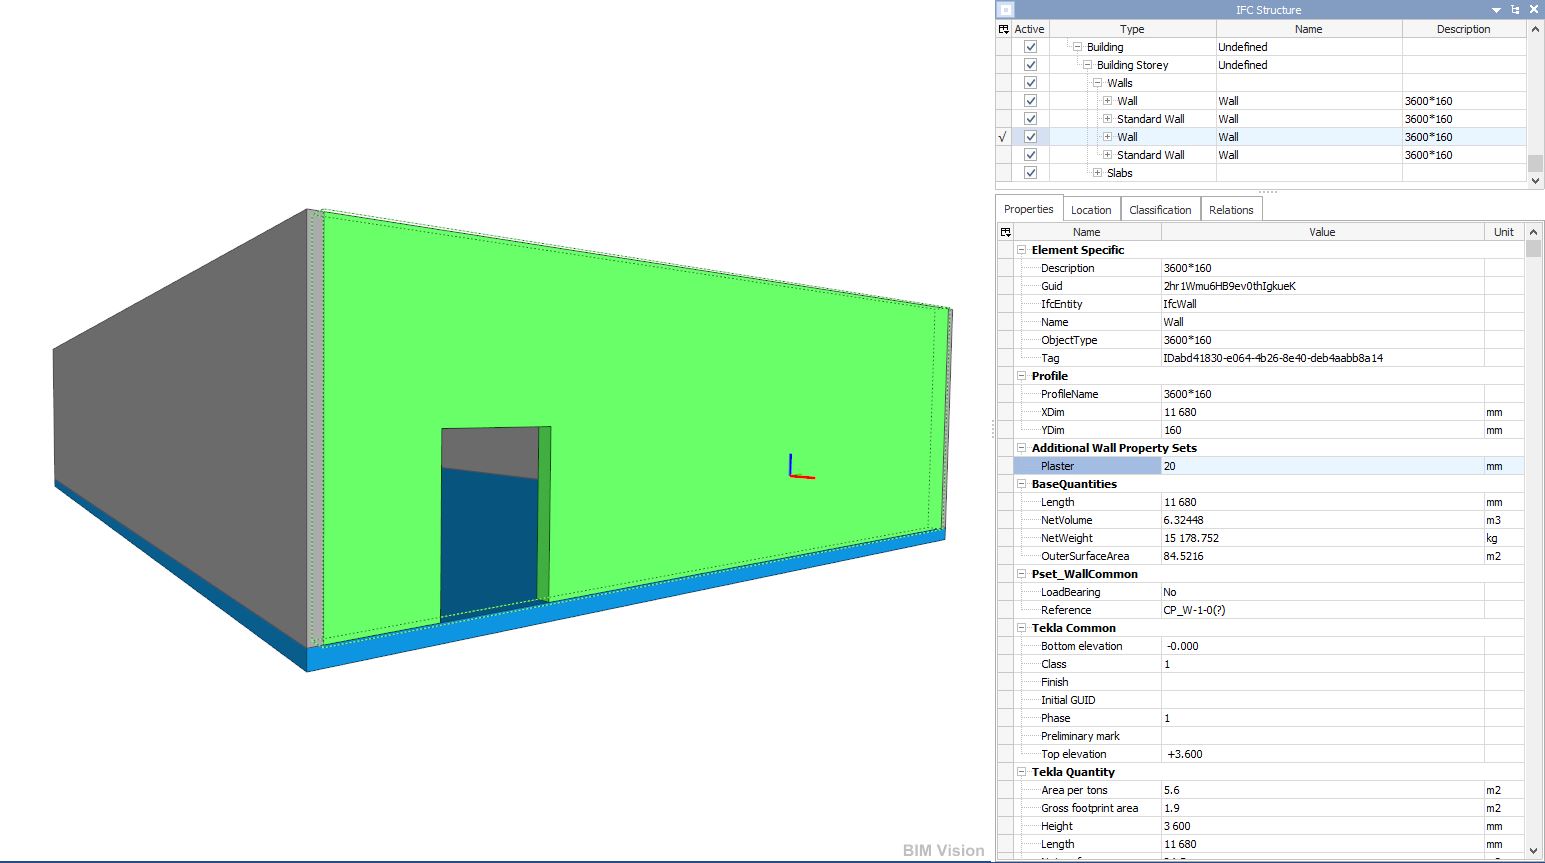
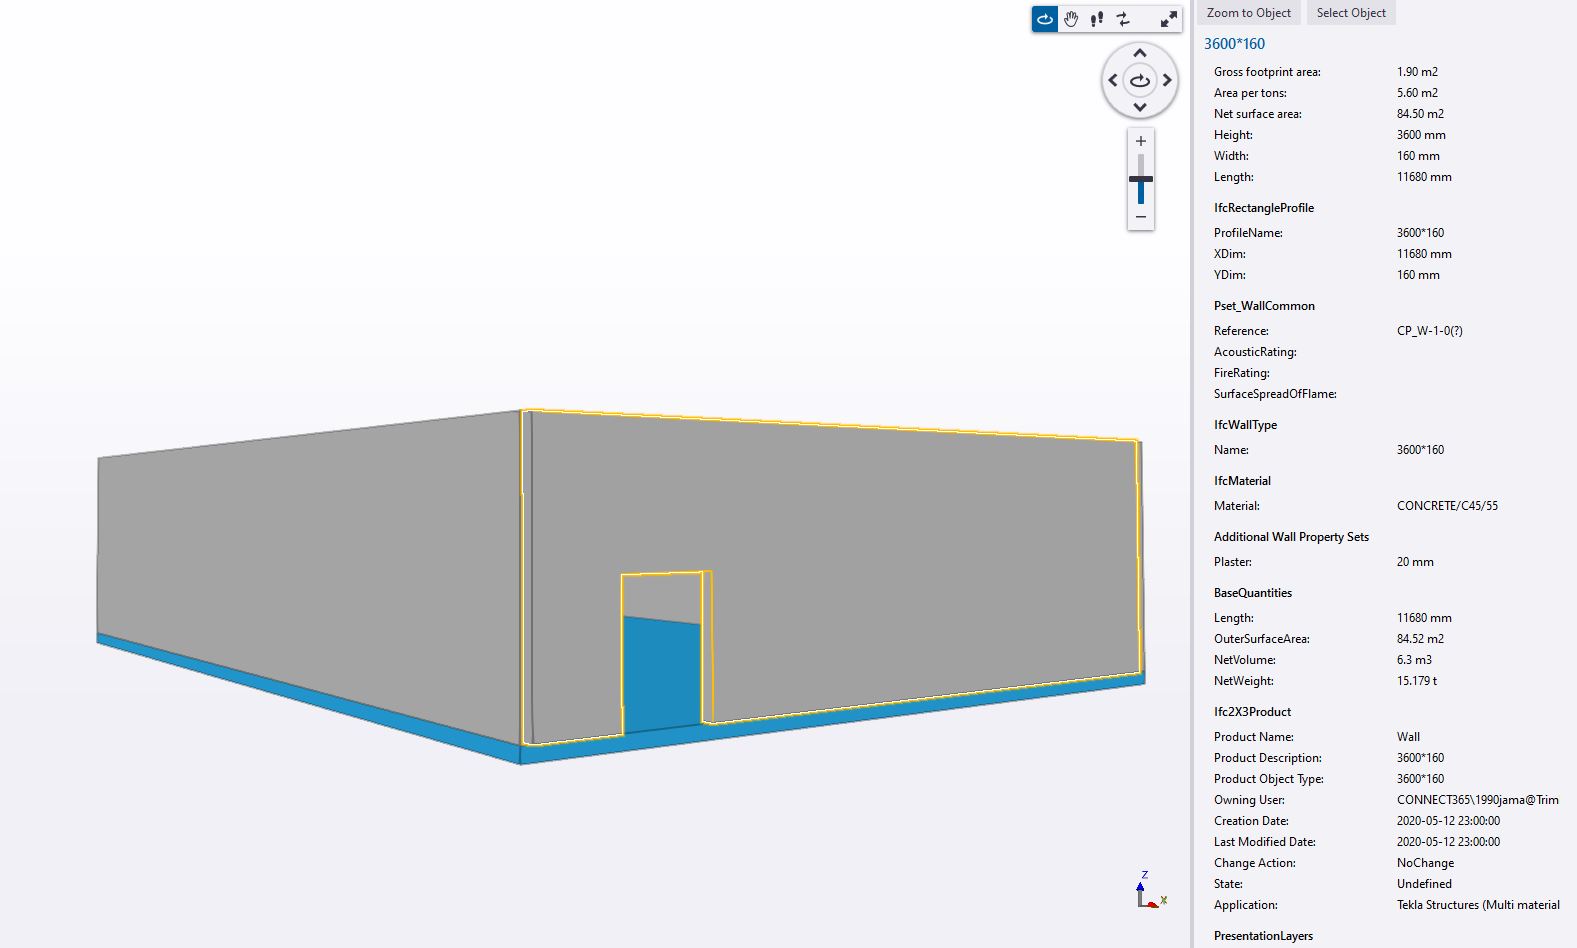
IfcWall additional property in Trimble Connect viewer
As you can see, regardless of what IFC browser we view our wall in, an additional property of 20 mm thick plaster is shown along with other attributes.
Summary
If you are still wondering why you should add additional information to objects in the IFC model, read Marcin Pszczółka’s article “What is the best file format in BIM?” in which he shows that by assigning additional properties to objects he doesn’t have to wait for the IFC for infrastructure.
Model-based designs, which are increasingly popular, are based on the ability to assign all this information to an object that we would traditionally place in the drawing.
I’m curious if you also use your own property sets when exporting an IFC file or rely only on the basic information generated by a native program.
Did you like that post ? Share it with others !
We spend a lot of time and effort creating all of our articles and guides. It would be great if you could take a moment to share this post !
You have successfully joined our subscriber list. Check your inbox. Confirm email in order to get access BIM Case Studies from the biggest Norwegian projects.
Reasons to Subscribe to the BIM Corner List:
BIM CASE STUDIES
After reading this guide, you will learn:
How BIM is used on the biggest projects in Norway
What were the challenges for the design team and how were they solved
What were the challenges on the construction site and what was our approach to them
News From BIM World
Every Thursday you will get a package of news and useful links from the BIM world.
No Hype
Just real content that’s meant to make a difference in your BIM knowledge.
This site uses cookies to offer social functions, analyze traffic and conduct remarketing activities. Details can be found in the privacy policy (info button).