The Ultimate Guide to Automating Tekla Reinforcement with Grasshopper
Grasshopper has completely transformed how I work with reinforcement in Tekla Structures. As you’re probably aware, manually shaping and setting up a range of reinforcing bars is incredibly time-consuming and can be quite frustrating. In this article, you’ll learn how to model Tekla Reinforcement efficiently and save hundreds of hours that would have been spent on manual processes. You’ll find hands-on assignments and examples throughout the article, all explained in a way that’s easy to understand.
Table of Contents
1. Why use Grasshopper to create Tekla Reinforcement
The process of designing reinforcement is often seen as one of the most tedious tasks engineers have to deal with at work. It’s incredibly repetitive and eats up a lot of time, which makes it a prime candidate for automation.
Thankfully, there’s a growing trend of designers turning to parametric tools to streamline this process, making it quicker and more enjoyable. After all, who wouldn’t want to bypass the laborious steps of 3D modeling of reinforcement and the monotonous task of creating drawings?
Grasshopper offers a solution to automate this entire process. Creating bars in Grasshopper feels very similar to the manual process in Tekla, but without the painstaking effort.
Here’s how it goes:
Pick the rebar group creation in the ribbon.
Select which Tekla part needs reinforcement (Part input).
Choose the Shape of the rebar (Shape input).
Define the range of the rebar (Range input).
You can see the whole workshop recording HERE. Below you can see recap of the workshop in the article form.
2. Tekla Reinforcement Components in Grasshopper
Lets take a look on available components in Tekla Grasshopper Live link for reinforcement.
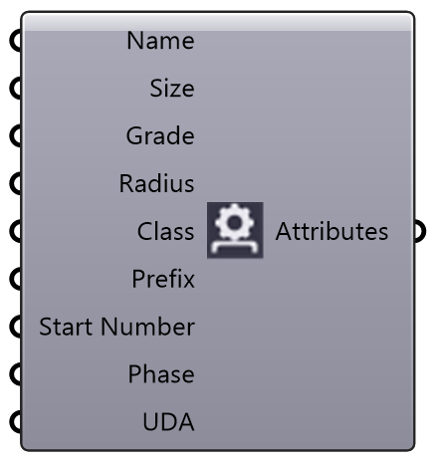
2.1. Rebar Attributes
Set the Name, Size, Grade, Radius, Class, Numbering attributes, Phase and User-defined attributes of the bar or bar group.
Size and Grade are text inputs. You can also set them (and the Radius) using the Rebar Catalog component connected to either input. Text inputs will override the Rebar Catalog input if both are used.
Attributes component in Grasshopper
User-defined attributes are input as a text string. Syntax example.
Note!
If you’re using a Panel component, multiline data on will keep the attributes as a single string (same part) whereas off means the output will be a list (separate parts).
Attributes Syntax
2.2. Hook / Hooks
Set the Hook attributes of the bar or bar group. The same hook attributes will be used for both ends.
Note!
The direction of the hook is defined by rebar plane.
Hooks component in Grasshopper (same ends)
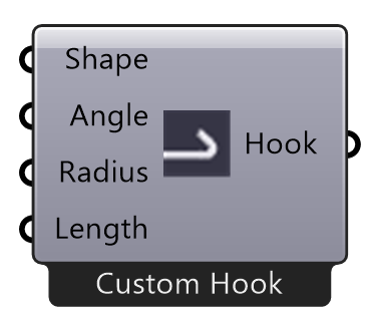
Set the Hook attributes of the bar or bar group. The ends can have different hooks.
Hook component in Grasshopper
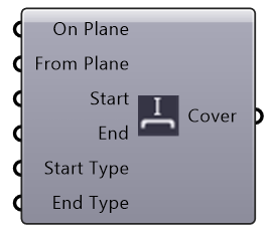
2.3. Cover
Set the Cover thicknesses and offsets of the bar or bar group.
Note!
Pay attention to rebar plane!
Cover component in Grasshopper
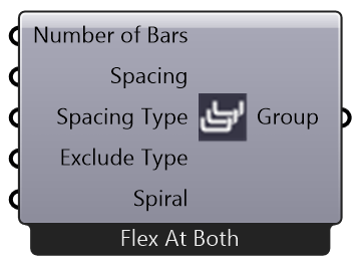
2.4. Group
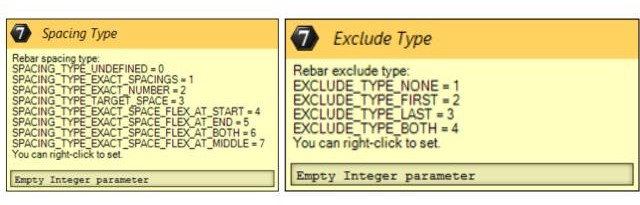
Set the Spacing and Exclude attributes of the bar group.
The Number of Bars input will take effect when the spacing type is Exact Number, otherwise the Spacing values are used to distribute the bars.
The Spiral input can be used to enable creation of spiral bars.
Group component in Grasshopper
Group attributes in Grasshopper
3. Rebar Group in Grasshopper
Different combinations of range and shape inputs allow us to create various rebar groups. In this way, you can create all sorts of Rebar groups with just one component. Lets take a closer look to these combinations.
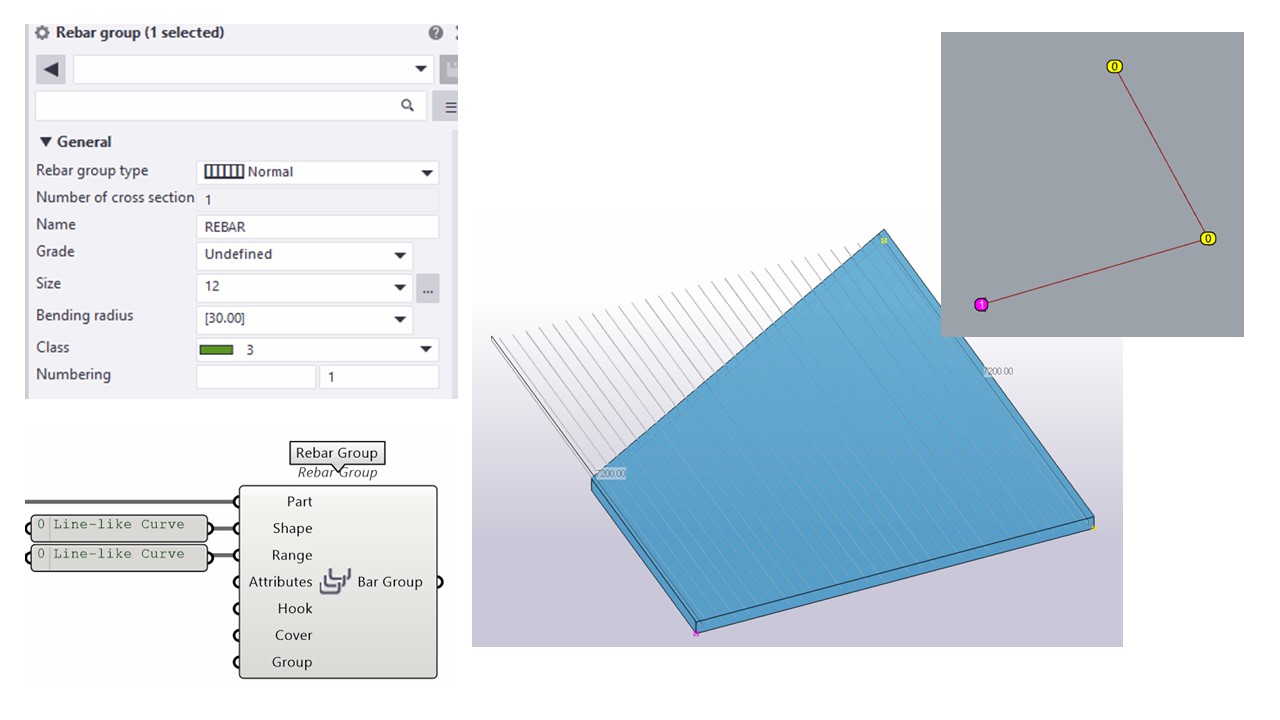
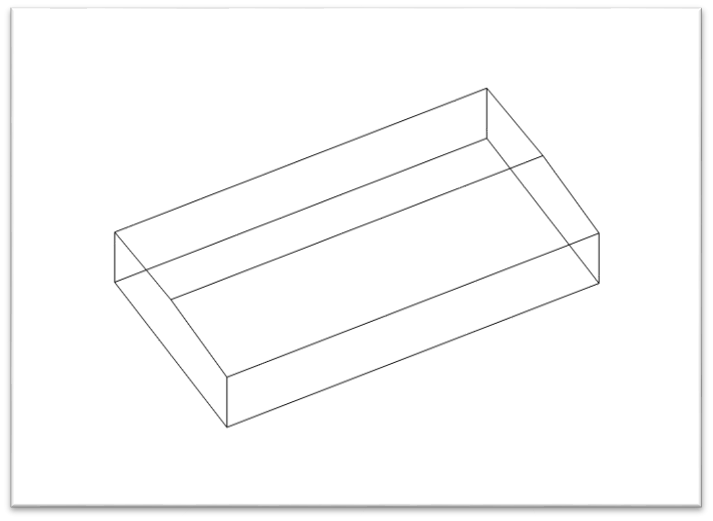
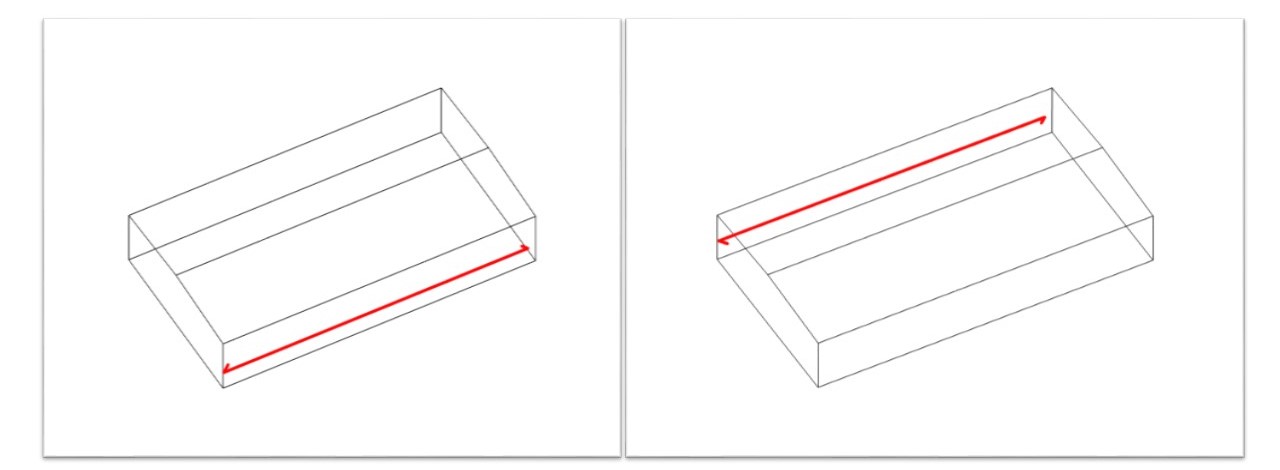
3.1. Normal
Range: The range of the bar group.
Normally the input is a line.
Normal rebar group in Tekla with Grasshopper
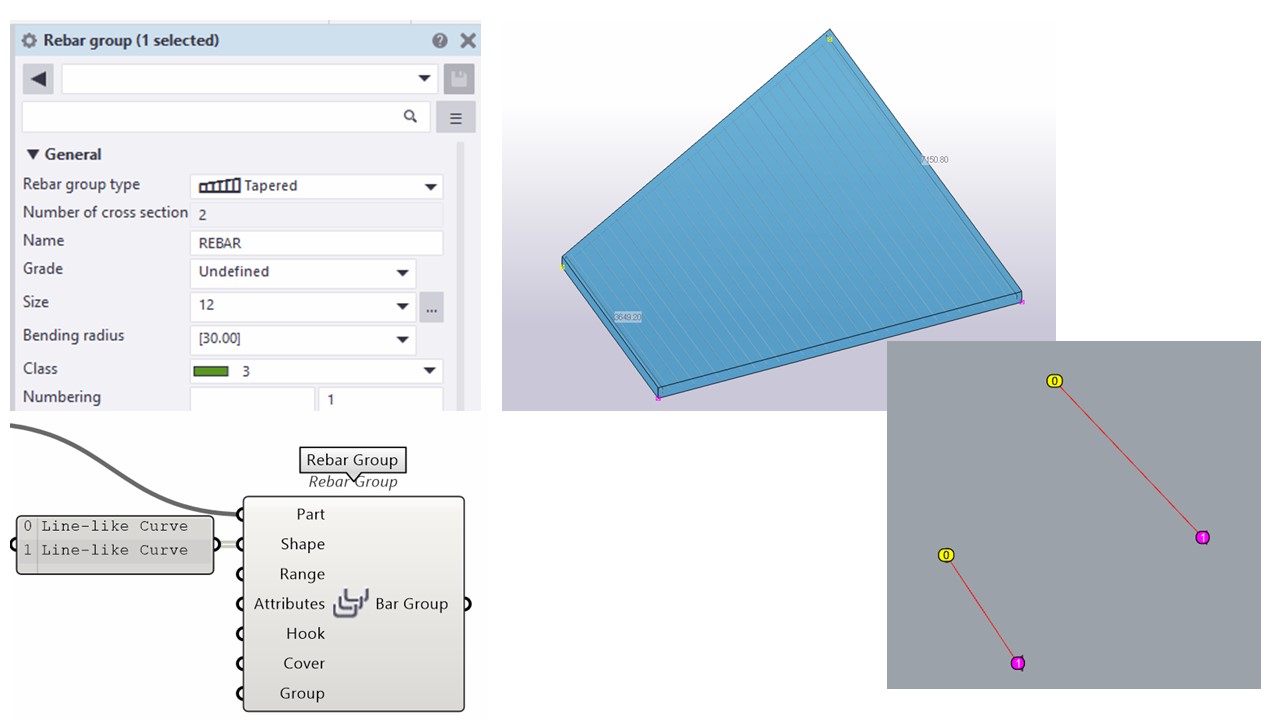
3.2. Tapered
To create a tapered bar group, remove the grafting from the shape input and provide multiple shapes as a (non-grafted) list.
If the shape input is a list of shapes (forming a tapered group), you don’t need to have a range input.
Tapered rebar group in Tekla with Grasshopper
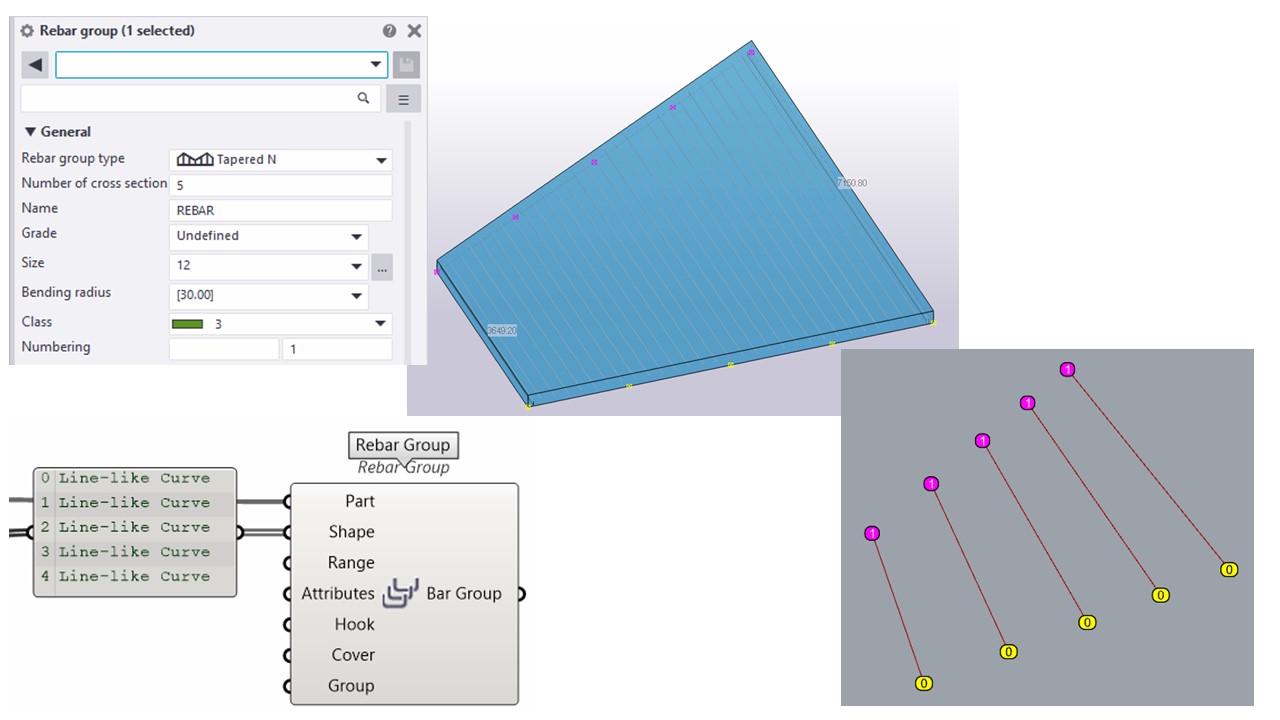
3.3. Tapered N
To create a tapered N bar group, remove the grafting from the shape input and provide mor than two shapes as a (non-grafted) list.
You don’t need to have a range input.
Tapered N rebar group in Tekla with Grasshopper
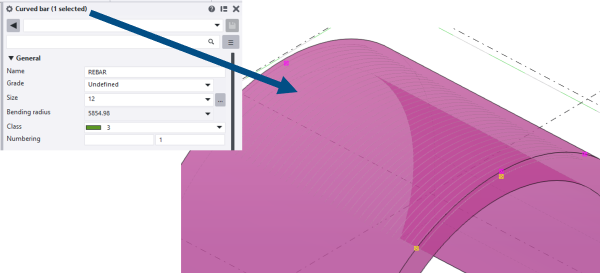
3.4. Curved Tekla Reinforcement with Grasshopper
To create a curved bar group, the shape input should be a arc – Double check if it is a Grasshopper arc (to create several curved groups, provide a grafted list of arcs).
It’s possible to change the maximum number of points of shape polygons for rebars.
– ‘Rebar’ components have a settings called “Max control points” setting that can be accessed by right-clicking the component, similar to ‘Beam’ components.
– When shape input curves are converted to Tekla polylines, the number of points is kept below this value if possible.
Curved reinforcement in Tekla with Grasshopper
Useful tips for creating curved reinforcement by using Grasshopper:
✅ To achieve arc reinforcement, pay attention to the shape input. Sometimes, the curve must be changed into the fitted arc. Remember that it is possible to set a maximum number of control points in the rebar group!
✅ By defending a number of points, we can control the number of points in the polyline and maintain the desired rebar shape. Yes, you can connect just points as a shape input for the Grasshopper Rebar group component.
✅ The additional helpful component is ‘’Rebuild a curve’’. In the Taperade group, it is preferable to use curves with the same number of points defending the NURB curve.
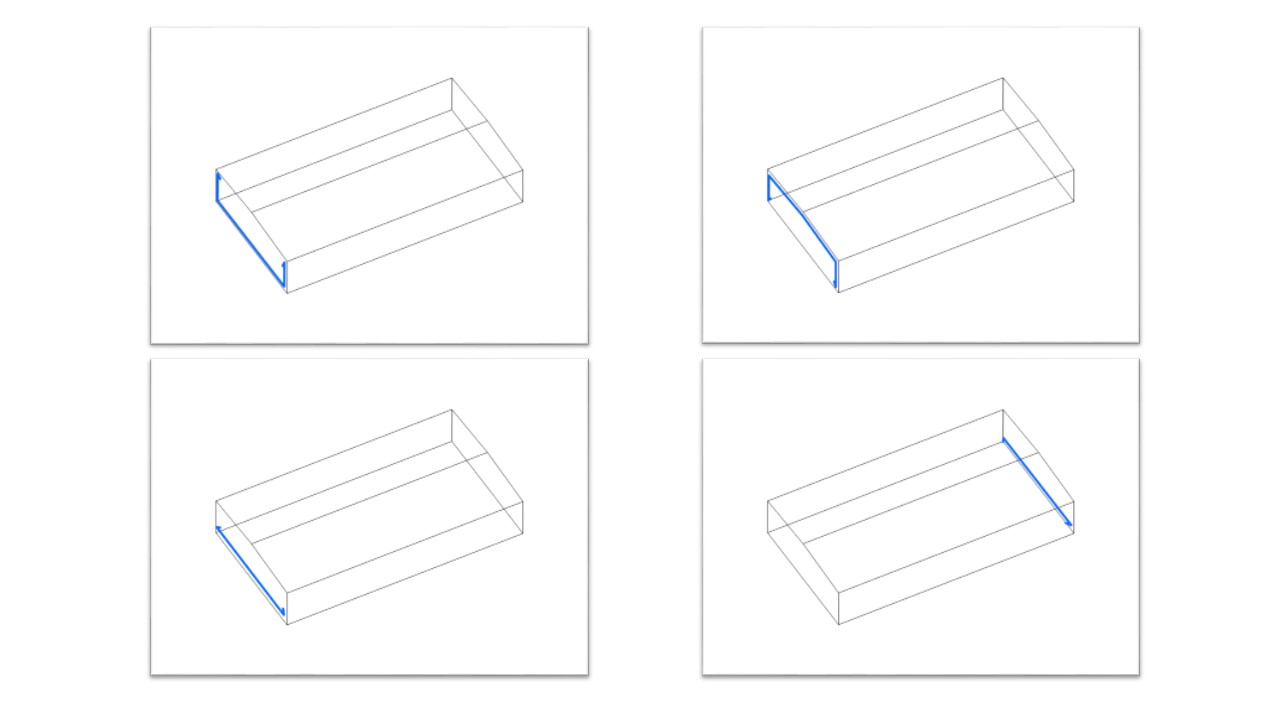
4. Hook direction
I’ve always struggled with changing the hook direction. Adjusting this with Grasshopper is quite straightforward.
Essentially, hooks are created in the same plane as the rebar was defined. You just need to take three points of the rebar and place a plane that “crosses” these points. However, problems arise when we define rebar with just two points.
The solution for that is to create a “fake” middle point on the rebar and move this point just 2mm in one of the axes (depending on which plane is desired). Even though rebars are defined by three points that are not in a straight line—because one of the points is moved—Tekla will still recognise it as a straight bar.
Change Hooks direction with Grasshopper
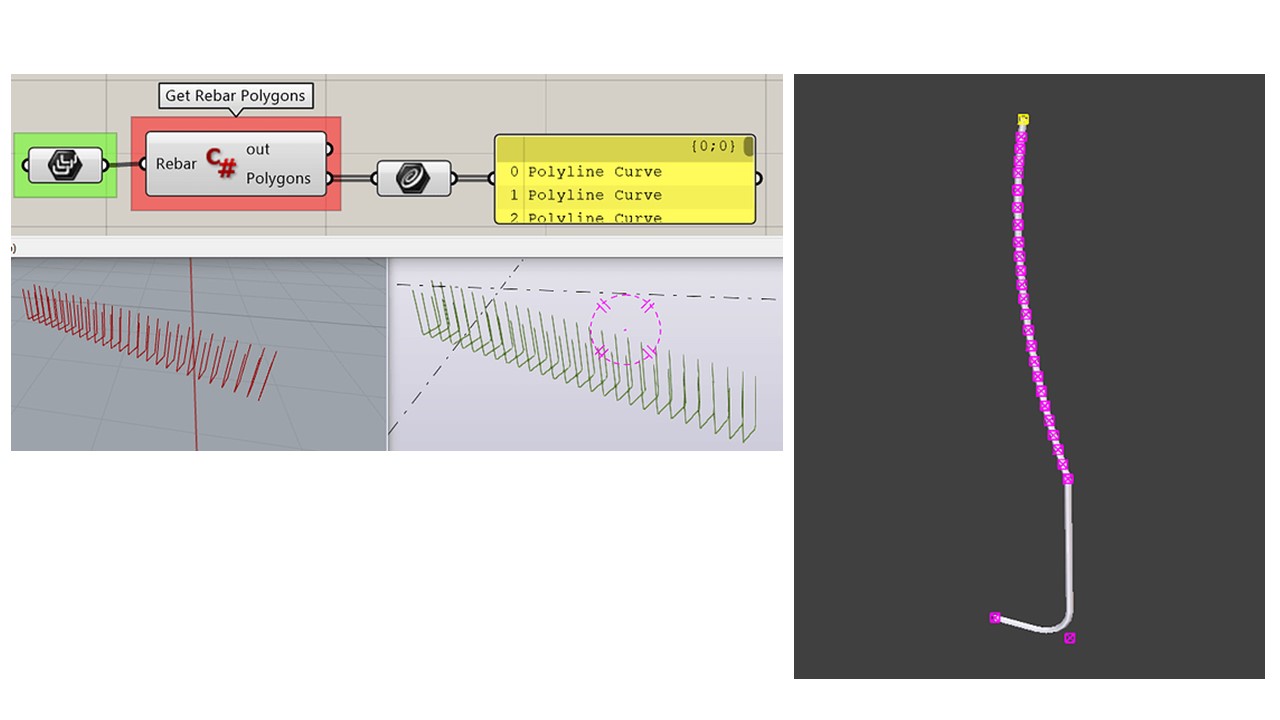
5. Using Grasshopper for Tekla Reinforcement Modifications
Grasshopper isn’t limited to just creating rebars; it also allows for the easy modification of the shape of existing rebars that were initially set manually in Tekla Structures. There’s no need to start from scratch to change the rebar’s definition. You can add an extra leg, shorten it, find a middle point, change the cover to a non-standard one, and more!
Get Rebar Polygons in Grasshopper
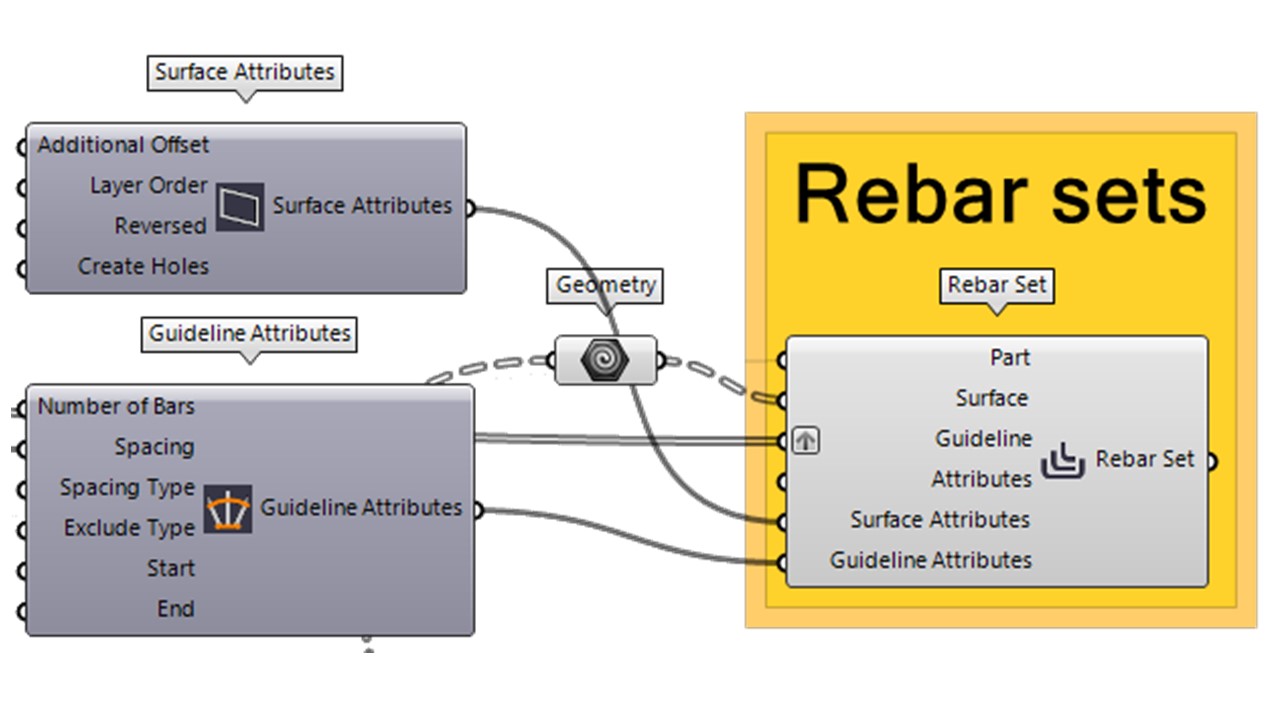
6. Rebar sets in Grasshopper Tekla Live link
In Grasshopper-Tekla Structures Link v1.16 will be avaiable Rebar set components. They require Tekla Structures 2022 SP 12 or newer.
New components:
“Rebar Set” to insert a rebar set.
“Surface Attributes” to set the attributes of the surfaces or leg faces of the rebar set.
“Guideline Attributes” are used to set the attributes of the rebar and set guidelines.
The following components still have to be added: Modifier components, e.g., splices and hooks. Looking forward to testing it!
Tekla Rebar Sets in Grasshopper
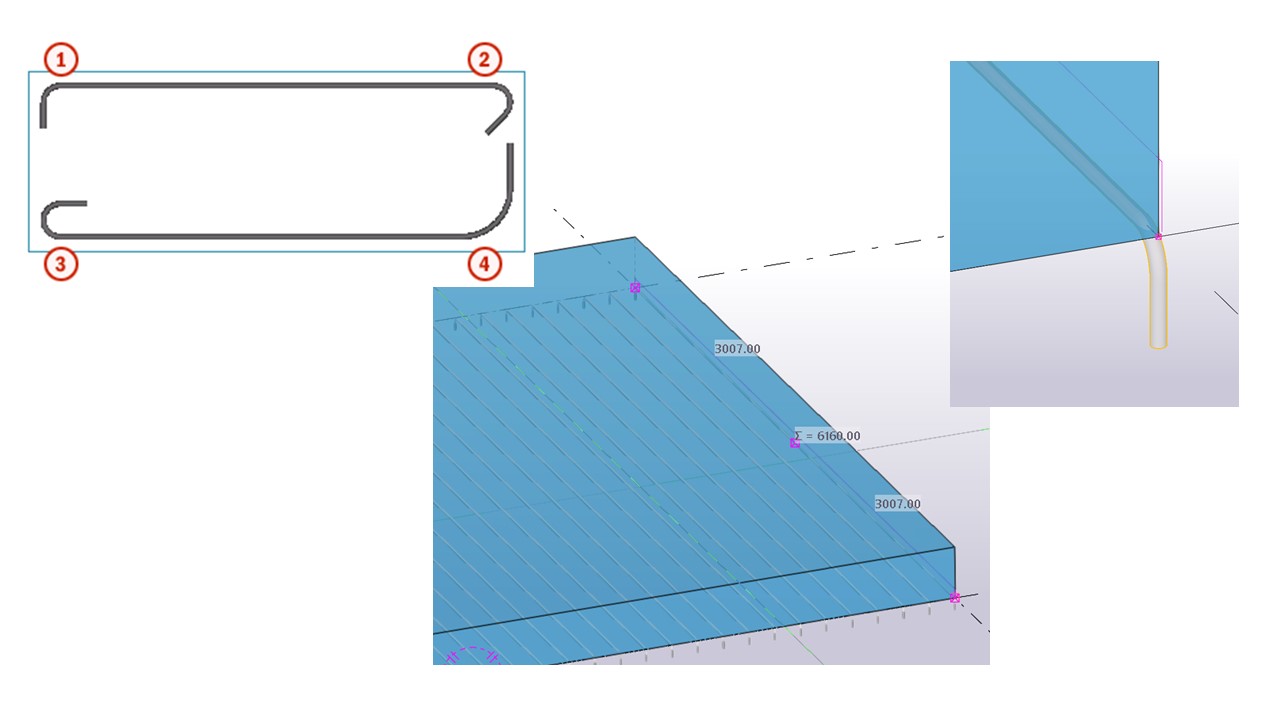
7. Case study - Normal Reinforcement Foundation
Task Description:
Reinforce the foundation placed in gridline 6 using normal rebar group type. Apply rebar shapes according to the next page.
Input:
Model object from Tekla Structures.
Case study Fundament to reinforce
Longitudal reinforcement
Cross reinforcement
You can download the necessary case study files below:
Using Grasshopper to make standard designs easier is a big help, especially for jobs we do a lot. But here’s something important to remember:
Grasshopper is really cool and can do a lot, BUT…
…I once tried to use Grasshopper for everything. It often ended up taking five times longer than just doing it by hand. The worst part was that my script was so detailed and specific to one project that I couldn’t use it again for anything else.
So, before you jump into writing a reinforcement script, take a moment to think if it’s really worth your time and effort.
You have successfully joined our subscriber list. Check your inbox. Confirm email in order to get access BIM Case Studies from the biggest Norwegian projects.
Reasons to Subscribe to the BIM Corner List:
BIM CASE STUDIES
After reading this guide, you will learn:
How BIM is used on the biggest projects in Norway
What were the challenges for the design team and how were they solved
What were the challenges on the construction site and what was our approach to them
News From BIM World
Every Thursday you will get a package of news and useful links from the BIM world.
No Hype
Just real content that’s meant to make a difference in your BIM knowledge.
This site uses cookies to offer social functions, analyze traffic and conduct remarketing activities. Details can be found in the privacy policy (info button).