4 Ready-to-Use Grasshopper Scripts to Automate Tekla Structures
This practical blog post guides you through creating your first automation scripts in Tekla Structures using Grasshopper. Forget tedious tasks—these scripts are simple, effective, and ready-to-use right away. If you’re new to programming or want to easily automate Tekla Structures, this article is your perfect starting point.
Don’t worry if you’ve never used Grasshopper or Tekla before! We provide a simple, step-by-step installation video guiding you through downloading and setting up Rhino, Grasshopper, and Tekla Structures. Avoid common pitfalls and get your setup right from the start.
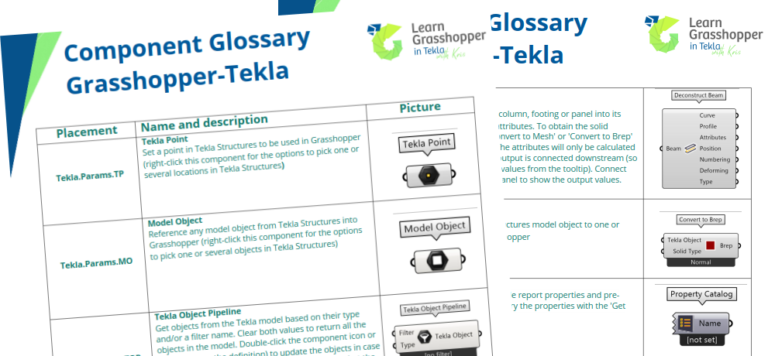
Grasshopper has many components, but don’t feel overwhelmed! Focus on learning a few important ones first. Here’s a helpful list of 12 essential Tekla Live Link components you’ll regularly use to automate your Tekla Structures models. Download PDF from masterclass materials.
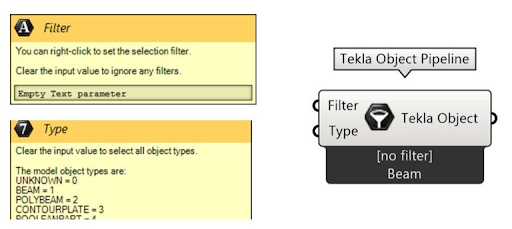
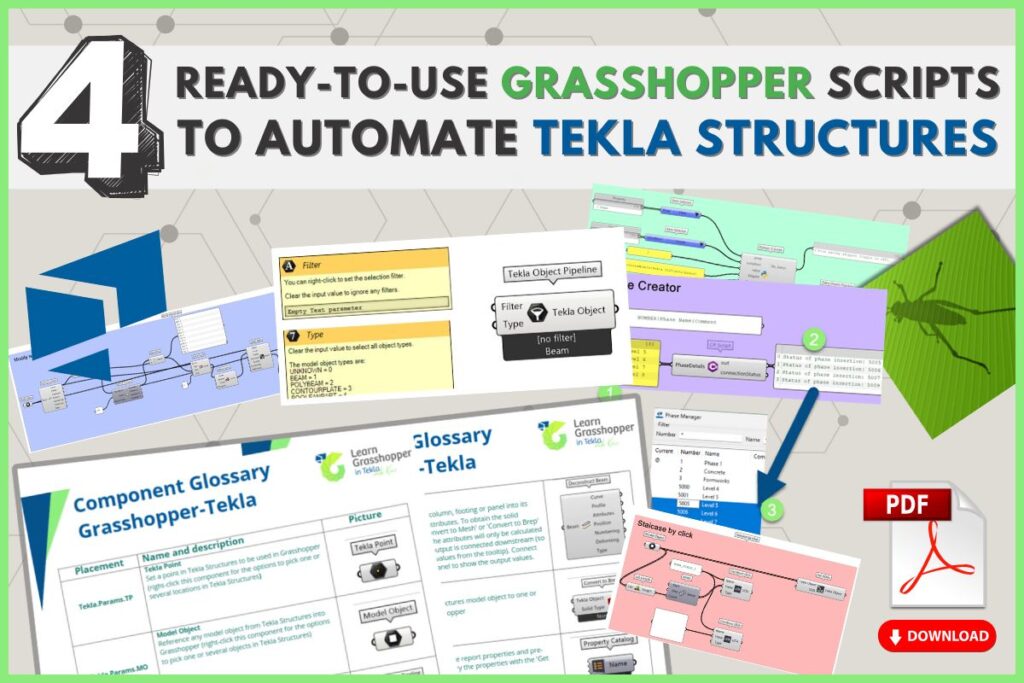
The Object Pipeline component is one of the most useful tools in Grasshopper for Tekla. It helps you quickly select specific elements based on predefined filters.
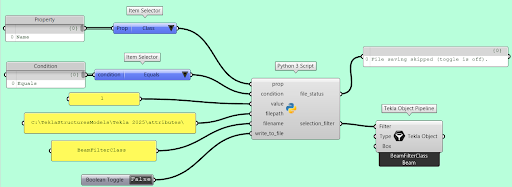
We’ve made creating these filters even easier! Just provide the filter details, your Tekla model path, and the filter name. Our simple Python script generates a ready-to-use selection filter file automatically.
Selection Filter Automation
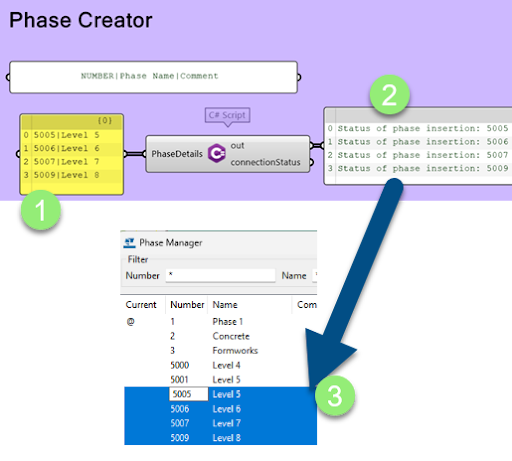
2.2. Phase Creator
Do you manage projects with multiple phases? Use our easy-to-follow C# script to automatically create project phases. Simply list your phases using this format:
NUMBER|Phase Name|Comment
Note: Adjust paths to match your Tekla Structures installation.
Phase Creator
Note! In Rhino 8 you can set up references to correct Tekla Structure path. Be sure to change the path to your Tekla Folder accordingly.
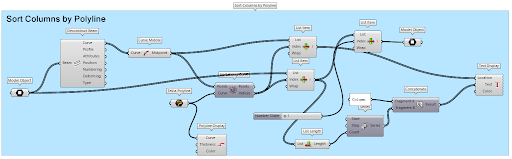
Tekla’s default numbering system can be frustrating. Gain full control by using Grasshopper scripts to automate object numbering. Simply select the Tekla elements and draw a polyline to define your numbering direction. It’s quick, efficient, and stress-free.
Sort Columns by Polyline
4. Easy Tekla Object Modifications
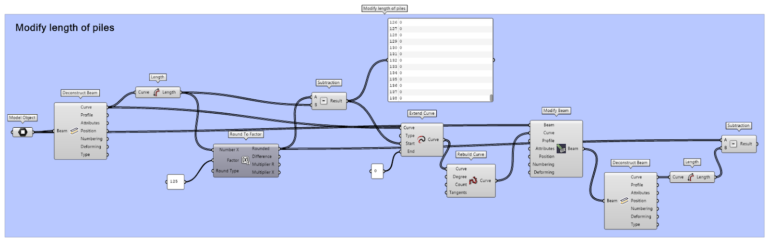
4.1. Modify Pile Lengths
Standardizing element lengths, like piles or rebars, simplifies ordering and reduces production issues. Our script quickly checks pile lengths, rounds them to specified tolerances, and adjusts lengths automatically. Save time and eliminate repetitive adjustments.
Modify Pile Lengths
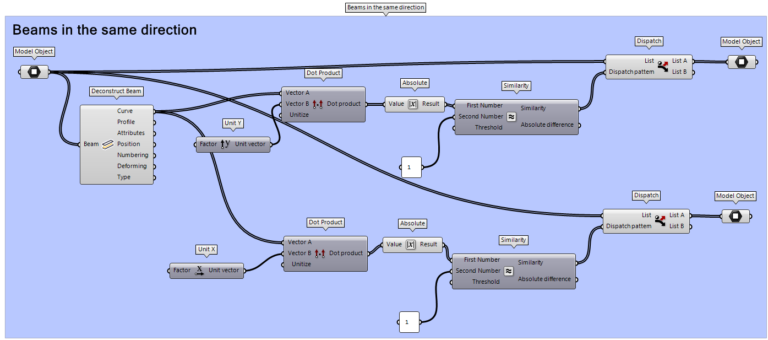
4.2. Align Beams by Direction
Want a straightforward way to select beams running in specific directions? Our script easily filters beams based on their direction—whether X or Y. Keep your model clean and manageable without manual sorting.
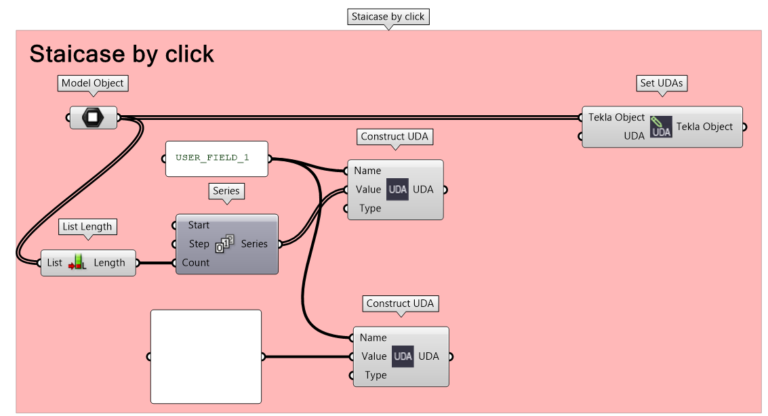
Setting UDAs manually is time-consuming. With Grasshopper, automate this tedious task effortlessly. Store values directly in Grasshopper or import from Excel or a simple text file. Check out our detailed lesson on automating UDAs:
You’ll learn not only how to create objects but also how to organize and label them automatically, making your Tekla models smarter and more efficient.
Automating Tekla Structures UDA
Summary
All Grasshopper scripts mentioned are available for download through our masterclass materials. Watch the full video, download the files, and effortlessly automate Tekla Structures tasks yourself.
Make your workflow smarter, quicker, and less tedious—start automating Tekla Structures today!
You have successfully joined our subscriber list. Check your inbox. Confirm email in order to get access BIM Case Studies from the biggest Norwegian projects.
Reasons to Subscribe to the BIM Corner List:
BIM CASE STUDIES
After reading this guide, you will learn:
How BIM is used on the biggest projects in Norway
What were the challenges for the design team and how were they solved
What were the challenges on the construction site and what was our approach to them
News From BIM World
Every Thursday you will get a package of news and useful links from the BIM world.
No Hype
Just real content that’s meant to make a difference in your BIM knowledge.
This site uses cookies to offer social functions, analyze traffic and conduct remarketing activities. Details can be found in the privacy policy (info button).