
Some time ago, I created a post about 10 Grasshopper basics that every user should know – here is a link. It’s fundamental to learn the basics of any program before starting more advanced scripting. Based on my experience as a Grasshopper trainer, the biggest issue is the lack of knowledge of Grasshopper fundamentals. That’s why I continue this series Grasshopper for beginners that every user should know. I hope that will help start with your parametric design journey.
MY LIST OF BASICS IN GRASSHOPPER
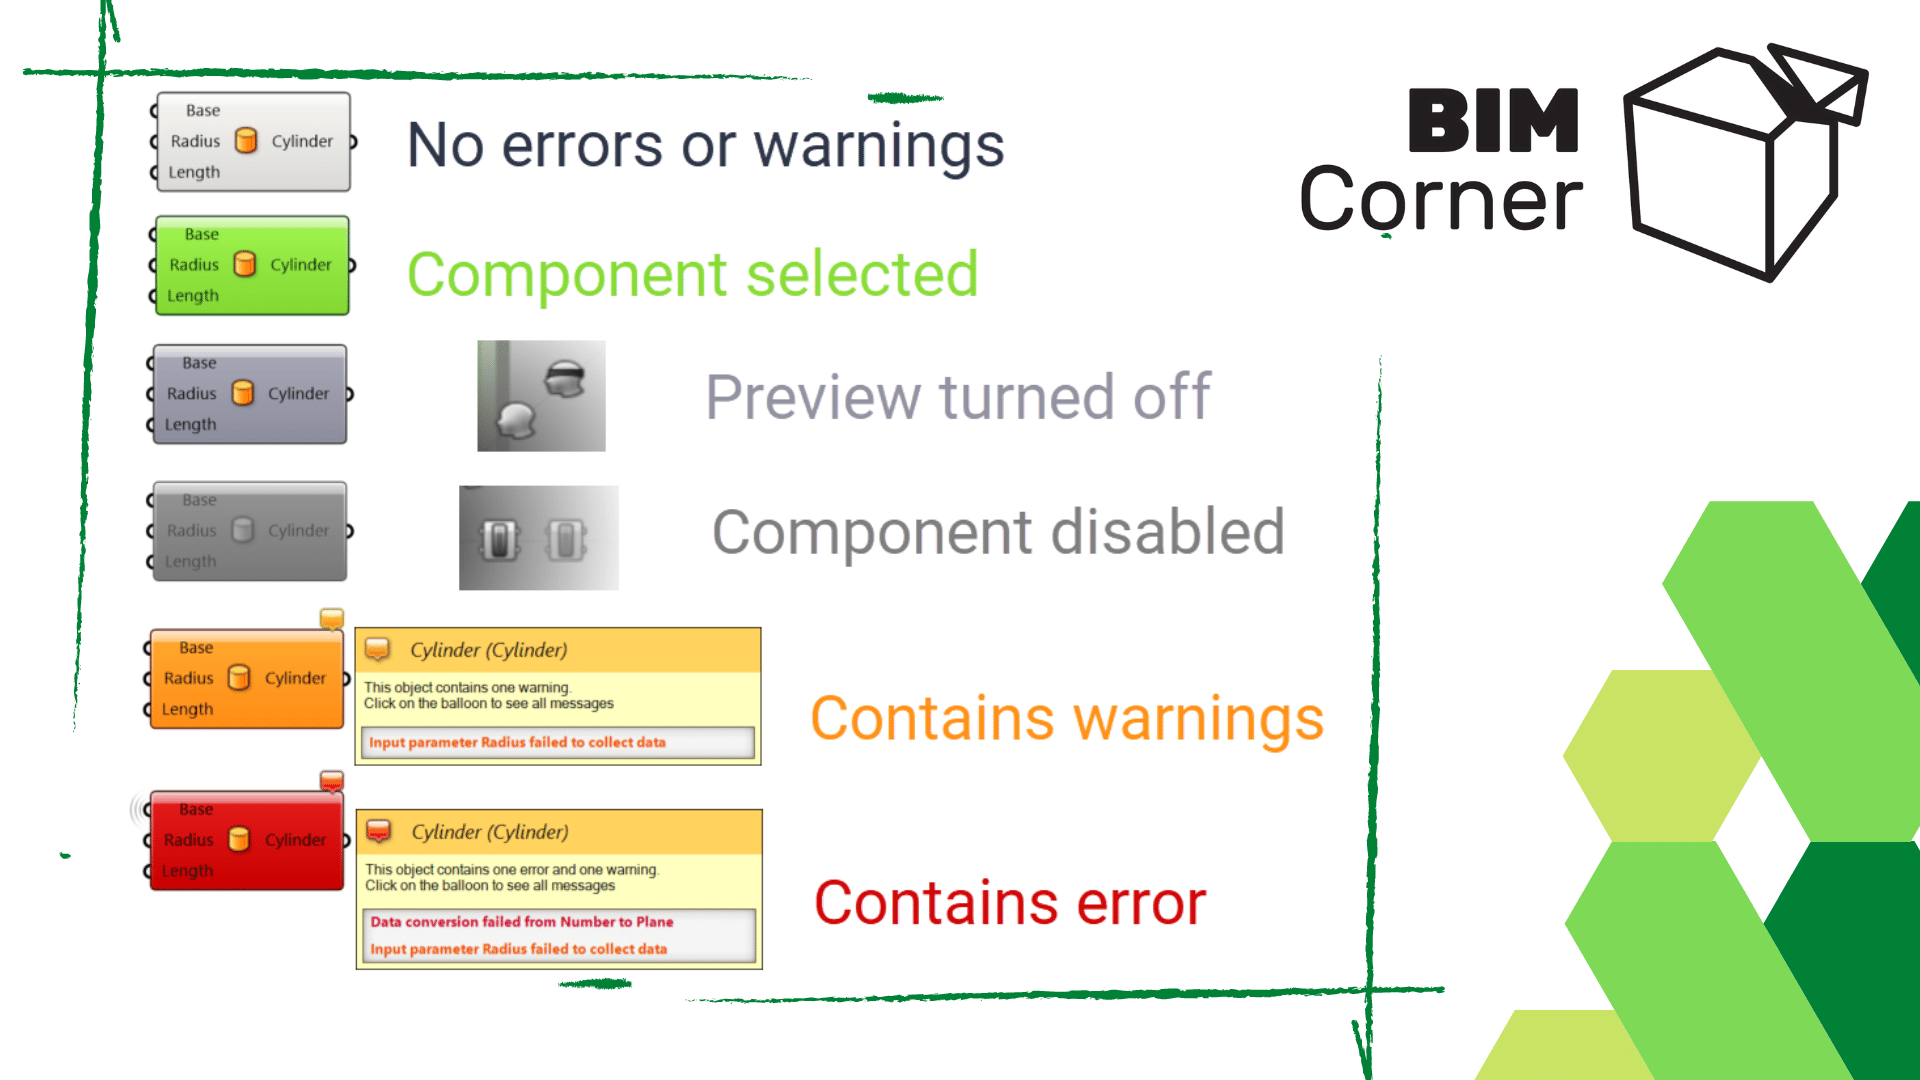
11. Component color errors
We can glean some information about the state of each object based on its colour.
Let’s take a look at Grasshopper’s default color coding system.
A component that contains neither warnings nor errors is shown in light grey. This colour object indicates that everything is working properly with this component.
A component that has been selected will be shown in a light green colour. If the selected component has generated some geometry within the Rhino, this will also turn green to give you some visual feedback.
A component in which preview has been disabled is shown in a slightly darker grey. To disable the preview for multiple components simultaneously, first, select the desired components and then toggle the disable preview icon (blindfolded man).
A component that has been disabled is shown in a dull grey. To disable a component, you may right-click on the component and toggle the disable button, or you may select the desired components, right-click anywhere on the canvas and select Disable. Disabled components stop sending data to downstream components.
A parameter that contains warnings is displayed as an orange box. Any object that fails to collect data is considered suspect in a Grasshopper definition since it does not contribute to the solution. A small balloon at the upper right-hand corner of the object symbolizes that. If you hover your mouse over this balloon, it will reveal information about why the component is giving you a warning.
A component that contains at least 1 error is displayed in red. The error can come either from the component itself or from one of its inputs or outputs.

12. Display
If a Grasshopper component generates some form of geometry, then a preview of this geometry will be visible in the viewport by default.
You can choose between:
- Turn off preview,
- Wire-frame preview,
- Shaded preview (set up as a default).
Preview Selected Objects: With this button toggled, Grasshopper will only display geometry that is part of selected components, even if those components have a preview off.
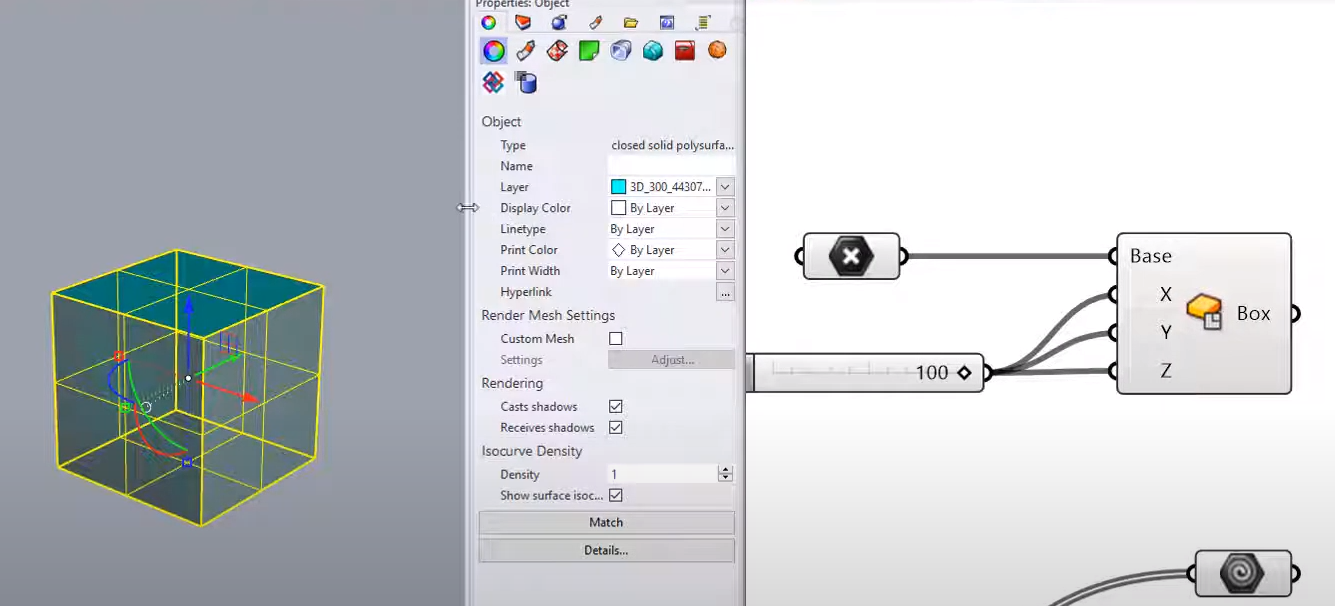
In order to work with (select, edit, transform, etc.) geometry in Rhino that was created in Grasshopper, you must “bake” it. Baking creates new geometry into the Rhino document based on the current state of the Grasshopper graph. It will no longer be responsive to the changes in your definition.
If you need your grasshopper definition to be independent of a Rhino file you can do that by changing the way data is inherited and stored in the context menu of a parameter or component input.
To change store referenced Rhino geometry in the grasshopper definition itself, right-click a component and select Internalise data from the menu.
Once you select Internalise data all wires will disconnect from that input. The data has been changed from volatile to persistent, and will no longer be updated. Note that this data will be independent of the Rhino file.
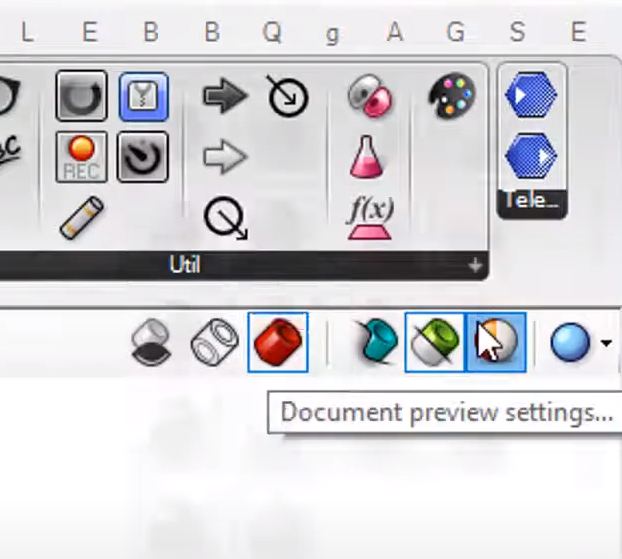
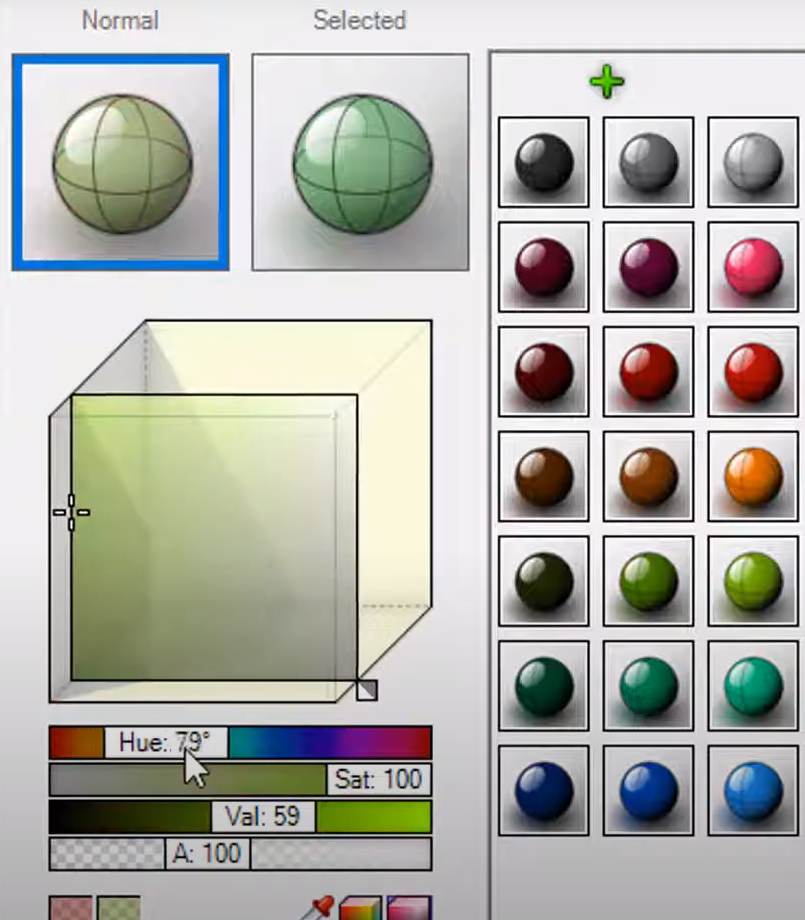
13. Change preview color
Grasshopper has a default colour scheme for selected (semi-transparent green) and unselected (semi-transparent red) geometry. It is possible to override this colour scheme with the Document Preview Settings dialogue.
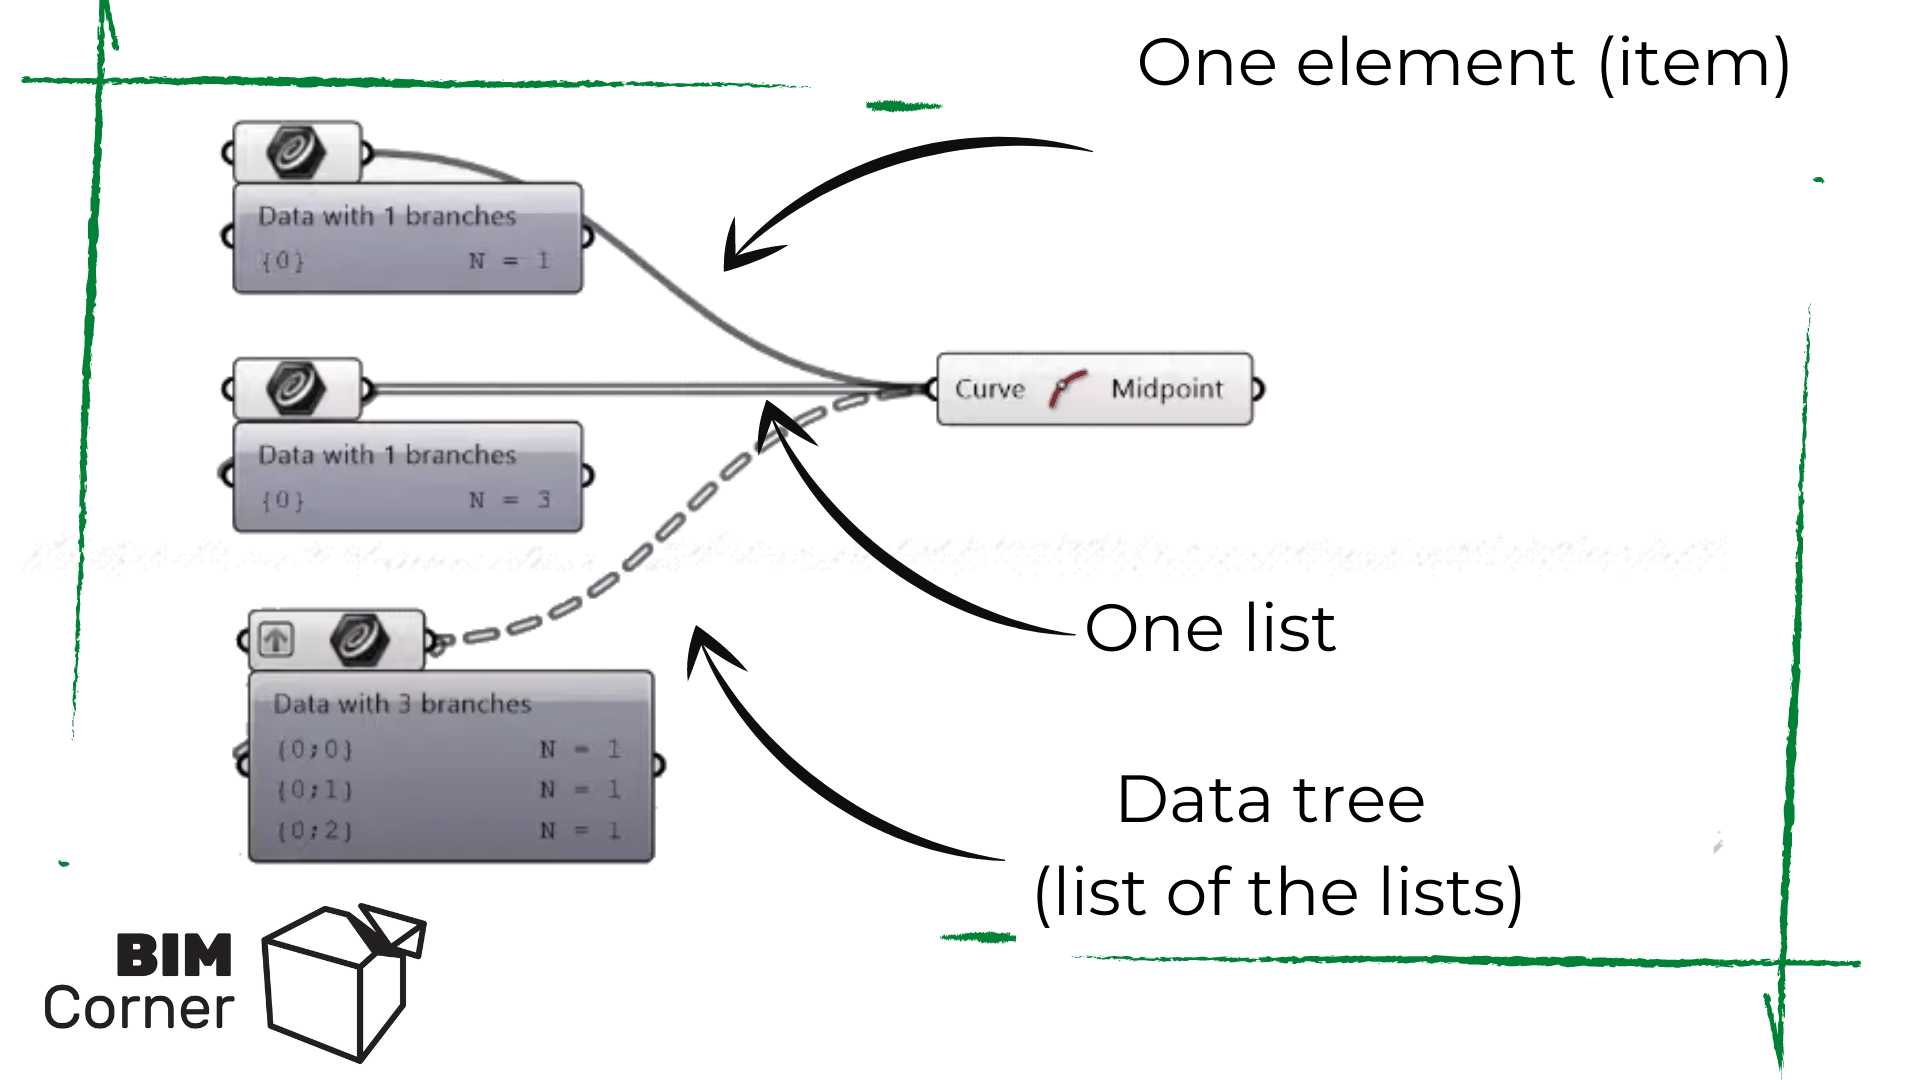
14. Fancy wires
One of most important basics for all Grasshopper beginners is how wires are displayed
Wires represent the connections and the data flow. Grasshopper can also give us visual clues as to what is flowing through the wires. To view the different types of line types for the connection wires you have to activate it. To do this, simply click on the View Tab on the Main Menu Bar and select the button labelled “Draw Fancy Wires.”
Fancy wires can tell you a lot of about what type of information is flowing from one component to another. For example:
- Standard line – Means one element in the one list
- Thick Line – The line is thicker because there flows more data. Through this connection go one list but with several elements.
- Dashed line – shows that data is built with several lists – so-called data tree
In addition to that there are three ways of wire displays:
- Default Display,
- Faint Display,
- Hidden Display.
To change the wire display, simply right-click on any input on a component and select one of the views available under the Wire Display pop out menu.
15. Panel zoom
When zooming to a panel a menu appears allowing to change the background color, font and other attributes. These options are also available when you right-click the panel. Thanks to that it will be easier to distinguish panels from each other.


Next week will come more from Grasshopper for beginners serie. Stay tuned!
Which Grasshopper Rhino Tips are your favorite?
Write in the commentary below which you like most.
Do you have any questions?
Write an email at [email protected]
I always write back !!
Check out more tricks in Grasshopper
5 GRASSHOPPER TRICKS TO DEFEAT SPAGHETTI MONSTER
5 TIPS To Better Collaboration In GRASSHOPPER
If you want to get more information about Grasshopper and learn parametric modelling, download the free guide – FREE DOWNLOAD
Grasshopper is a plugin to Rhino that you can download HERE