After using Grasshopper for five years, I am still finding new options and revelling the following Grasshopper secrets. In many cases, you have just to know it because it is almost impossible to find out by yourself. In this article and attached video, I want to show you some secrets that you might not have found yet. Check out the list of Grasshopper secrets that will surprise you!
Grasshopper secrets that will surprise you!
1. Arranging icons
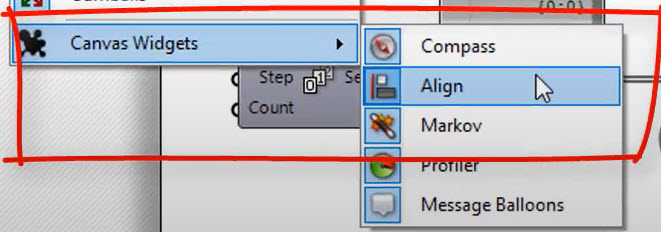
Do you know how to spread your components evenly in Grasshopper?
First of all, make sure that your align in canvas widget is turned on.
Canvas Widgets --> Align
After selecting components, a dashed frame with buttons in the middle of every edge will appear. Next, with arrows you can align all your components to one of the frame edges. With the right arrow adjustments to the right edge and the left arrow to the left edge. The button between arrows will centre all components by clicking the icon on the vertical edge. All components will be moved to one place, creating just a small frame around them.
Important!
If you move one of the components a little bit higher, a bigger frame will be visible. Now you can click on the fourth button, which will spread your components evenly based on your (bigger) frame size.
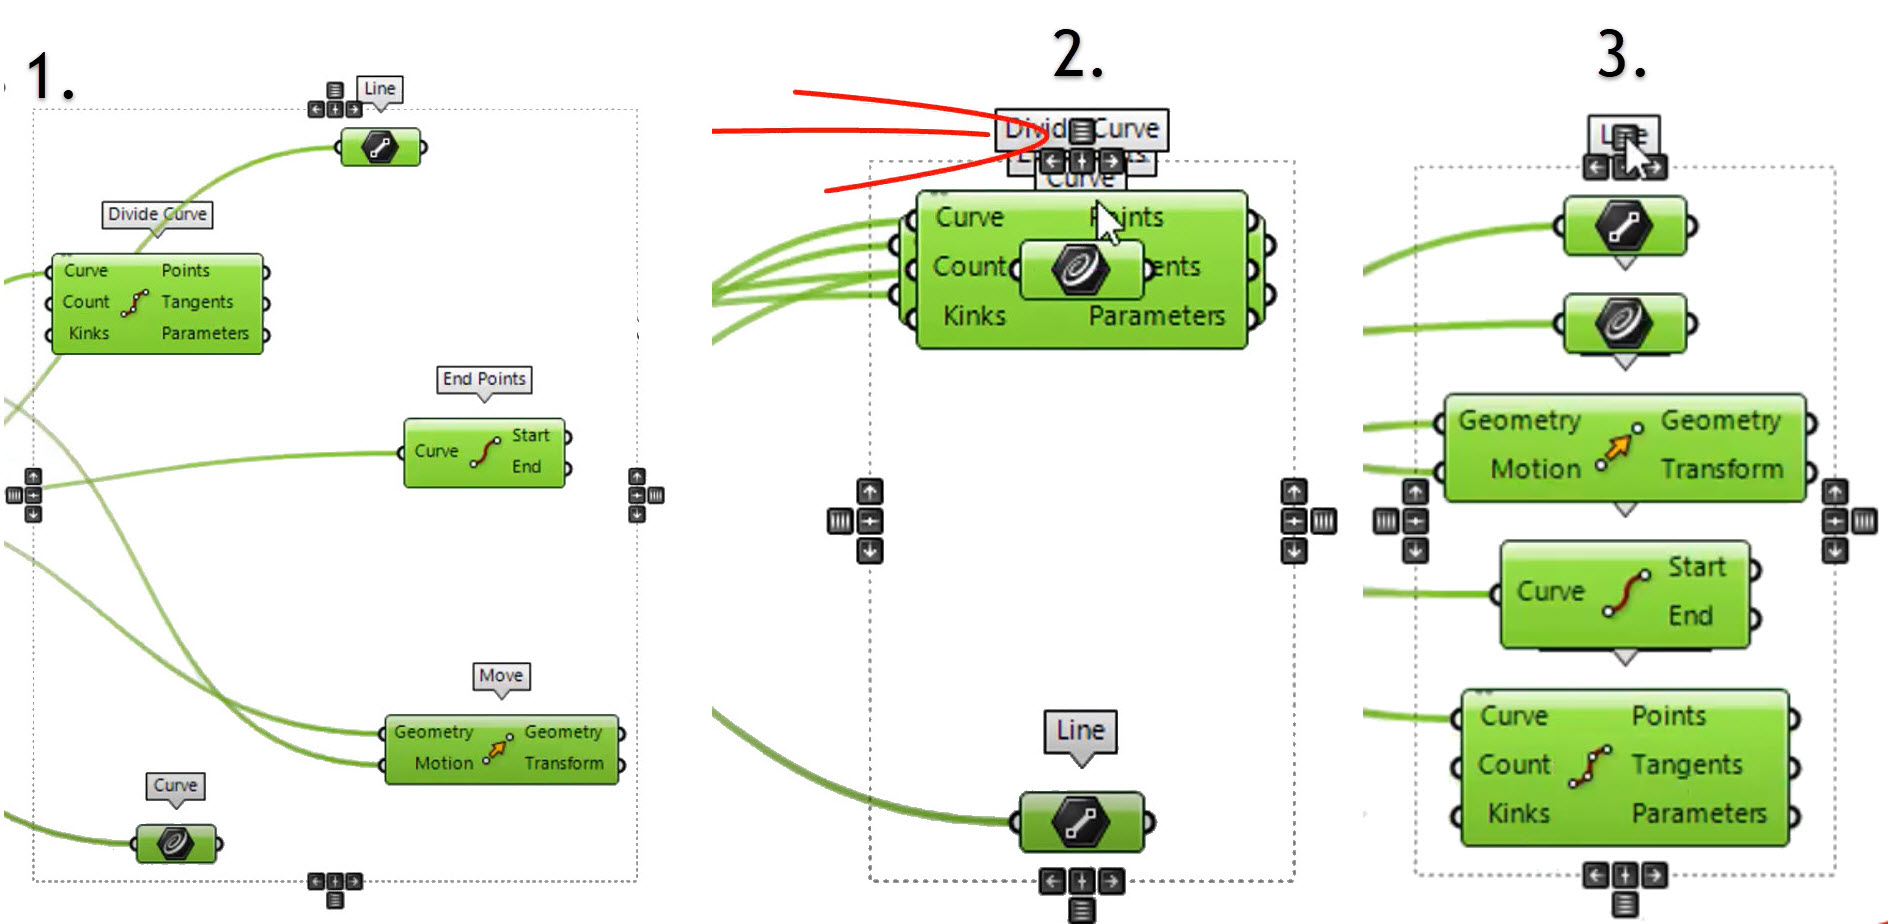
There are two helpful Grasshopper components to sort points. Sort points and sort along the curve.
The first one sorts points based on the Euclidean coordinates. First, it will sort from the lowest to the highest x coordinate, then the y coordinate and at the end, the z coordinate.
Whereas sort along the curve component bases on the input curve shape and the direction.
But what if we do not have any curve as an input and points are placed randomly in the circle shape?
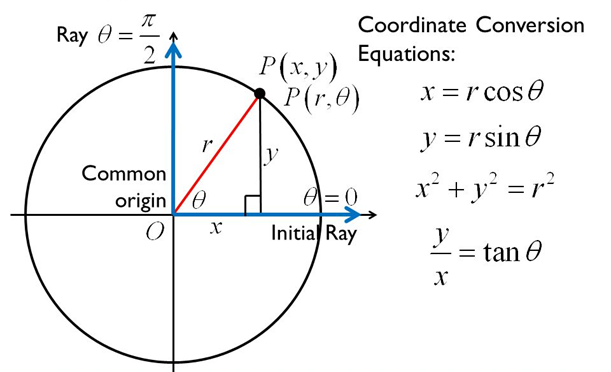
To sort all these points in the anti-clock direction, we can change the coordination system from cartesian (x,y) to the polar system(r, phi)
Instead of a cartesian system with x and y’s coordinates, points are described with the radius and the phi, which is an angle between the radius and x-axis.
In order to change the system, we have to define the centre of all points I showed how to make it in the previous video by using the arithmetic mean to find the center point of all points.
After connection points to the Polar Component together with the new center of the polar system, output points will be described with the polar variables. Every point now has an angle phi. If we sort out these values from the smallest angle to the biggest one, we will sort out all the points in an anti-clock direction.
Change from cartasian to polar system
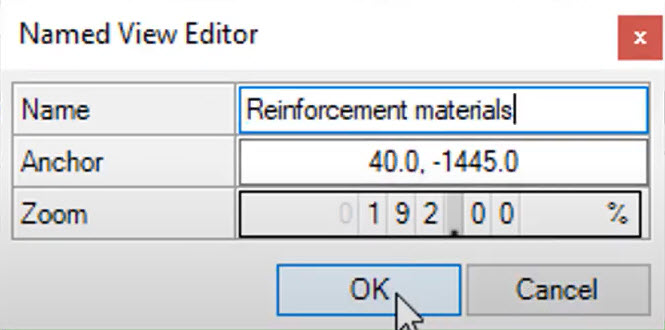
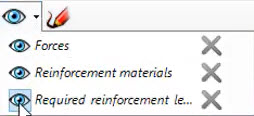
3. Add new views
In one of my previous Rhino tips movie, I showed how to create your own views in Rhino. Here is a link.
in almost the same way you can do that with your script in Grasshopper. Click on the eye symbol on the top ribbon, write your view name and specify the anchor in x and y of a canvas and the zoom value. In this way, you can easily save your views and jump through your script parts.
Named view editor
List of created views in Grasshopper
4. Volatile Data
Most parameters can store two different kinds of data: Volatile and Persistent.
Volatile data, as the name suggests, is not permanent and is inherited from one or more sources. This data is changing whenever a new solution starts 🚩
Persistent data is data that has been exactly set by the user. For example, it has been chosen from Rhino – by right-clicking and selecting a ,,set on curve“ for example.
If you need your grasshopper definition to be independent of a Rhino file, you can do that by changing the way data is inherited and stored in the context menu of a parameter or component input.
To change store referenced Rhino geometry in the grasshopper definition itself, right-click a parameter and select Internalise data from the menu.
Once you select Internalise data any wires will disconnect from that input. The data has been changed from volatile to persistent, and will no longer be updated. Note that this data will be independent of the Rhino file.
Data intternalising make volatile data permanent and disconnect all connections.
DOWNLOAD
5 STEPS TO LEARN GRASSHOPPER
5 Steps to learn Grasshopper is a guide full of books, exercises, tutorials and videos. Everyone will find something for themselves – regardless of the level of initiation.
Have you ever wondered why some Grasshopper components have two dots on the top?
Two dots placed in the left top corner
Here is an answer…
This symbol means that this component is using a multi-threaded method for solving 💻 . Components are spotted with tiny dots in the upper left corner to help you understand the component’s capabilities and current ‘mode’ of operation.
This method improves the performance of components 📈. Grasshopper can be up to 20% faster when using multi-threaded components. Results may vary as there are only specific components that can compute in parallel.
For components that support multi-threaded calculations, the feature can be enabled/disabled using the right-click context menu on the component itself.
A list of components that support multi-threaded mode.
OK Kris, but why should I disable an option that makes components work faster? It doesn’t make sense!
Here is a thing!
Using multi-threaded gives the best results for great amounts of data and complex cases. In simple scripts solving will be not faster, even slower in many cases.
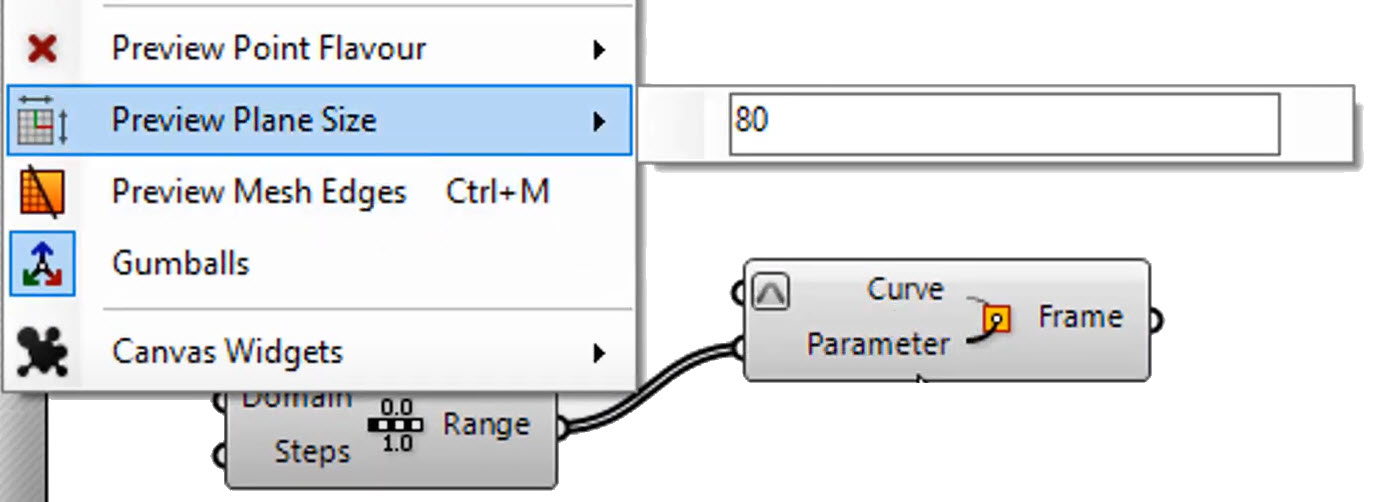
6. Plane size
As a default plane size in Grasshopper is set up very small. It can be problematic to see your plan vectors on a huge geometry. In an easy way, you can change that. Go to display in a Grasshopper ribbon and to preview plane size. Here you can scale all your planes according to your rhino geometry.
Remember that this is just a preview size.
Change the preview Plane size in Grasshopper
I’m sure there are more grasshopper secrets that I didn’t mention, so if you have any, let me know in the comments below.
You have successfully joined our subscriber list. Check your inbox. Confirm email in order to get access BIM Case Studies from the biggest Norwegian projects.
Reasons to Subscribe to the BIM Corner List:
BIM CASE STUDIES
After reading this guide, you will learn:
How BIM is used on the biggest projects in Norway
What were the challenges for the design team and how were they solved
What were the challenges on the construction site and what was our approach to them
News From BIM World
Every Thursday you will get a package of news and useful links from the BIM world.
No Hype
Just real content that’s meant to make a difference in your BIM knowledge.
This site uses cookies to offer social functions, analyze traffic and conduct remarketing activities. Details can be found in the privacy policy (info button).