The Industry Foundation Classes (IFC) standard plays a crucial role in today’s construction industry, enabling interoperability between different software and systems, contributing to more efficient project management, and increasing collaboration between teams.
One of the latest developments in the field of IFC standards is version 4.3. I have already written several articles on this topic, which you can find here:
- All you need to know about IFC 4.3 for infrastructure
- IFC 4.3 in road projects – case study
- Relations I used to create IFC 4.3 for infrastructure
- Spatial Breakdown Structure in IFC 4.3
- IFC 4.3 on construction site
- Webinar about IFC 4.3
- Ticket to openBIM
- Export to IFC 4.3 webinar
- The Key Changes in IFC Schema Shaping OpenBIM for Infrastructure
In this article, we will take a closer look at how Trimble implements this standard in the Trimble Quadri software.
Trimble Quadri
Trimble Quadri is a tool used in the construction industry for efficient management of infrastructure projects. To start, I would like to outline a few fundamental principles of how this software operates.
- Integration and Data Unification: Trimble Quadri enables the integration of various types of data, including geospatial, geotechnical, and project data. The system is based on an object-oriented model, meaning that all data transferred to Quadri are converted and presented as objects. This unifies the data in Quadri, ensuring consistent use throughout the design and construction process. I have written more on this topic here: [LINK].
- Integration with Other Tools: The program is integrated with other tools used in the construction industry through application programming interfaces (APIs), such as BIM design software like SketchUp, Quantm, Revit, Civil 3D, OpenRoads, Tekla, TBC, Rhino+Grasshopper. This means that project data can be transferred directly to Quadri without the need for file-based workflows. I have written about this here: [LINK].
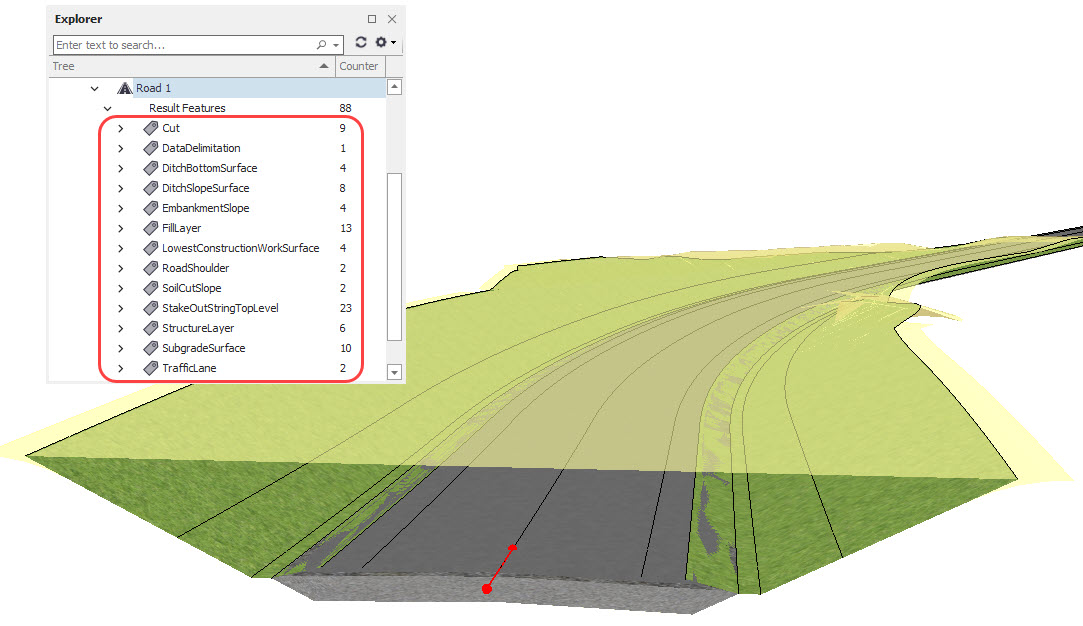
- Building Information Modeling (BIM): The software allows for the creation of Building Information Models based on existing objects, which is crucial in the process of modernizing and expanding existing infrastructure. It also includes tools for creating terrain surfaces.
- Enriching BIM Models with Information: With the tools available in Quadri, it is possible to enrich BIM models by adding a significant amount of information.
- Team Collaboration: By leveraging the cloud, Trimble Quadri greatly facilitates collaboration among different teams involved in a construction project, providing access to real-time data and models.
- Quality Control and Progress Monitoring: The software enables progress monitoring, quality control, and real-time issue identification. It allows for data to be displayed in various contexts, views, sections, and tables.
- Data Export: Quadri software has the capability to export data to various formats, including DWG, DGM, LandXML, FBX, as well as IFC formats such as IFC 2×3, IFC 4, and IFC 4.3. This means that users can easily adapt their data to different tools and applications, which is essential in the process of exchanging information between different platforms and industry specialists.
In the article, I would like to focus on the process of exporting data to the IFC 4.3 format, which represents an undeniable breakthrough in the industry. The implementation of the IFC 4.3 standard is a long-awaited update that allows for the detailed inclusion of data related to infrastructure objects.
Below, I will outline how the export process works in the Trimble Quadri application.
Export Process from Trimble Quadri
- Selection of Data to Export: At the outset, the user must decide which project data they want to export from Quadri. This may include 2D and 3D objects, geospatial data (terrain), alignments, etc.
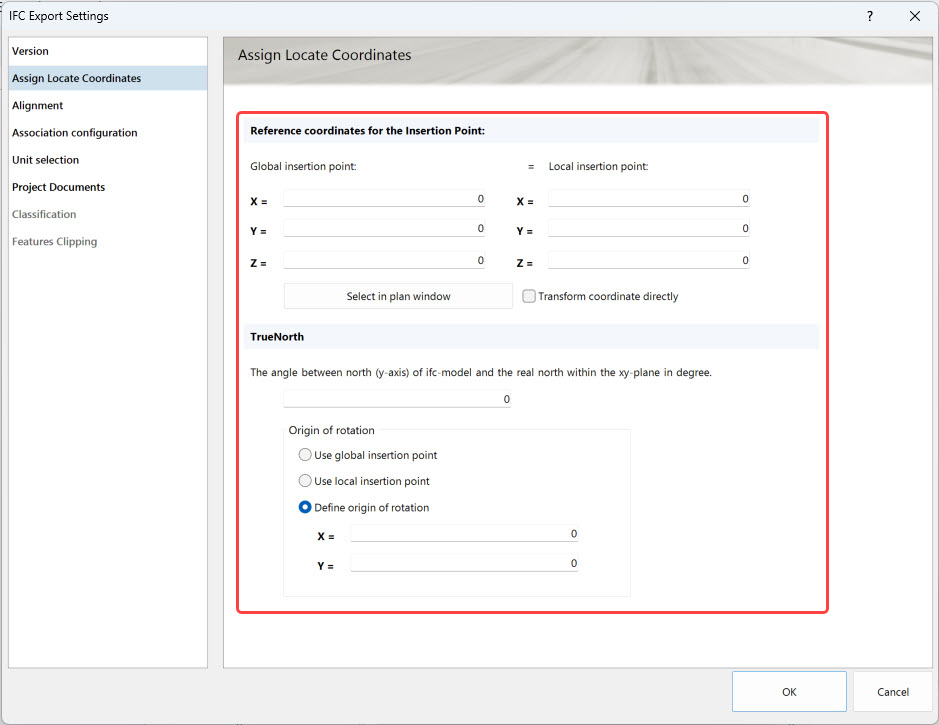
- Choice of IFC Format: Next, the user needs to select the appropriate format, in this case, IFC, as the target export format. The choice of the IFC 4.3 standard is significant because it provides support for infrastructure data. Additionally, during configuration, we can specify the insertion point of the model.
- Spatial Structure Configuration: The added value of IFC 4.3 lies in the ability to define the spatial data structure for infrastructure models. The selection and potential editing of the configuration file allow for customizing the structure of exported data to the specific needs of the project.
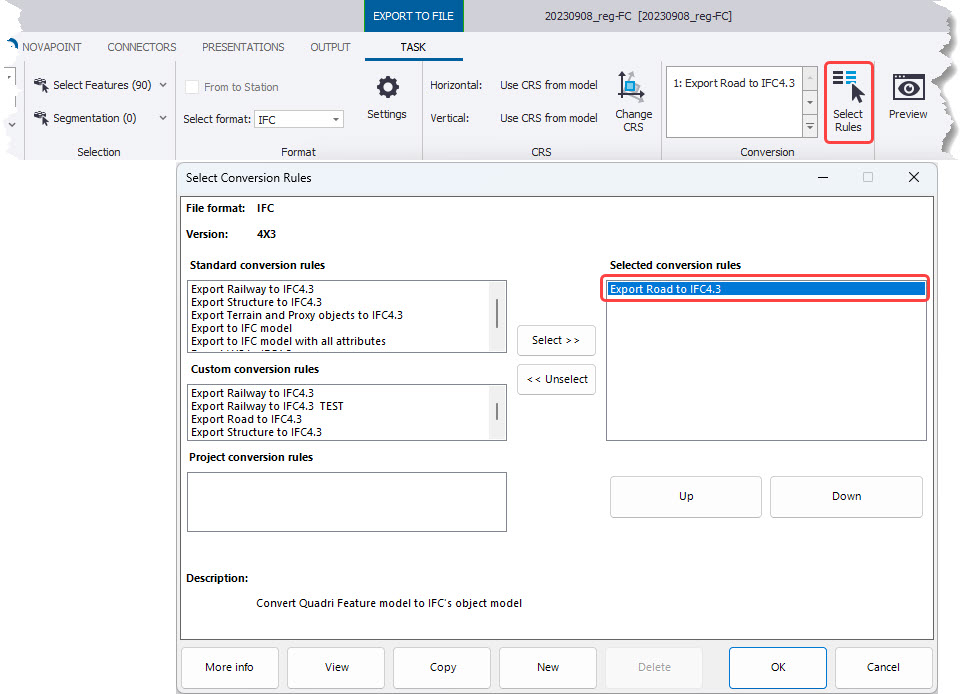
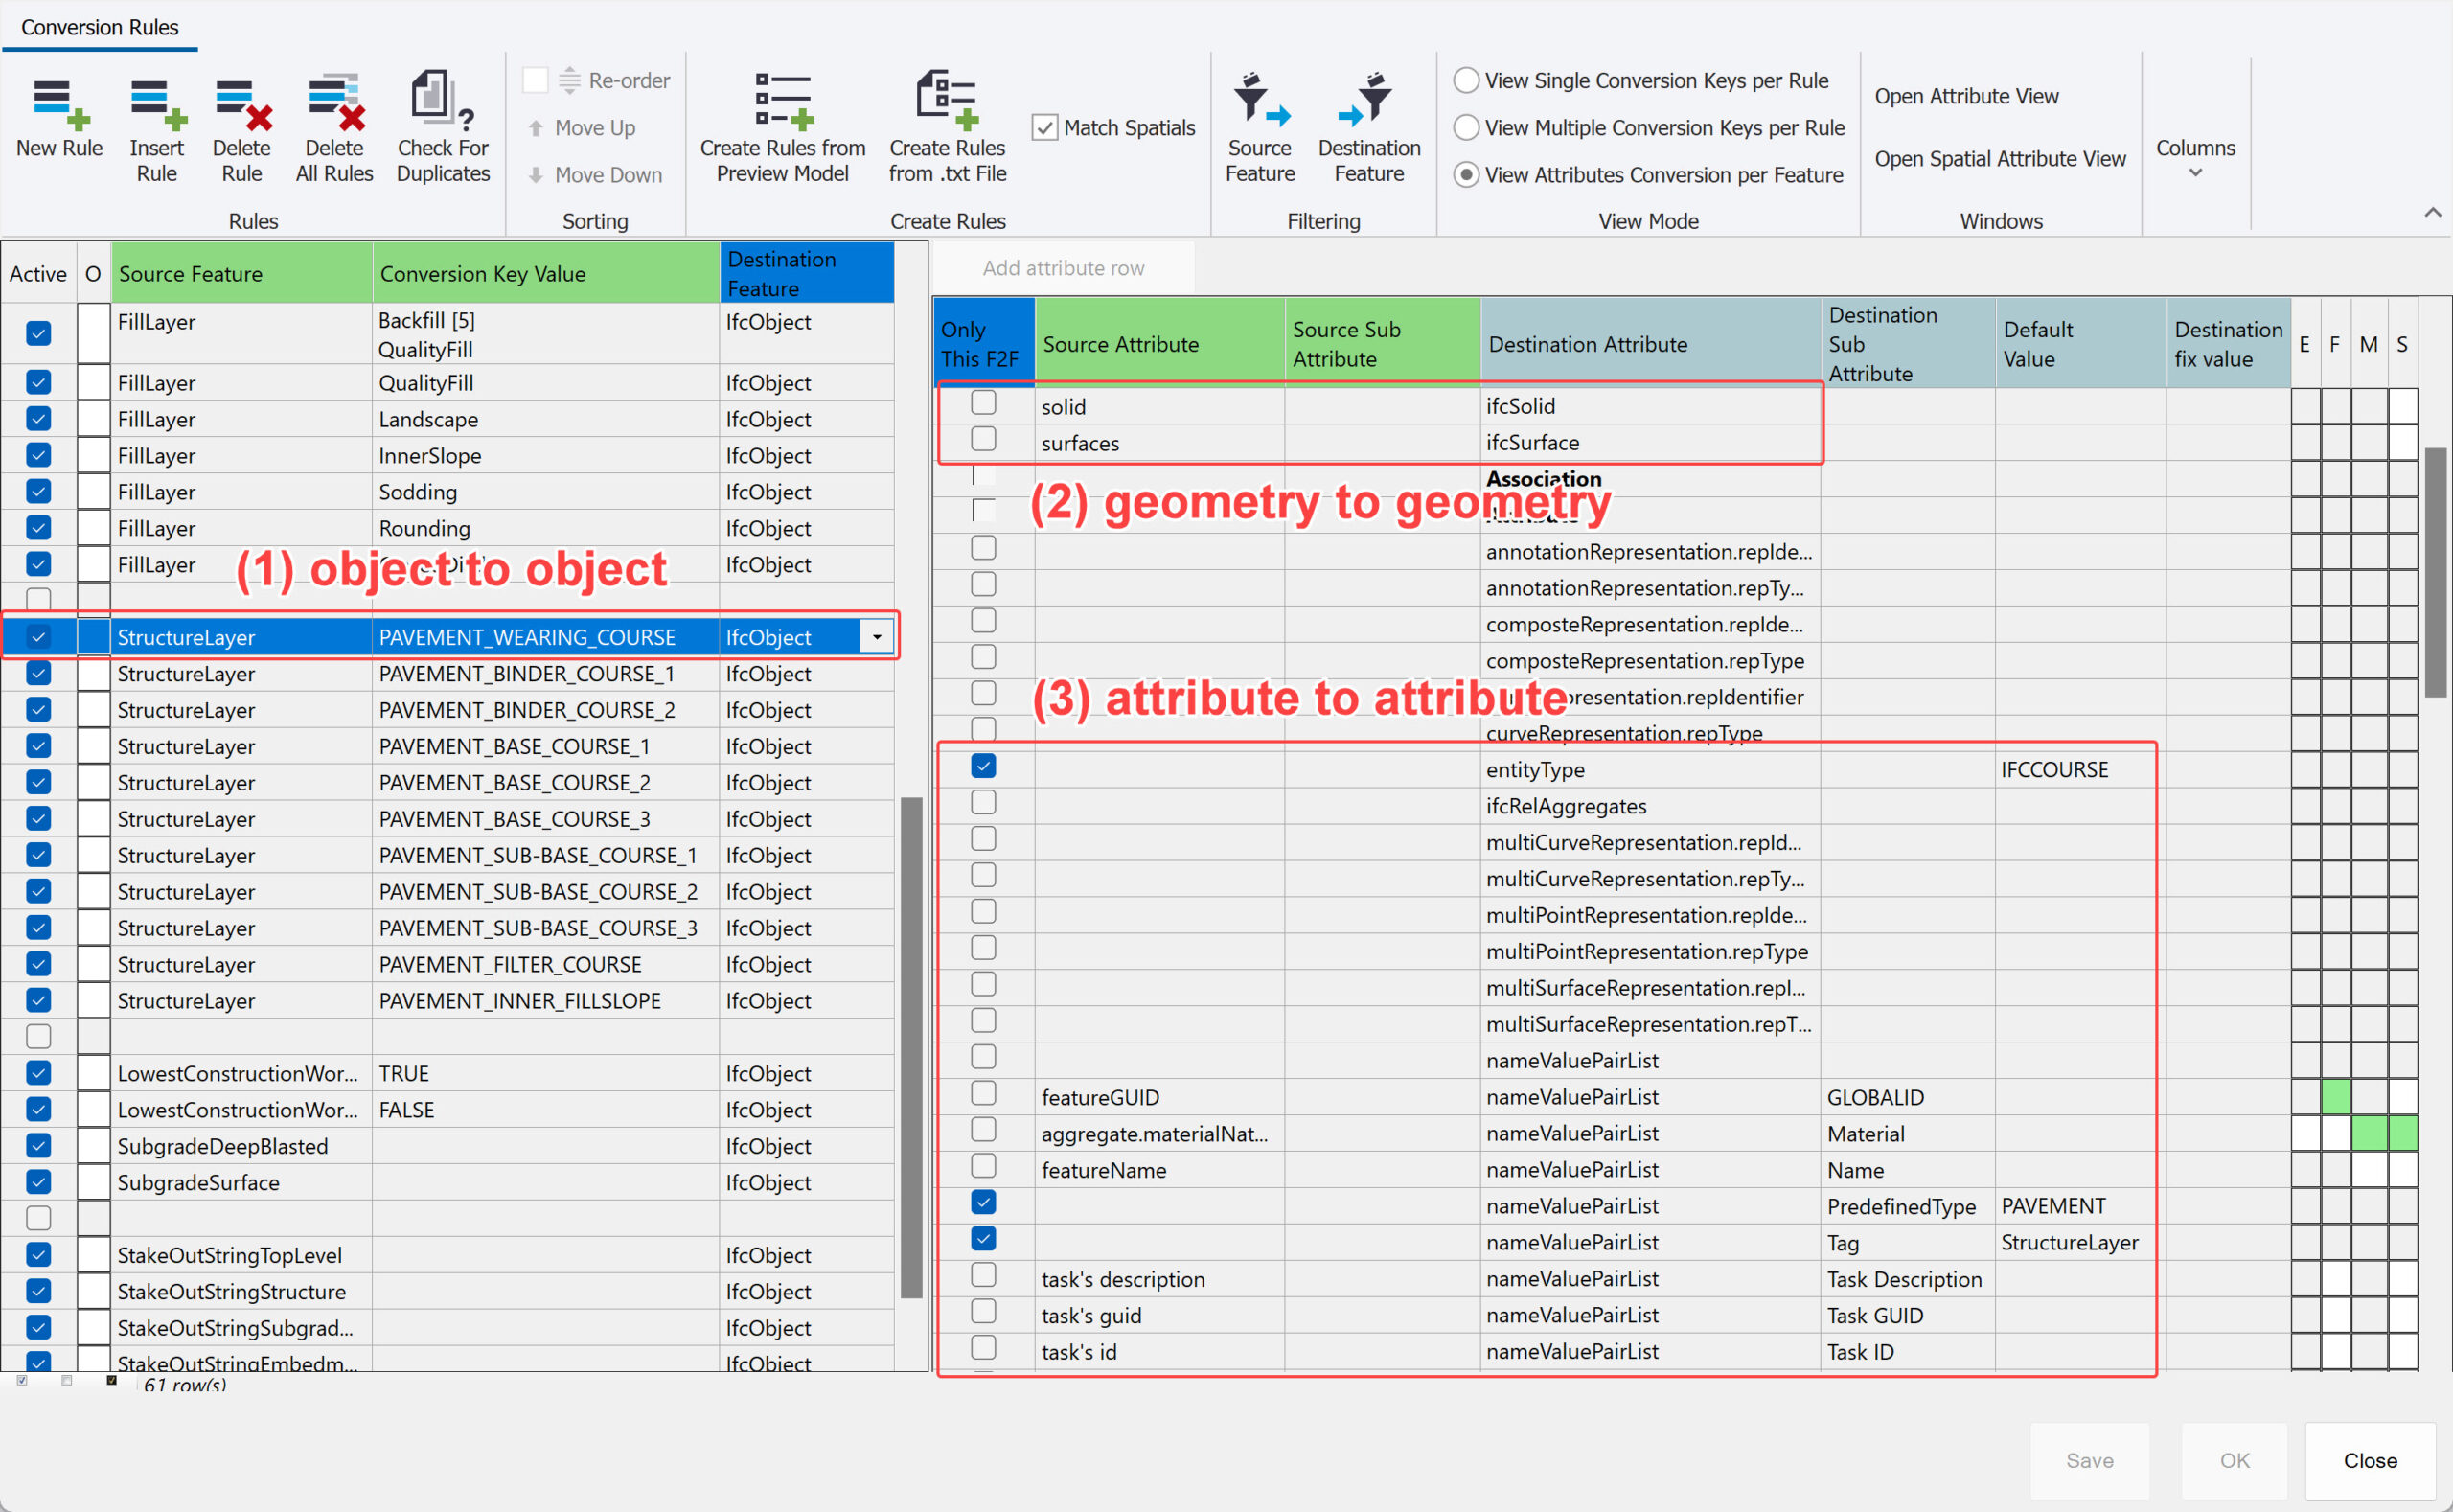
- Conversion Rule Selection: In the final stage of the process, the user selects a conversion file, which enables the transformation of data from Quadri to the IFC 4.3 format. This is a crucial step as it allows for precise determination of how data and information will be saved in the exported file.
Exporting a Road Model to IFC 4.3

1. Selecting data for export

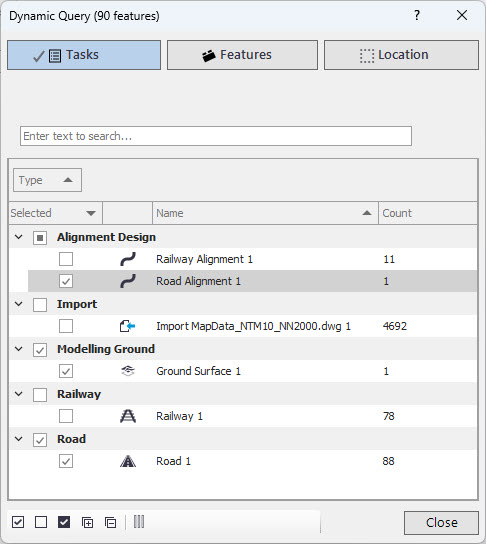
Objects can be selected in three different ways:
- Objects Included in Tasks: Object selection can be based on project tasks. This means that the user can specify which objects related to specific tasks should be exported.
- Objects in the Project: Another option is to select objects based on their presence in the entire project. The user can highlight specific objects that are relevant to the project, regardless of tasks.
- Based on Location: The third method is to select objects based on their location. This allows for the selection of objects within specific areas of the project, which can be particularly useful in infrastructure projects.
2. Choosing the IFC Format
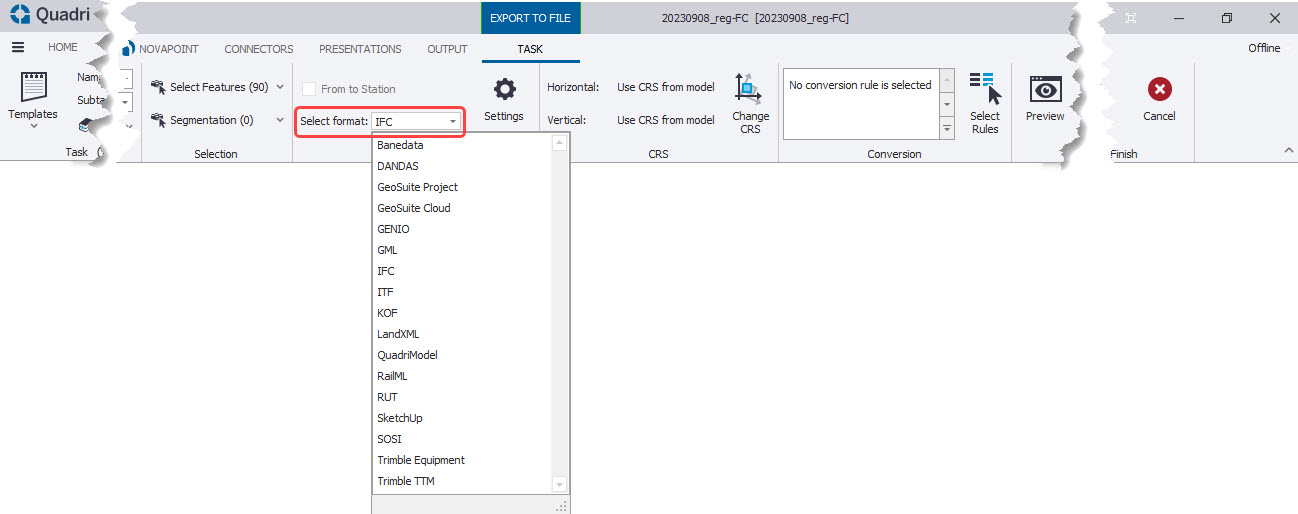
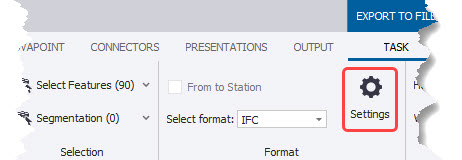
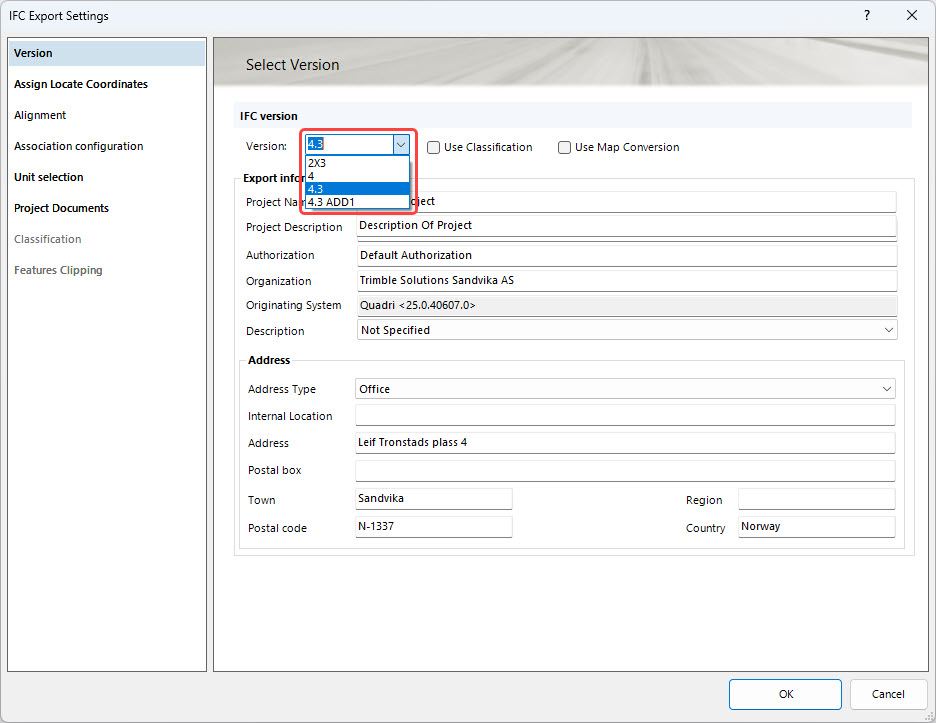
We can define the insertion point of the model as follows:
3. Spatial Structure Configuration
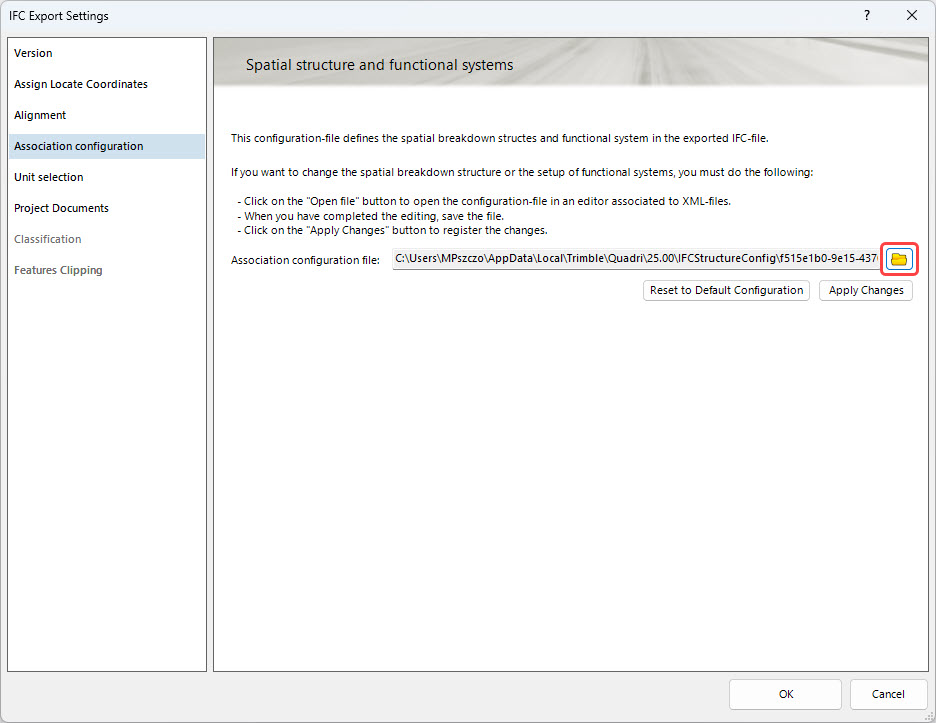
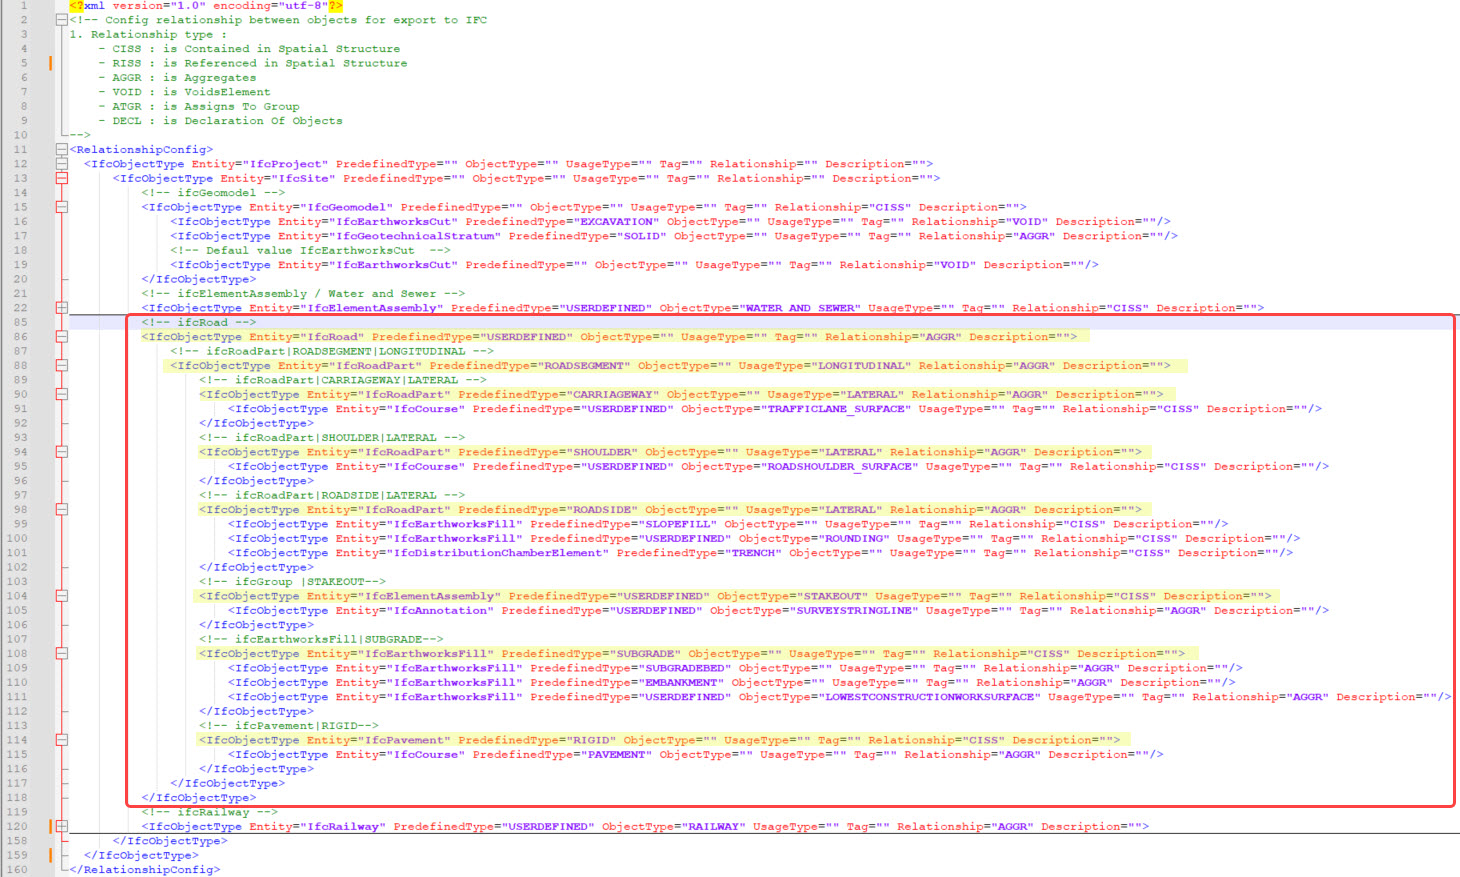
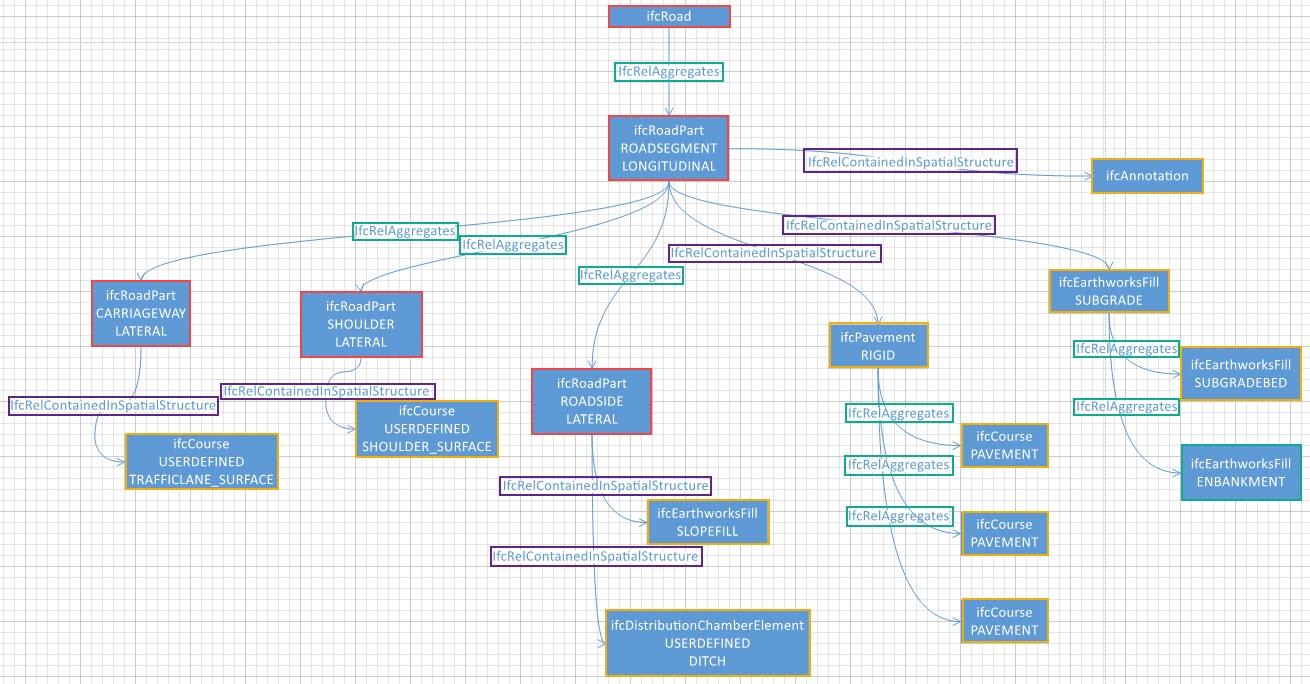
Understanding the principles and relationships between objects is crucial for flexibly shaping the spatial breakdown structure of the project. I have included more information on this topic in this article: [LINK].
4. Selecting Conversion Rules

Summary
Remember that exported files from Quadri can be customized according to your specific needs, which is a significant advantage.
I hope you enjoy the articles where we explain various processes step by step.
I would love to hear from you about what other tutorials would be useful for you in the future. Your feedback is valuable to me and will help me create content tailored to your needs.
Until next time! Marcin Pszczółka